Home Blog Page 22

Best Indoor Dog Bed Ideas & Tips

0

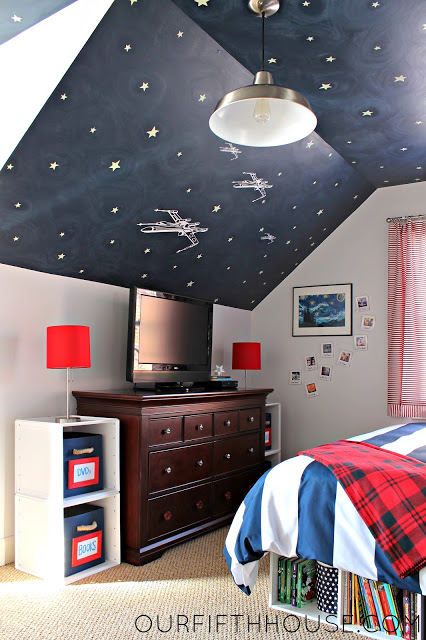
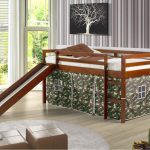
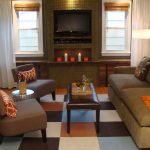
Integrating pup’s bed into bedroom

Integrating your pup’s bed into your bedroomLike human dog should have a particular place for rest and sleep otherwise it might share your bed, sofa or other resting places.

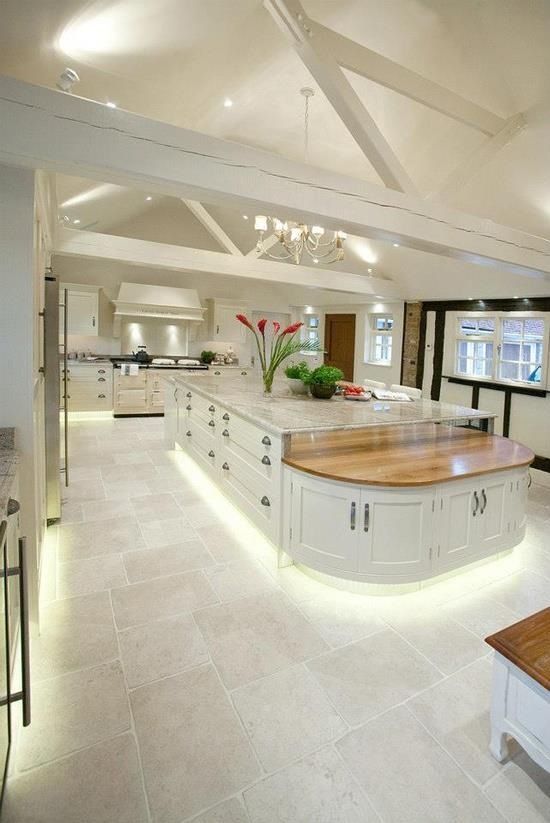
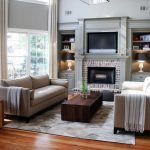
Sometime you might be in confusion where should the dog bed can be placed? Should you keep the dog bed in your bedroom?  Will it match with other furniture?Sometime you also might not have a separate room for your dog; you need to share your own room. It’s not a problem to share the room with your pet just you need to consider few things.

dog bed in your bedroom

Start with checking the room to find a silent space for your dog. Then measure the size of your pup and the available area and decide what sort of bed can be accommodated within that space.

It’s also essential that the place is within eye’s sight in the bedroom. But not very near of the air conditioner or heating vent or not so near of the window. If it is near the window, then pet feel uncomfortable when direct sunlight falls on it.

image source: woodshopdiaries.com

Creative decision:
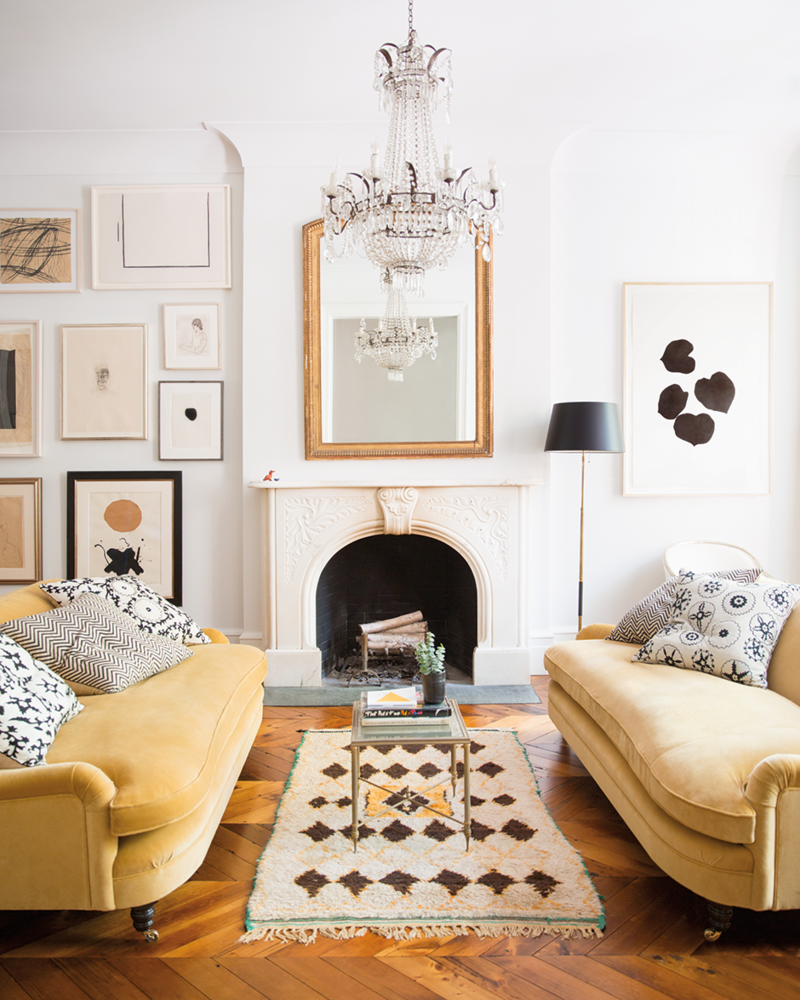
It’s time to show your creativity while choosing the bed for your pup. Before choosing the bed, you consider available free space along with your other furniture and buy the bed accordingly. Try to match the design and color of the other furniture.

Dog Bed Buying Tips

There are many points you have to find when you are planning to put your dog bed in your bedroom. Some of them are

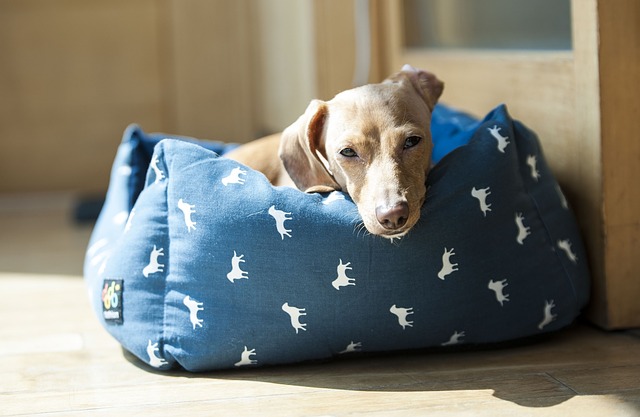
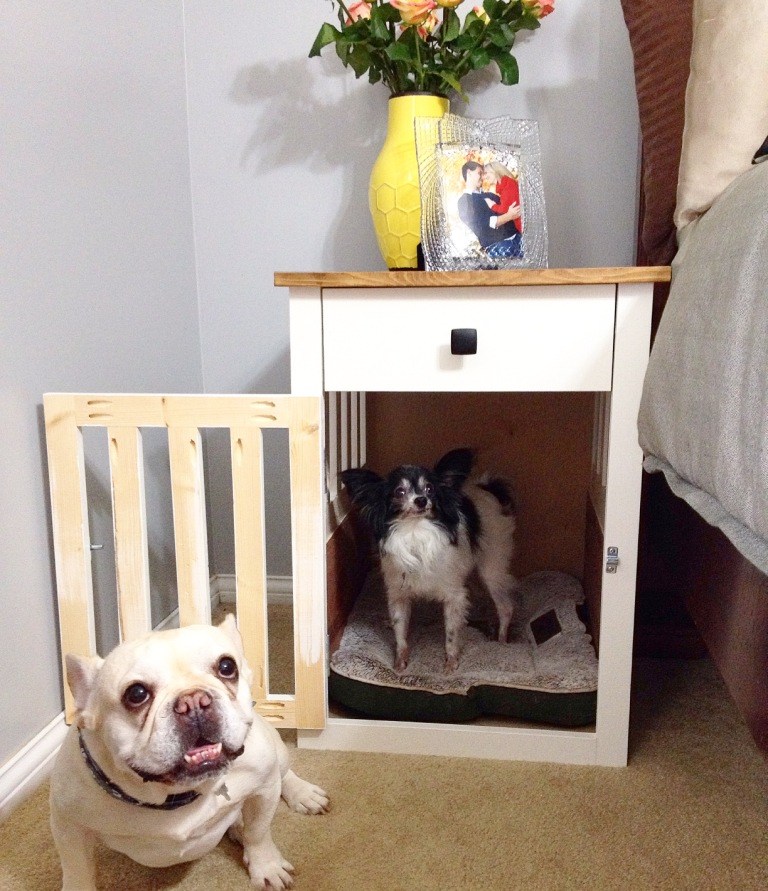
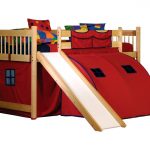
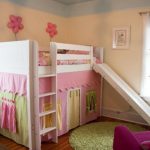
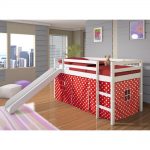
  • The bed must be good looking and cave bed that means hoody bed is the best for the bedroom.
  • The floor of the bed should be designed in such a way so that it can be clean easily.
    You can also buy a stylish crate instead of bed if the dog is new.
  • Other things like food bowl or toys also must be good looking and matching with the other furniture in the bedroom.
  • You can also bring some interactive toys for your dog so that it will not feel bored.

Arranging dog bed

Selecting the source of the dog bed is essential. You can buy it from nearby any shop, online shop, e-commerce or any other suppliers. You can also make your dog’s bed by yourself. For this, you can follow some tutorials from online, or you can develop any existing dog bed, or you can apply your own creativity.

If you decide to make the dog bed by yourself, then you must have some tools and materials including

  • Sewing machine
  • Scissors for cutting
  • Fabric old or new whatever you like to use
  • Zipper

Nowadays many stylish dog bed also available on the market. So without expending time, you can buy best dog bed from the market even cheap.

Finally, I would like to say whenever you plan to buy a dog bed which will be placed in your bedroom; you have to focus on many factors which mentioned above. Overall decoration is significant to stand out the bedroom.

10 Tips for a Fun but Attractive Kid’s Bedroom

0

Attractive Kid’s Bedroom

Once your children are ready to have their own bedrooms, they will definitely be excited to have properly designed bedrooms made in accordance with their interests and likes. You will be equally excited about the prospect of making your child happy by decorating his or her bedroom. Obviously, the first thing you should do is find out from your child what his or her needs are and then you should conceptualize how you will pull it off. Think of what you already have and what you still have to acquire.

Depending on the bedroom’s theme, it could be either affordable or expensive. It is your duty to prepare a budget sufficient enough to give your children the bedroom of their needs. However, when designing your child’s bedroom, you should remember that the design of the room will have to be modified as your child grows up. A teenager would never fancy the idea of sleeping in a childish bedroom. If you want to design a child’s bedroom that will bring happiness to your children, here are a few tips to help you out.


  1. Brightly Colored Window Treatments


Use brightly colored curtains for your child’s bedroom. Ensure that the colors you choose match the motif of the whole bedroom. Brightly colored window treatments are advisable since they give the room a cleaner and sharper look. To reduce the amount of light coming from overhead during the day, you can use a valance. You can also have a shade to be used in the evenings. The shade should have a color that complements that of the room.


  1. Children’s Toys as Décor in the Bedroom

Children’s toys are colorful and come in different shapes and sizes. You can use them as decorations for your rooms. This approach helps you save storage space by using hooks for hanging large toys and open shelves for small toys. It looks particularly amazing especially if the toys are properly arranged.


  1. Paints and Prints

For the bedroom walls, you can choose brightly colored paint and combine it with some prints. Besides the walls, you can use that paint for cabinets along with other accents. Instead of using prints, you can try using a mural or add a colourful wallpaper decal to the wall. Let it reflect your child’s favorite theme such as race cars, flowers, and others.


  1. Room-Fitting Fabrics

For the beddings in your child’s bedroom, you should try using fabrics that match the theme of the room. Select the bedding wisely so that it matches the overall theme of the room and provides comfort. Mix and match pillows, sheets, as well as comforters. You can even have additional pillows just for accent. Besides that, you should also try matching the curtains, which gives the room a unified look.


  1. Ceiling Decorations
kids room ceiling decorations
source: ourfifthhouse.com

You can easily make the ceiling conform to the taste of your child by decorating it using glow in the dark items. Your child will start enjoying staring at it when he or she is just about to sleep. It will seem as if he or she is gazing at the night stars.


  1. Educational Pieces

Avoid just sticking with the design. Ensure that you place items that could aid your child’s learning such as educational toys, charts, and books. If you do this, your child will have fun while he or she learns.


  1. Photo Decorations
kids room wall portrait decorations
source: myparadissi.com

Use pictures of your child’s fondest memories for decorating. You can include pictures captured while on vacation, while your child was participating in school activities, among others. You can use the photos to create an accent wall using such photos framed in different sizes.


  1. Innovative Storage
storage ideas for kids room
source: parents.com

Storage spaces in your child’s bedroom are important for keeping your child’s things organized. Allocate different areas for clothes, books, and toys. Train your child to return the items they take and teach them the importance of being organized and how to be organized.


  1. Floor Coverings
2018 floor coverings for kids room
source: builddirect.com

Your children will definitely crawl on the floor to play. So, place a broadloom to protect their hands, knees, feet, and other parts of the body. Use a broadloom carpet that suits the body’s design. You have many options to choose from when it comes to the floor coverings. You can even use rubber mats in place of carpets.


  1. Lampshades
lampshade for kid's rooms 2018
source: kidsomania.com

Use a lampshade to give enough light to your child’s bedroom. The lampshade can even be used as a decoration for the bedroom. Decorative lamps that have creative shades can be used for your child’s bedroom. However, you can still get plain lampshades and then decorate them yourself.

Some designs are sophisticated and elegant. However, irrespective of the decoration you choose, the most important thing is the love and care that can be reflected in the amount of time and hard work you dedicate to working on your child’s room.

20 Amazing Loft Bed With Slide Designs

0

The fun does not depend on the age. You can always have a little of fun in your life if you decided to install a loft bed with slide in your bedroom. Believe me; you can easily consider having a loft bed with slide to change your lifestyle and to add some fun to it.

Loft bed with slide

loft bed with slide ideas
apartmenttherapy.com

I can really understand your fears of taking the decision of having a loft bed with slide. Do you think it is made only for young kids? here is the answer to your question, slides are not made only for kids, they are made to present fun to everyone that wants to have some so, why do not adults enjoy some of the fun that a loft bed with slide could offer.

Loft bed with slide for adults

new loft bed with slide
homedit.com

If you are brave enough to have a loft bed with slide for adults in your bedroom we will sure give you some great ideas to help you make this decision.

Loft bed with slide and gym

amazing loft bed with slide
pinterest.com

If you are interested in having a good shape body, try to use your loft bed with slide for adults as a small Gym. And this will be easy if you replaced the stairs with climbing wall to get to the upper level then use the slide to begin an energetically day. Complete your small gym by adding sports types of equipment in the lower level of the loft bed.

Loft bed with slide and storage

loft bed with slide for adults
apassionforhomes.files.wordpress.com

But if you are a creative person that kind of persons that the ideas come to your mind at night and needs a fast way to get down to write some notes on your personal computer which placed under the loft bed. The slide will be an amazing way to get to your computer faster.

loft bed with slide ideas
fancy.com

And you can always use the space under the slide to install some storage units that will help you organize your creative projects near your hand and make it easy to reach. I can guaranty to you that it will be the dream home office.

anyway, a loft bed with slide could also be a suitable design for those who are in need for a little fun at their lives but does not have enough time to go to a place that offers that kind of fun.

Kids loft beds slide

amazing loft bed with slide
maxtrixkids.com

If my past ideas of loft bed with slides for adults did not convince you to have one in your own bedroom, I think I will succeed this time when giving you some ideas to use for your kids’ bedroom.

new loft bed with slide
homeizy.com

In our last article about the L shaped bunk beds, we have offered so many ideas of how we can save the space by using this kind of bunk beds designs. Now, you must know the value of space saving that loft beds could offer to you. We decided to draws your attention to the fun side of loft and bunk beds. 

Loft bed with storage

Loft bed with slide could also be used as a perfect place to store your kids’ things under the loft bed. And with the help of the slide, they will have the time to enjoy their stay in the bedroom. It is the time that you can teach your kids how to be organized and give them the opportunity to be happy.

Loft bed in a game room

kids loft bed with slide ideas
thebooandtheboy.com

the slide attached to the loft bed could help you turn your kids’ room into a game room with a climbing wall and one or two of the bean bags under the loft bed in front of a screen with the last edition of their favorite games to play on the screen, you can consider it a game room that any kid dream to have one at home.

A loft bed for a princess

cool loft bed with slide
decofurnish.com

In this case, the slide will be the fastest way for the princess to get down from her tower, to reach all who are waiting to meet her. She can enter the castle under the loft bed to make all things under control.

Loft bed for the super boy

loft bed with slide for boy
tiltpress.com

Super boy will sure need the slide to reach who wants his help. When he hears the call of duty he can use his maximum speed to offer help and put everything in order. The lower level of the loft bed could be his sanctuary where he can hide his secret personality.

Loft bed with desk

You can always use the lower level to install a desk and a small lab for your kid where he can show his own geniuses.

Surefire Ideas to Arrange Living Room with Fireplace

0

Living Room with Fireplace

No one can deny the character, structure, and warmth that a fireplace spreads once in a living room. However, decorating a living room with fireplace could require some effort. You shouldn’t take this consideration relentlessly, the way you design a living room with a fireplace differs with an ordinary room. Such as, where should you put the couch, how close the seats to the fireplace, and how many? Should you make it the centerpiece of the room?

small living room with fireplace decoration
Source: tremost.com

From large living room space to small places, with some thinking and smart decorating tips, a fireplace can still add its charm. Take a look at these living room ideas and learn from the best designers.

how to decorate a living room with a fireplace

The most asked question, or actually the first one that comes to your mind is how to arrange a living room with fireplace. But when it comes to small living rooms the asking ratio goes higher. And on that matter, we are here to put your mind at peace.how to arrange small living room with fireplace

Our first advice is to visualize the fireplace area before you start spontaneously assembling your furniture. See these three main tricks to arranging small living rooms with fireplaces and send me your feedback.

Small Living Room with Fireplace

1. Center fireplace:
Arrange your furniture around the fireplace making it the center of the room. Give the room a cozy vibe by using a love seat and two accent chairs instead of one large sofa. Also, use an accent table in the middle to give the feel of a larger living room space.

Add bookcases to the sides of your small living room fireplace like shown in the picture. This way you increase your living room storage space.

Small living room with fireplace
via woodynody.com

2. Center Fireplace with two sofas
Use two sofas that are in balanced size to the space of your living room. In this style, the room will seem less crowded and still have the same seating. You can add some cushions near the fireplace for extra seating and more warmth. Plus, a small table in the middle & perhaps another one beside either side of one of the sofas to hold teacups or books. Use a large rug to hold the room furniture together.

small living room with fireplace design
from: HGTV

3. Corner Fireplace:
A corner fireplace in small living rooms can have two side effects. Whether it’ll be a good option because it gives a lot of wall & floor space for other decorating & furnishing options. Or it’ll be a bad choice, only if you don’t have enough space to angle the furniture along to center the fireplace. However, you can get out of this struggle easily by placing the edge of your rug in line with it and arrange your furniture the same way.

Living room with corner fireplace
source: roomcandy101 go to our FaceBook page for step by step instructions.

For more inspiration, check these pictures of decorated living rooms with fireplaces:

These were three ways to arrange your small living room with a fireplace. Place your inquiry in the comments below for further living room with fireplace decorating tips!

Best kids tree houses ideas and tips

0

Kids tree houses are the first dream of independence that prompt in every kid’s mind. here the kids could depend on themselves, invite friends, make small parties, play games, eat snacks, and plans for some amazing tricks to do it with their friends.

Kids tree houses

best kids tree houses
lushome.com

Kids tree houses are not only a haven for children but they consider it their own small world which they can live all the adventures in it, develop their creativity and simulates the life of adults. For all the past reasons if you have the opportunity to make this dream come true, please do not hesitate. If you decided to build one of the kids tree houses for your kids you will become a real hero in their eyes for sure.

Important tips

kids tree houses ideas
blueforest.com
  • Check if you need permission from the local planning department before building.
  • Talk to your neighbors and let them know your plans. If your tree house will have a view of a neighbor’s property to avoid future complaints.
  • Talk to your insurance agent to make sure a tree house is covered under your home insurance policy.
  • Check these kids garden ideas will help you to get inspired surrounding the tree house with decorations.

It is not that difficult

kids tree houses ideas
rebloggy.com

If you are thinking about building a tree house for your kids but have some worries about the difficulty of building one, do not worry we are here to help you!

First, prepare yourself to be a hero! Then it is the time for the second step, search for the right place to build the tree house which must be a place that you can watch them clearly. It is true that not all tree houses are necessarily found in the forest. All that is needed is a good sturdy tree trunk that serves as a solid foundation for the tree house.

kids tree houses ideas
maisonboheme.blogspot.com.eg

The ideal trees for kids tree houses are oaks, maples, firs and apple trees. You can always ask for the help of a tree specialist to inspect your tree before beginning construction. The tree must have some qualities like a strong trunk, strong branches, deep roots and well established

The design

cool kids tree houses
fullhomeliving.com

Here comes the step of choosing the design that suits the place you choose to build the tree house. Here you can find many pictures of new designs that will surely inspire you. Also, you can find some other useful ideas on the internet or you can buy a book which speaks about how to choose the right design for kids tree houses.

When creating your design, do not forget to plan the growth of the tree. Leave a large space around the trunk of the tree for the tree to grow. It is worth investigating the specific species of your tree to determine the range of growth.

Choosing wood

cool kids tree houses
ssameci.info

The reclaimed wood is environmentally friendly but may not be as strong as new wood. Be cautious when picking up reclaimed wood and do not use it for any of the weight-bearing parts in your tree house. You must be firm when you say the warnings to your kids like they must never climb on the roof of their new tree house.

The access to the tree house

amazing kids tree houses
pixdaus.com

Before building your kids tree houses, you must decide a way to access it. Such as a ladder, that will easily allow you and your kids to enter the house. Your way must be secure and strong.

You can buy or build a regular ladder to climb to your house in the tree. You can also use rope ladder which made of rope and small boards, that you could hung from the platform of the house on the tree. Stairs also are the safest access way to a tree house.

Kids tree houses furniture

Kids tree houses furniture
dornob.com

The furniture of the tree house must be as light as possible. The lightest is the better because it will not make more loads on the tree house. You can take your kids when choosing the furniture; this will make them so happy and will feel as they have a real house. Use colorful pieces of furniture to add a cheerful feeling to the tree house.

Painting the tree house

kids tree houses designs
hometrendesign.com

If you want your tree house to be more attractive and has a unique appearance, now it is the time to dye it or paint it. Try to choose the color of the paint that works in combination with your home.

Cover for the roof

kids tree houses lighting
madebymood.com

The rain could be a threat to the tree house so you may consider using a waterproof cover for the roof of the tree house. And be sure of the safety of the power connections that you will use to light the house.


2018 Best Above Ground Pool Ideas With Building Tips

0

Above ground, pool ideas could be a great inspiration to any homeowner, especially in warm climates. Who doesn’t dream of a beautiful jump to the cooling water in a pool of his own? Above ground pool ideas is about avoiding the overcrowded public swimming pools during summer heat and simply jump into your own pool. Wow, it is really something to dream of!!

Above ground pool ideas

    cool above ground pool ideas   

With enough space, a small budget of money and a significant portion of ideas, the dream of having your own swimming pool can easily be put into reality, because building an above ground pool on a budget is not so complicated.

Above ground pool materials

new above ground pool ideas

If you have enough space in your backyard to install an above ground pool, Steel, Aluminum, PVC, fiberglass or Resin are the choices of the materials, and it is the best of the above ground pool ideas.

above ground pool ideas pinterest
wearefound.com

By choosing one of the past elements, you can specify the required budget. They could be formed in round or oval form and lined with a waterproof film.


You can opt for a pool with a maximum diameter of eight meters and a water depth of 1.50 meters which is excellent for swimming. Your pool can be easily integrated into your outdoors; you can choose to make it disappear by creating an elevated deck that will surround the pool. So, it will seem buried without having to dig!

Components of an above ground pool

above ground pool ideas pinterest

And if you were asking about the components of an above ground pool these are the essential elements, Non-slip layer on the bottom, exhaust valve, wall skimmer connected to the outdoor recirculation pump, metal structure, stile, recirculation pump, support base, and sandbags for the filter.

Above ground pool building tips

amazing above ground pool ideas

Choosing the right setting for the pool is critical.

  • Choose a position that is entirely flat. Otherwise, the water pressure on one side of the pool will do damage.
amazing above ground pool ideas
abovegroundswimmingpools2015.tumblr.com
  • Choose a place that will allow the pool area to be illuminated entirely, due to the sunlight during the day, the more sunlight that the pool receives, the warmer the water will be. This natural heat will reduce the need for the frequent use of a pool heater.

above ground pool ideas pinterest

  • Choose to install the above ground pool away from the trees. Trees could be the reason behind slowing the water heating process. And it can lose leaves, making pool cleaning more difficult job.
above ground pool ideas pinterest
jennysteffens.blogspot.com.eg
  • It is advisable, to leave at least 2 meters of space around the outside perimeter of the pool to allow you free space for moving
above ground pool ideas pinterest
homescorner.com
  • Try to position the pool drain as near as possible to a drain cock to take advantage of gravity and avoid having to use a pump to empty the pool.
above ground pool ideas with deck
mymodernmet.com
  • The site of the pool must also have access to electricity and a source of water for the pump, heater, and filter.
cool above ground pool ideas
showyourvote.org
  • After installing the above ground pool begin to fill the pool to the optimum level. If you used the standard water system of the house, it might take 25 to 30 hours for this operation.

Above ground pool deck

new above ground pool ideas 17
homedesignlover.com

One of the biggest innovations on the market was undoubtedly the creation of deck for above ground pools.

best above ground pool ideas 19
bullyfreeworld.com

With this structure, you can put above ground pools on the floor, and you will be able to enjoy an economic pool with the same efficiency of a typical swimming pool. The difference is that above ground pools building permit is not compulsory

above ground pool ideas gallery

Among the most used options for a deck, wood is the one that most resembles the original idea.

best above ground pool ideas 20
beeyoutifullife.com

Wood does not heat as much as some ceramics, or stones, so its exposure to the sun does not leave the environment even hotter.

cool above ground pool ideas

This idea has been changing over time because wood after exposure to the sun and rain, the wood will rot and end up creating compromised spaces that can even cause accidents.

above ground pool ideas with deck

Therefore, choosing the right kind of wood is crucial. Ceramic, Stones, and Porcelain could also be used in building a deck for an above ground pool.

cool above ground pool ideas 18
deblij.net

Above ground pools decorating ideas

amazing above ground pool ideas

You can use bushes or shrubs around the pool as a simple way to decorate the exterior. Another simple way to decorate your aboveground pool is to use one of the pool fence ideas around the outside.

above ground pool ideas design

You can also place reclining seats or swinging in front of the pool. The critical thing to remember is to incorporate your style.

DIY Outdoor Firewood Rack Ideas and Designs for 2018

0

DIY Outdoor Firewood Rack

If you have a wood-burning fireplace, of course, you will need a place to store firewood, right? I think you need the firewood nearby,  so you don’t have to go out to cold shed through a rainy yard, but at the same time, you don’t want it inside. Also, you want it to stay off the ground, so it doesn’t get waterlogged. So the perfect solution in this DIY Outdoor Firewood Rack.

The firewood shelter combines rustic ranch styling with ample sheltered storage that keeps firewood off the ground and obscured from sight. Clad on the sides and roof with beveled cedar lap siding, the shelter has the look and feel of a permanent structure. But because it’s freestanding, you can move it around as needed. It requires no time-consuming foundation work. As long as it’s loaded up with firewood, it is very stable, even in high winds. But if it has high exposure to the elements and is frequently empty, secure it with a pair of wood stakes.

DIY Outdoor Firewood Rack - Firewood outdoor holder

Firewood is messy, it brings in some insects, and unless you live in a rustic home, possibilities are it doesn’t do much for your habit. But then if you store it ricked outside, you will need to make sure that it doesn’t catch mist between it and the side of the house or suit perfect home for bugs in the self-parking.
On top of all that, You can store your wood close, clean, and dry, and it allows you to buy woods in bulk, saving your money and time.DIY Outdoor Firewood Rack-messy of firewood DIY Outdoor Firewood Rack-outdoor storage rack

It is nearly time for some cozy crackling fire. Let’s talk about creative DIY Outdoor Firewood Rack ideas for yard and firewood storage.

OUTDOOR FIREWOOD RACK IDEAS

  1. DIY Firewood Rack: Do you think yourself the novice at woodworking, but are looking for creating DIY Firewood Rack that supplements some more design inside your home during the winter season when you need to keep those woods in place, or even in summer when you just want to keep them outside? This impressive DIY Outdoor Firewood Rack is something that yields explorer results almost effortlessly. Additional, you can produce the whole project to life in just portion of the value that you would unless spending on a store-bought wood rack. This one calls for an investment of money, combined with just a little bit of creativity and construction skills. Take a look at this excellent guide to gain insight into how the finished structure looks. DIY Outdoor Firewood Rack-fireplace accessories DIY Outdoor Firewood Rack-handmade rack
  2. Firewood Rack for half Rick of Wood: If these get-together with whole family and friends are an ordinary affair for your yard, you would undoubtedly love this Outdoor Firewood Rack! Few blocks of wood, when put together with three cinder blocks and few cedar fencing pickets, using some bolts and nails – can end up in fetching firewood rack that’s nearly four feet wide and four feet tall. The rack has to create the appropriate dimensions for storing half rick of wood.DIY Outdoor Firewood Rack-for half of Wood
  3. No Tools Firewood Rack: A simple DIY Outdoor Firewood Rack was standing off the ground on a few large blocks of concrete, this motivation doesn’t call for any complex tools to come to life with complete integrity. Easily constructed from two scenery frames, and a few 2X4s with footers that have to cut into half, this No Tools Firewood Rack makes a chic and edgelike touch with the impressive assembling and the large size that it flaunts. As the structure sports some breakable pieces, the best thing about the rack is that you can push it around very conveniently with the individual parts, instead of grappling with the whole stage at once.DIY Outdoor Firewood Rack no tools

OUTDOOR FIREWOOD STORAGE BOX

DIY outdoor storage box has some real style factor to it. All you have to do is turn the slats to get a coastal louvered look.DIY Outdoor Firewood Rack Storage box

Create a chic way to save outdoor decor with this slatted deck box. While building the louvered looks may appear intricate, I am here now to tell you; it’s as easy as turning the braces. Also commendable, assembly requires little more than a saw, drill, and a Kreg Jig.DIY Outdoor Firewood Rack storage levels boxes

Now Let’s See How to Build DIY Outdoor Firewood Storage Box

Recommended tools you will need besides an electric screwdriver, a right angle tool (or angle square or framing square) to keep your uprights vertical and at least one C-clamp (with over 3″ max opening) to hold firm pieces of lumber together when driving screws in. Recommended screws are #10 x 3″ long Yellow Zinc wood screws, with two possible choices for head design. One is the most common choice the Phillips head screws. On 3-inch length, they can be tough to drive in as they will strip a lot.

The second, better choice is the T-Star head screws. Your cost is the same but for T-Star screws you’ll need the T-star driving bits, and luckily they come standard with many bit sets.

You can also use these Grip-Rite #10 x 3-in Philips Head Exterior wood screws. They are a bit cheaper. We just like the Yellow Zinc screws more for cosmetic reasons.

TIP: Pre-drill holes for wood screws. It’ll make your job driving the screws in so much easier, and you’ll avoid potential cracks in 2x4s.

TIP: Use an outdoor glue in addition to screws in your DIY projects. It makes the construction so much sturdier.

NOTE: Because it won’t be adjustable, you must carefully plan the size of your homemade rack before cutting 2x4s.

Steps

  • Cut the parts: Using the cut list above, cut the 2×2 legs and 1×3 boards to length.
  • Prep the slats: By using Kreg Jig, drill two pocket holes in the ends of each of the Rails and Slats.
  • Place the first slat: Apostle a line half an inch from the face of the Front Right Leg. Make a second Mark two and a half inches of the board’s head point.
    Now place the end of a 22-inch-long Slat on the stake, so that its top position rests on the crosshairs of the two lines and the bottom edge tilts forward flush with the front edge of the Leg.
  • Add the first slat: Using a Kreg right corner lock, ensure the slat in place on the leg. Using a drill/operator, drive 1¼-inch pocket-hole bolts within the holes in the slats and into the leg.DIY Outdoor Firewood Rack layout built
  • Continue adding the slats: Place the next slat underneath the first, angling it identically. Put the brace in the pocket hole to hold the slat in place. Ensure that slat is with bolts. Secure three new slats, for a total of five tilted slats. Reform this manner to construct left side of the box’s front.
  • Measure and cut divider: Place 2×2 facing the free ends of the 1×3’s. Mark the top and bottom of “board” on the 2×2 divider, and then cut it to length.
  • Unite a divider: Mark half inch hole line on the divider. Clamp a set of slats against it, and then secure them with pocket-hole screws.
  • Compile the panels: Put the joined slatted boards face down on the work facade. Clamp divider to the counter. Drive pocket-hole screws through slats in independent committee to secure it to the divider between them.DIY Outdoor Firewood Rack box drawing
  • Prepare rails: Sober fit the doubled-up upper rail and lower rail between the legs. Mark the location of the divider on all rail. Next, drill pocket holes through a diameter of each board so that screws will run into the rails and the ends of the divider.
  • Establish rails: Place face of the top rail glow with head side and face of the leg. Ensure the track to each leg using pocket-hole screws.
  • Attach the rail to the divider: Drive screws through the rail and into the divider.
  • Duplicate headrail: To build a sticking top point when the box is unlocked, use a grain of wood glue to the placed rail, and then extended the second rail facing it. Add the rail to both legs and divider. Finally, connect the bottom rail toward the underside of the lowest slats and flush with the face of the legs.
  • Combine the cleat: Apply glue to the backside of the 1×2 cleat, and then position it in place on the bottom rail. DIY Outdoor Firewood Rack step by step construction
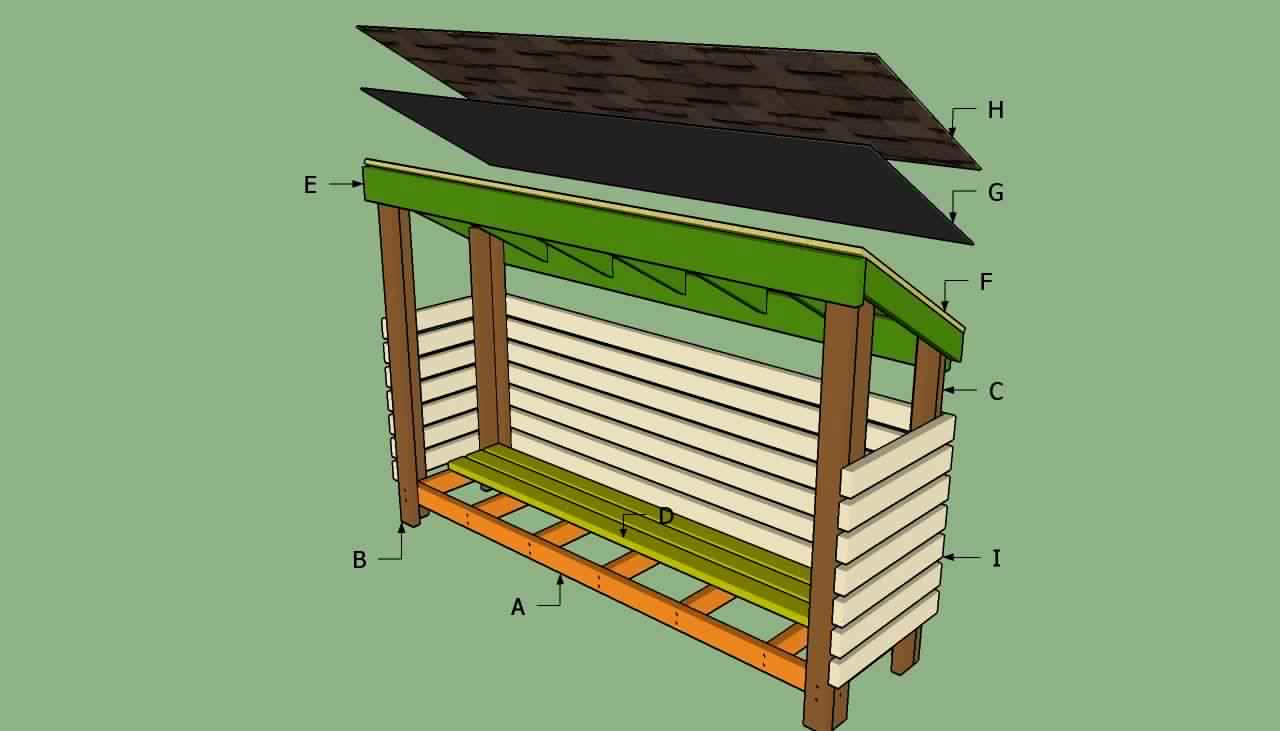
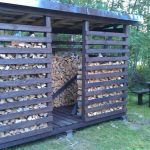
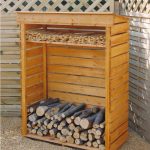
Place a spacer block between the cleat and the lower slat; this spacing will allow the floor slats to set on the cleats below the slats and divider. Drive 1¼-inch wood screws through the cleat and into the rail to hold the cleat in place.
  • Layout the lid pieces: On a flat surface, lay out lid pieces. On the perpendicular boards, look at the end grain of each board and attempt to alternate the direction the boards’ “cup” (moon-shape of the grain).
  • Attach the lid: Using a drill to make three hinges to the underside of the lid and the top edge of the back of the box. Add additional lid support hinges, if desired.DIY Outdoor Firewood Rack for outdoor storage boxDIY Outdoor Firewood Rack Final shape of storage box DIY Outdoor Firewood Rack wonderful design for storage firewood box

It will be our please to explore more ideas and designs to share it with you. Please check our below Gallery.

How to Choose The Best Led Shower Head Types

0

Led Shower Head

Skipping an intro and lots of chattering, I’m going to head on how a LED shower head works and why you need those exceptional LED lights.

led shower lighted head types
via: Happydeals.com

First of all, all colored shower head types rely on water flow to give them the energy to produce light via a microturbine chip. In some rare occasions, these LED lights just stop working. Basically, it’s due to mineral deposits building up inside the shower head, which in turn prevents the microturbine chip from producing enough power to light the led up.

However, this issue is easily solved when you immerse your shower head in vinegar and water solution for a few hours. If this problem ever encounters you, try this solution and give me your feedback.

Secondly, on the matter of why you need it, these shower lights offer a mood change during your shower time.Let’s say you get back from work feeling tired, or you wake up but still feeling sleepy, these lights activate your mood. They’re also a lot of fun for kids when you want to give them a little motivation on getting showered.

It’s an awesome & fun experience to try with your partner. You’ll find yourself falling in love with shower times all over again.

Best lighted shower head Types

1# PowerSpa shower LED head:

led shower head light
Source: Amazon.com

This chrome fixed mount face type comes with air turbo pressure boost technology. It is both stylish and practical!

2# DreamSpa color changing shower head:

Best led shower head types
From: showerfeed.com

This baby has 5 water functions: PowerRain, EconomyRain, Hydro-mist, pulsating massage plus a water saving setting.

It has an automatic color changing system, it changes with the water temperature.

3# MagicShowerhead with jet spray:

Shower Head With 7 LED Light
Via: Amazon

This one comes with 7 LED light colors. Its colored plastic head can fit most standard shower pipes. The LED lights change quickly so it will be more of a wake-up routine.

4# SZrandy square LED light head:

Hot-Sale-6-Inch-Square-7-Colors-Changing-LED-Shower-Head led shower head
From: Aliexpress.com

Wall mounted chrome with a slide bar and dual water temperature control is an amazing square-shaped rainbow shower head.

5# Led Shower Head with Temperature Sensor:

LED shower head types with temperature sensor
source: Ebay.com

This light up shower head has three patterns: Normal outlet, Atomizing spray, and center column outlet.

This type offers a great experience with crystal clear water flow. Automatic color changing with temperature sensor control. I think it’s worth the try!

After checking on all these led shower heads, I was certainly thinking of adopting the rainbow led, the square one with temperature control. Yet I really wish I could find a dual between rainbow and the three water patterns type, especially for the atomizing spray technique!

Do you have a living room with fireplace? Cause that’s what our next article’s about, keep in touch!

Follow our Facebook page for instant replies on your daily questions.

Large Kitchen Island Designs and Plans

0

In the past owning a large kitchen island was a dream that in few cases became reality. But now you only have to get the right dimensions, a suitable budget and the right spot in your kitchen to install a large kitchen island and finally perhaps just the courage to opt for one. 

Large Kitchen Island ( Designs & Plans )

large kitchen island ikea

Unfortunately, most kitchen spaces of apartment buildings do not have sufficient areas for placing such a practical, functional and externally attractive piece like the large kitchen island. But over time the situation has changed, more and more apartments improved planning. Now apartments can offer owners more spacious designs, not to mention private houses.

large kitchen island ideas

The large kitchen island could be fully packed with function, such as a refrigerator or dishwasher, open shelf for everyday porcelain and cutlery, a box of spice storage, bookcase for cookbooks, holders and wire baskets on the side of the cookware for kitchen towels.

Large kitchen island measures

large kitchen island types

The island should be free and allow sufficient circulation space to be around, the ideal is a spacing of 100 cm, but 70 cm already provide good circulation, should take into account the furniture surrounding the large kitchen island, for example, if you have another cabinet with drawers you will need a space for opening the drawers.

Finishing material

large kitchen island design

Both the material of the island and its finish must meet its functionality. The islands can be executed in MDF with the most diverse coatings like wood laminates, stainless steel sheets, and stones. The same is done with the island top if you choose to install the cooktop or the sink in the island it is necessary to check if the material of the island is preventing infiltration.

large kitchen island ideas
thecabinetguide.com

In general, natural stones such as granites and marbles, industrial stones like Marmo glass is the best choice. But if you choose wood it will be in need to have a special treatment to prevent infiltration.

The lighting of the island

large kitchen island ideas

Do not forget to design a lighting that values your island, sometimes it can be away from a window and needs an extra light beside the basic lighting that will highlight your large kitchen island.

large kitchen island with worktop
hgtv.com

Large kitchen island types

large kitchen island ikea

Large Kitchen Island could be with a bench to support cooking materials, with stove or cooktop with scrubber or hood, with sink, with shelves, cabinets, and drawers, with table or countertop for meals and island with a refrigerated counter. 

Island With built-in equipment

large kitchen island types

In this design, we can see the best use of space provided by the drawers, built-in equipment such as the cooktop, and the use of the countertop for fast meals.

Island with sloping side panel

large kitchen island with sloping side panel

This type of Kitchen Island is used for cooking and for support. The sloping side panel makes it easy to organize the utensils and takes advantage of the space below the storage shelf.

Island with bench

large kitchen island with bench

This design is wonderful, cheerful and very modern.

large kitchen island types
dailymail.co.uk

With the installation of the large kitchen island with standard table height it is possible to use benches also you can use chairs that are more comfortable and high stools.

large kitchen island ideas
studio-mcgee.com

Island with sink

large kitchen island ideas

This is an island model that serves and support the time of cooking, the stainless steel worktop is excellent for handling food and very practical in cleaning, however, some care must be taken to avoid infiltration.

best large kitchen island
bhg.com

The large kitchen island could also be supported with double sink and dining bench.

Large kitchen island plans

Without proper planning having large kitchen island could make a mess, it is important to pay attention to how convenient it is to the layout.

modern large kitchen island
renoguide.com.au

For example, drawers and shelves on the wall should be easy to open without disturbing the person who may be working on the island’s surface.

modern large kitchen island
decoholic.org

The difficult task is to plan the place for the dishwasher because, at the times when the door is open and someone goes along, it’s easy to get caught up.

large kitchen island designs
houseofturquoise.com

The minimum distance between open installations, such as doors, drawers to the surface of the island must be three feet or 90 centimeters.

Finally

amazing large kitchen island
homebunch.com

The large kitchen island, with their spaciousness, practicality and design diversity, has earned the desire of all who are interested in the interior design of the kitchen.

large kitchen island ideas
ecstasymodel.com

So, if you want to manage your space in a harmonious and functional way, to enhance the living space of your home and to live a practical and dynamic lifestyle, the kitchen with large Island is the smart solution you are looking for and it is a great choice as one of the luxurious kitchens designs.


Decorate Your Christmas Tree With Popcorn Garland!

0

Decorating Christmas Tree With Popcorn

Today you are going to learn a really fancy popcorn decoration trick that I find mind-blowing! Obviously, the holidays are coming up &you want to have a cool new idea for decoration.

Adding popcorn decoration garlands to your Christmas tree is one of the most budget-friendly and easiest things you can do. Moreover, you don’t want to miss the yuletide spirit and fun with your entire friends and family.

You’ll be surprised to how children will react to this popcorn decoration on the Christmas tree! You can even allow your kids to make them with you and have a healthy snack at the same time.

So, how can you make popcorn garlands for your Christmas tree?

Christmas Tree Popcorn Decoration:

You’ll only go through 7 easy steps to create a perfectly decorated Christmas tree with popcorn garlands.

7 steps for Christmas tree popcorn decoration:

  1. Prepare your popcorn.
  2. Choosing the best ones.
  3. Patience.
  4. Choose your thread.
  5. Stringing your popcorn.
  6. Secure the finished garland.
  7. Popcorn decoration time.

It’ll only take 7 steps to get an exciting popcorn decoration on your tree!

Let’s get started…

1. Prepare Your Popcorn:

So, first thing is first, you need to pop some kernels however you prefer. You can use any type of popcorn poppers to prepare your popcorn. There is no specific way to make your popcorn decoration.

Of course, you don’t have to add any salt or butter (unless you want to have some for snack! LOL)

Air-popped kernels work best for this decoration.

How much popcorn will you need?

  • 1 cup of unpopped kernels is enough for a 3-4 feet thread.

Bonus Tip.1:

In case you are going to use the pan to pop your corns, add some oil to help you cook the corn. Also, after you’re done, get a paper towel-lined plate or bowl and add your popcorn in it to prevent from getting soggy.

Are you in a hurry and want to cook popcorn quickly?

  • Use pre-popped bag or the microwave to get this step over with quickly.

2. Choosing The Best Ones:

After your popcorn is ready and cools down, it’s time to inspect it. You need to choose the best popcorn that you’re going to use for your popcorn decoration quest!

So, if any popcorn got burnt up, set them aside and any broken or misshaped one. But, don’t the misshaped or broken popcorn, enjoy eating them. Just choose the flowery looking popcorn to have a nice looking garland.

3. Patience:

I know how excited you are to get your popcorn decoration done! Believe I was, but let me share my experience with you.

It’s better to leave the popcorn for 1-2 days because fresh popcorn tends to break quickly. By being patient, you’ll have less brittle popcorn and you can string them easily.

Bonus Tip.2:

If you want a more Christmasy look, then it’s a fabulous idea to color the popcorn after the 1-2 days of waiting. You can use powdered food coloring for outstanding popcorn decoration garlands.

You can choose the traditional green and red Christmas colors, or choose any color of your own.

4.      Choose Your Thread:

The first most important thing to consider when choosing your thread is that it has to be sturdy. If you have some heavy embroidery floss around, that will be amazing because they come in several colors and are strong.

It’s even better when you have a fishing line which is even stronger and has a transparent color that won’t show if there were any gaps in the garlands.

The second most important thing to consider is the length of the thread and it should be longer than 5 feet. But, you’d better that you leave the thread attached to its spool. Just do what you have to do to make sure that the thread fits your popcorn decoration garlands.

The last thing is threading the needle and it’s best to find a thin needle to string through the popcorn. Don’t forget to make a knot at the end of the thread to avoid the popcorn from falling off as you string off.

5.      Stringing Your Popcorn:

Now, here’s where all the work comes in where you have to string the popcorn through the center and pull the end of the thread.

Keep on adding one popcorn after the other until your popcorn decoration garland thread is full!Push the popcorn closely together as you possibly can to get a good-looking garland.

Bonus Tip.3:

Get creative and mix popcorns with cranberries, lemon, dried orange, cinnamon sticks or dried lemons. Also, you sprinkle some glitter on it or spray some colors.

6.      Secure The Finished Garland:

This seems like a pretty logical step, but people tend to forget as they finish the garland and get all excited! Just make sure you secure the thread after filling the thread with popcorn.

Finally,

7.      Popcorn Decoration Time:

Victory! This will be your favorite part after finishing the popcorn decoration garlands, you’ll love how amazing they look!


Image Source: forrent

After decorating your Christmas tree with lights, get creative & decorate with your popcorn garlands. You can make the popcorn garlands look elegantly set on the tree or spread them around casually!

It’s your Christmas tree, so enjoy decorating in a way that represents your style and personality.

Merry Christmas to all of you, hope you enjoyed our popcorn decoration idea for your Christmas tree! Share this with family and friends, and share with us in the comments your experience with this DIY. Cheers!

By continuing to use the site, you agree to the use of cookies. more information

The cookie settings on this website are set to "allow cookies" to give you the best browsing experience possible. If you continue to use this website without changing your cookie settings or you click "Accept" below then you are consenting to this.

Close