Thinking of standard kitchen cabinet sizes and designs, you need it to fit with your kitchen measurements so you can get the most of the smallest spaces. Today we give you the efficient tips to maximize the benefit of every centimeter. Prepare to have an ideal kitchen that suits your needs.
After you read about Kitchen backsplash ideas you may need to find out the standard kitchen cabinet sizes and explore latest kitchen cabinets design 2017.
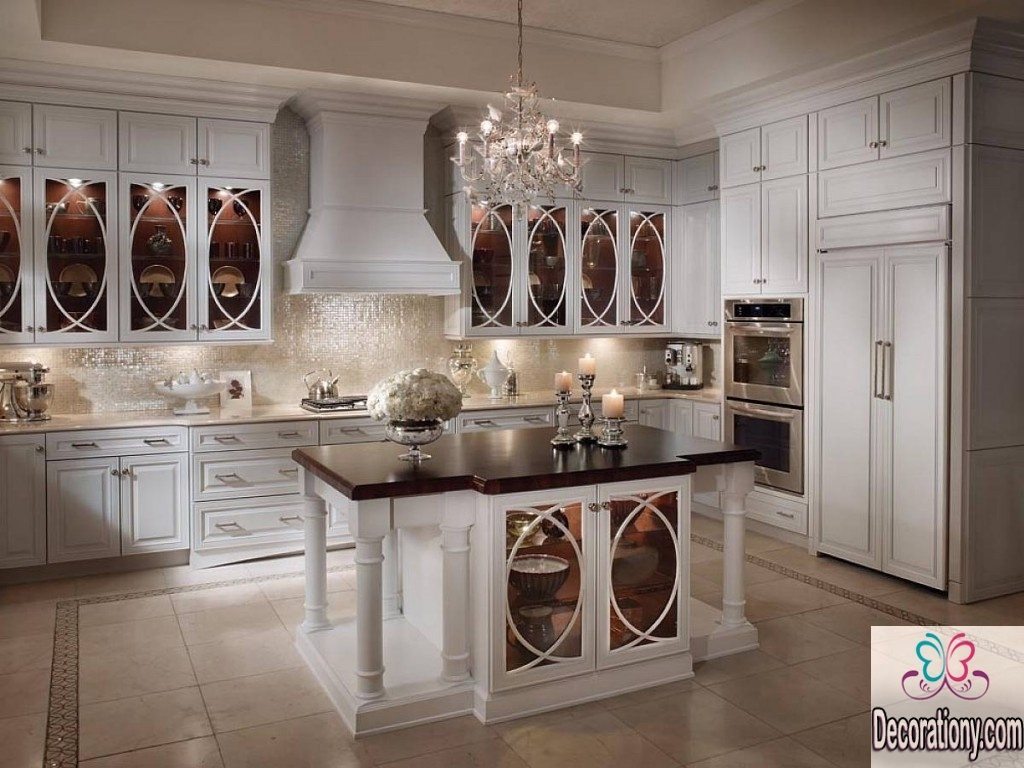
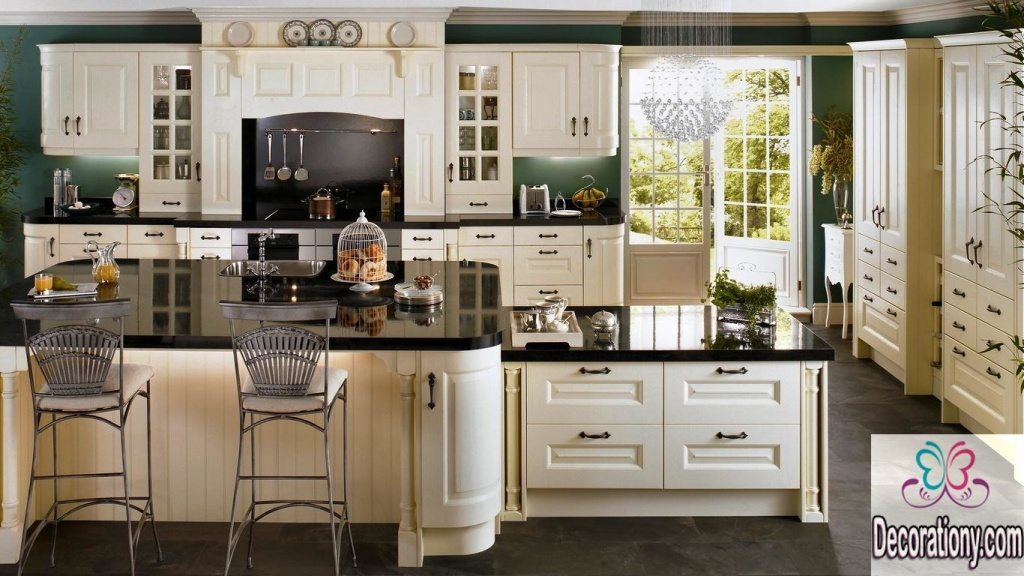
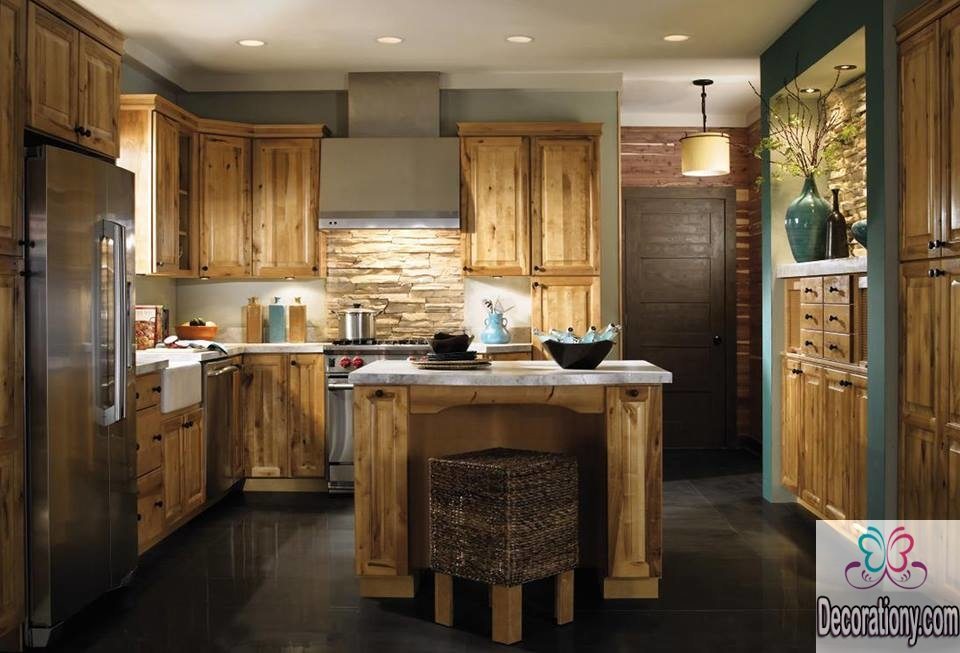
Kitchen Cabinets: Vanity Sizes
How To Install Glass Front Cabinet Doors Door Design Ideas pertaining to Installing Glass In Kitchen Cabinet Doors – Disarorecords
There are several tips to consider for having the vanity kitchen cabinet sizes!
Calculating kitchen measurements accurately is the first thing you need to consider.
Make sure you put electrical outlets in the design to suit the number of electrical appliances used in the kitchen.
Use easy-to-clean raw materials.
Use waterproofing materials for storage below the kitchen sink.
For small spaces, use cabinets with detachable shelves.
The drawer unit is an important piece in kitchen design, you don’t want to forget that.
Consider wheel cabinets for easier cleaning.
Make sure the height of the cabinets suits your daily activities.
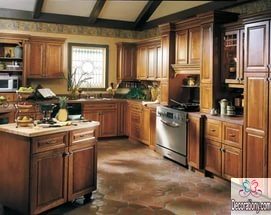
kitchen cabinet designs
The shapes and sizes of kitchen cabinets vary between rectangular, square and oval shapes. So when you decide on changing your kitchen decorations, you might struggle to choose the ideal shapes to suit your kitchen. Like these simple kitchen cabinets that will help to make a contemporary kitchen design.
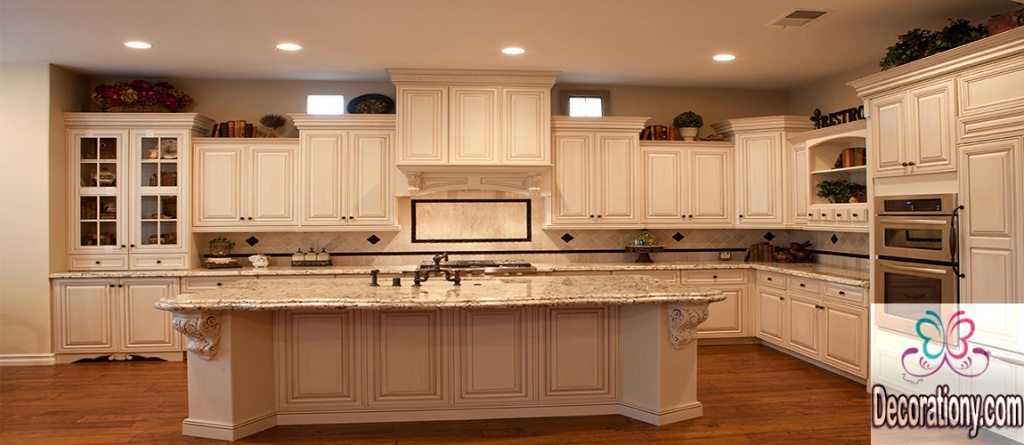
Rectangular cabinets are the most popular among all types, it’s suitable for small and large areas. It’ll give you a fair space to move in even the smallest places. Use wall-mounted cabinets, leave the other wall empty to give a wide place appearance. Read more of our Kitchen trends 2017.
Standard kitchen cabinet sizes
These are the ideal measurements and standard kitchen cabinet sizes. Make sure you collect your own kitchen measurements and apply those sizes to fit your need.
While base kitchen cabinets are the workhorse of kitchen design, they’re installed directly on the floor. This is a basic piece in your kitchen. So you need to be aware of your measurements, a wrong height could make a base cabinet inaccessible.
Height: 34.5
Height with counters: 35 to 36 Depth: 24
Depth with counters: 25 to 26 Standard widths: 12, 18, 24 (This size is great for storing baking pans), 30 (Single basin sink), 33, 36 (Double), 48 (The largest)
Counters are always laid on the base cabinets, where you install your sinks, dishwashers, and ranges. That’s why these pieces are usually the most expensive of kitchen cabinets, they’re simply the basics of kitchen design.
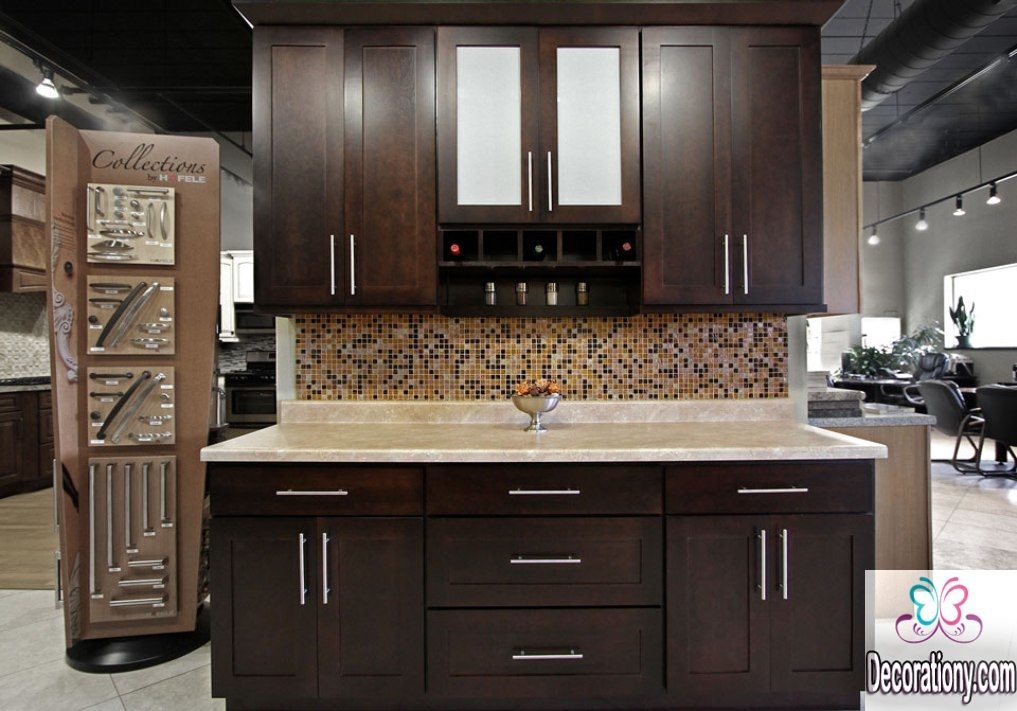
Also, wall cabinets are important, but it’s possible to build your kitchen and suit your needs without them. Wall cabinets are more like the showpiece of your kitchen.
Wall cabinet sizes:
Height: 12 to 48 Depth 12 to 24 Width 12 to 36
There are also the tall kitchen cabinets. Sizes and dimensions:
Height 84 and 96 (They can extend from floor to ceiling) Depth 12 and 24 Width 12 to 36
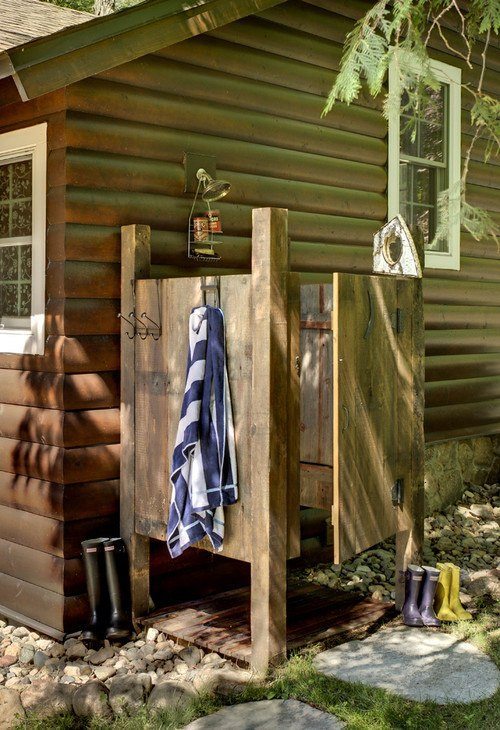
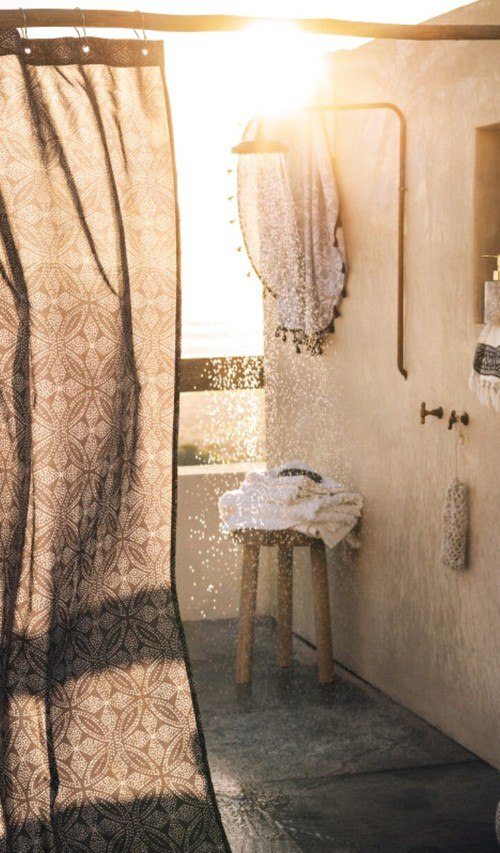
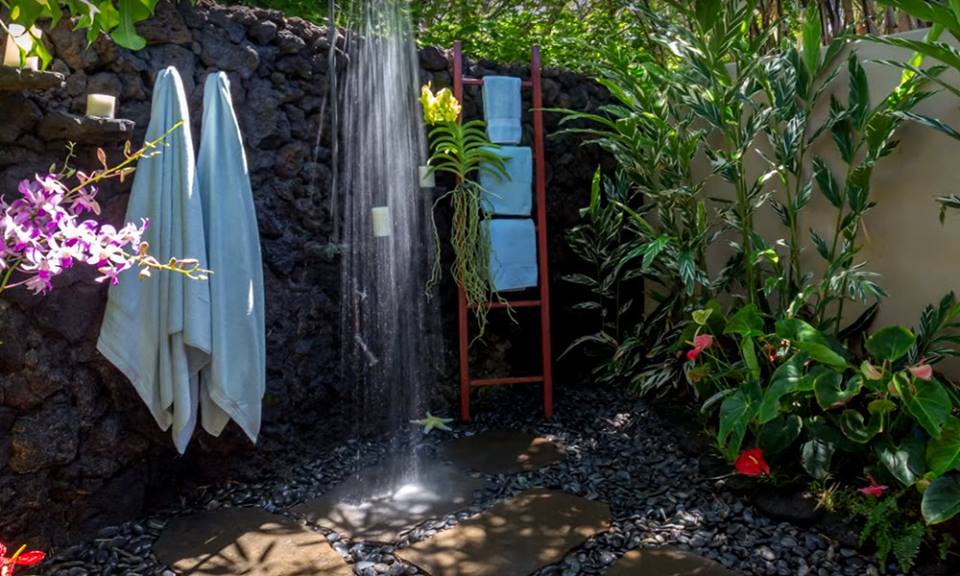
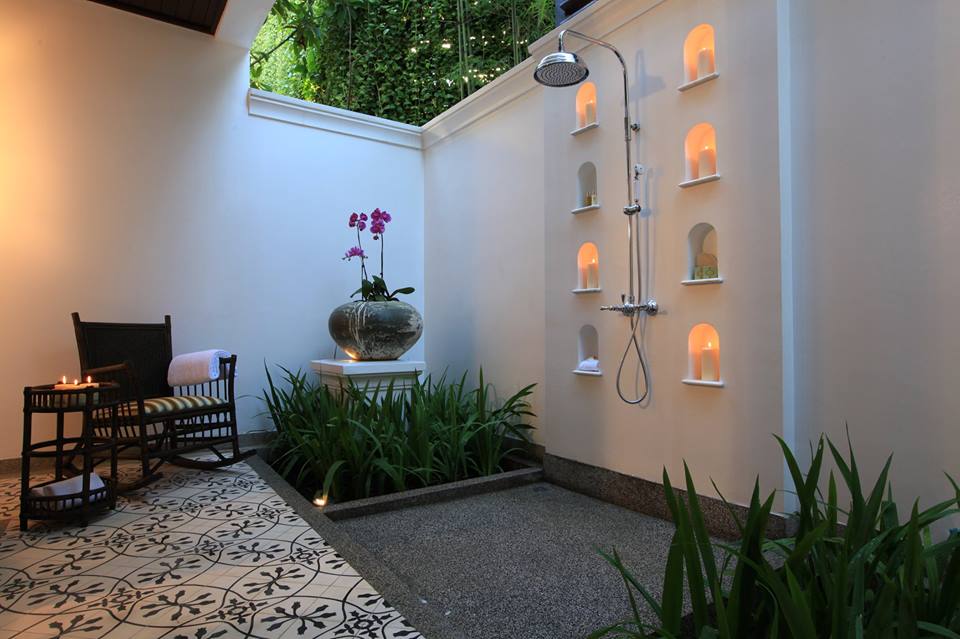
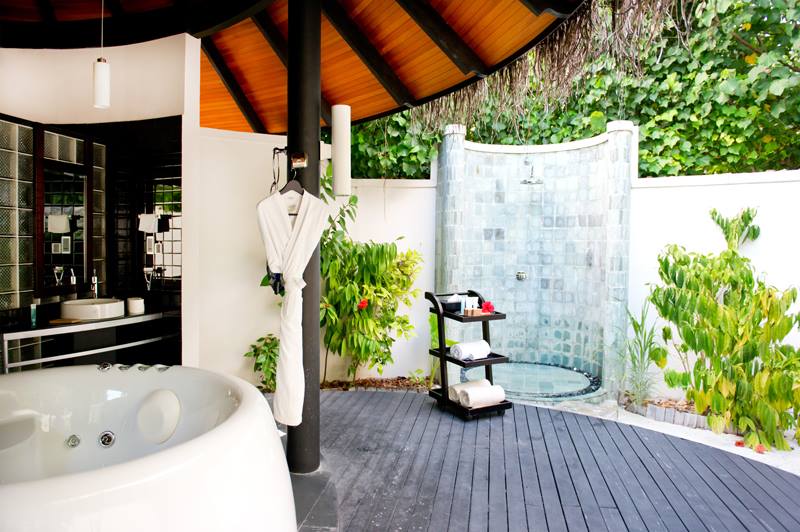
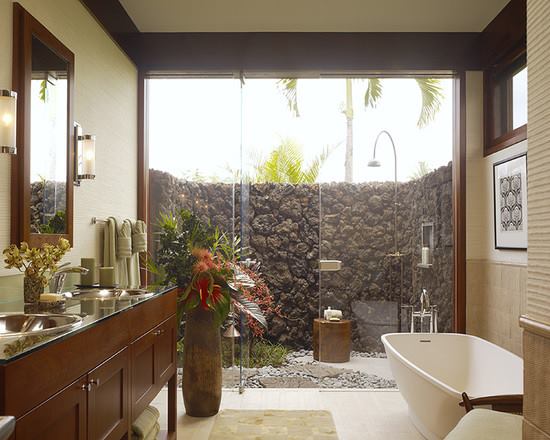
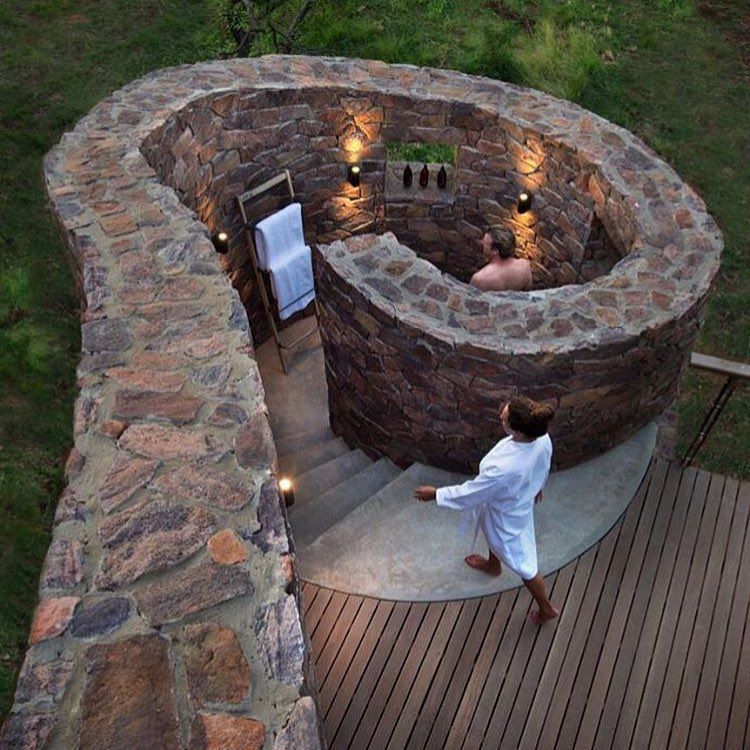
The first thing comes to your mind when you hear about an outdoor shower, that it only fits on the beach. This idea must be corrected. What’s better than having a shower under the sunlight?
You can easily install a shower in your home garden or in the backyard. You would want it for several reasons:
Cleaning up after outdoor activities.
Or simply having a blessed shower in the open air!
It is also the perfect place to clean-up kids after playing all day outside.
An amazing solution to shower your dog without messing your bathroom.
And of course in case your home is on the beach or you own a swimming pool in your home.
Now you know the reasons why you want to install an open air shower in your home, and we’re here to offer you some ideas that will help you get an outdoor shower that suits your home style and.
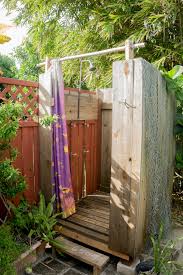
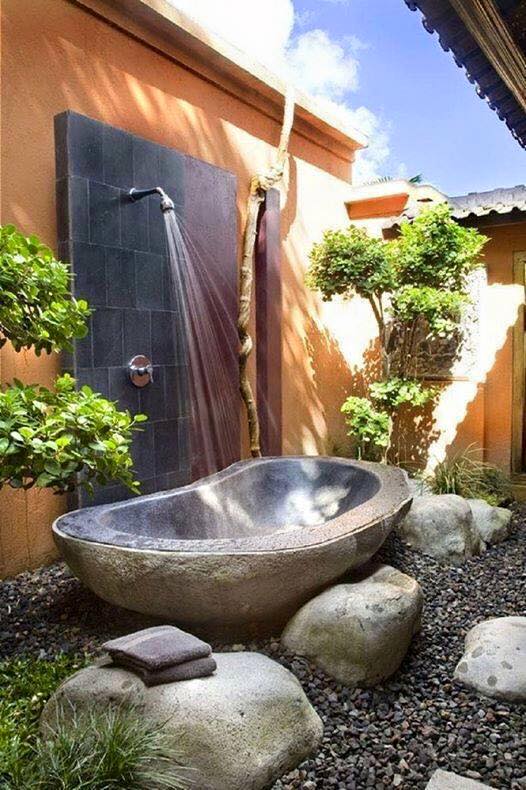
You can install an open air shower no matter the size of your backyard. Here are several ideas for installing a simple shower in your home yard.
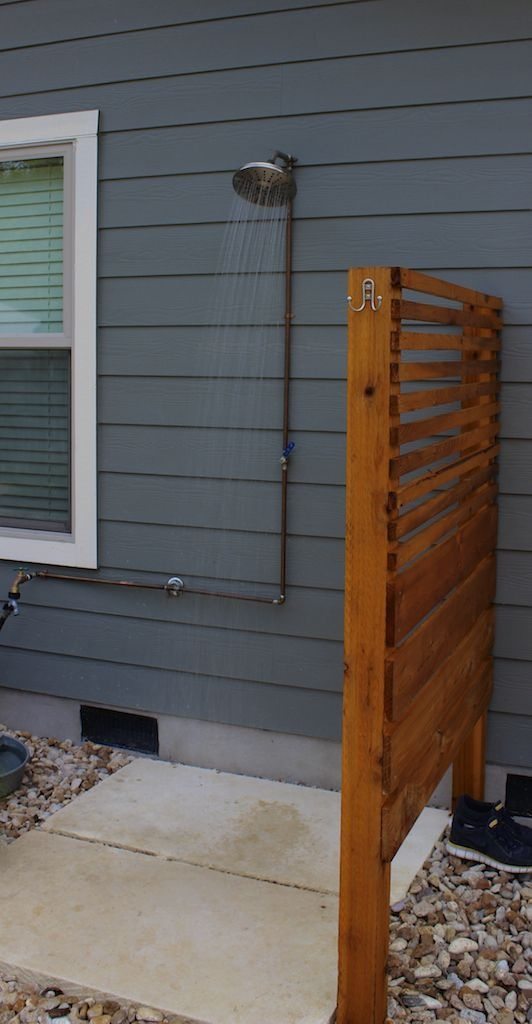
Use materials that suit the exterior design of the house.
You can use stone, wood, or metal to build an outdoor shower stall.
Make sure to connect the outdoor shower stall to the water drain.
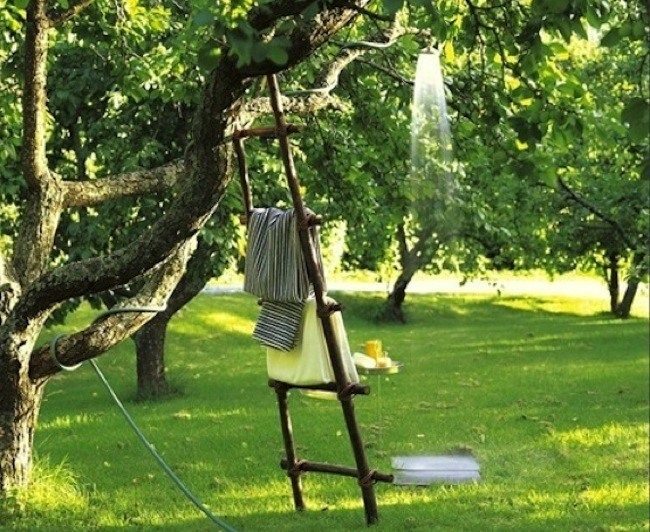
Use any kind of hanger for wet clothes and another for the clean ones. A ladder, like shown in the below picture would do the job!
Connect the shower with a good water source.
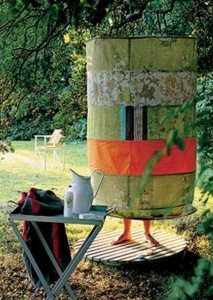
You can always design the shower in your own way with an innovative touch of your imagination. Be creative, after all, it’s your house and you’re the boss! You want to have flourishing summer time outside the house, so why not make it extraordinary?!
DIY outdoor shower
You can always use simple ideas to DIY your own unique shower; we will show you how to create a simple outdoor shower using easy items. See more of our tutorials.
Build the outdoor shower near pre-existing plumbing.
Choose a place where no one can see from the above.
You need some wooden fence posts to build the stall.
One garden hose to shower head adapter.
Find a shower head with a shut-off nozzle or buy one.
A rope is used to make a door handle.
Door hinges.
Some plastic hangers for hanging clothes.
Install the wooden fence parts in Square shape; make the door using the door hinges and the rope for the door handle. Install the stall near the pre-existing plumbing. Connect the water to the hose with the shower head adapter. Install the plastic hangers on the outside of the shower stall.
Outdoor shower fixtures & outdoor shower kit
It is easy to get the shower fixtures from plumbing stores and even online stores. The only thing that matters is your own pleasure. Once you’ve taken the decision to create your own outdoor shower, everything after is easy to happen. Having an outdoor shower in your home is a great thing so; enjoy your time building it as you’d prefer. See also this tutorial
2017 Outdoor Showers
Collection of latest outdoor shower ideas for 2017.
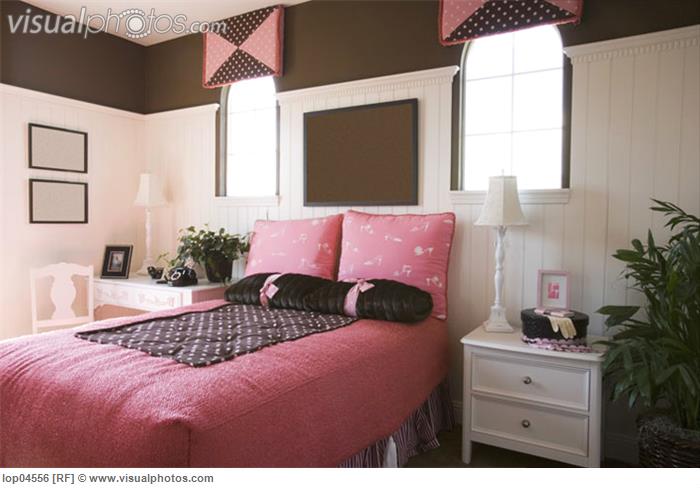
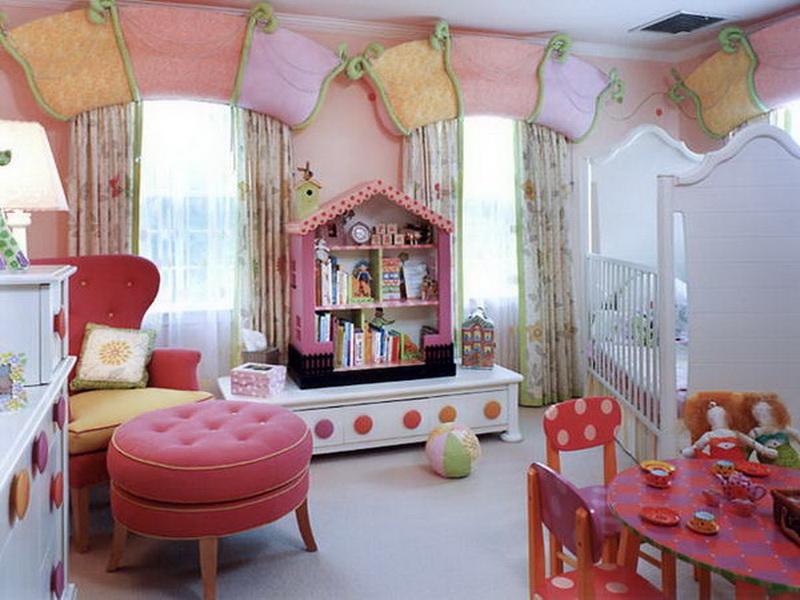
Girls room decor is no longer relegated to frilly beds and all over pink decorations. A girl’s bedroom nowadays can have a variety of colors and decorations as each girl favorites.
Through her childhood stages towards teenhood, her tastes may vary, and for every stage of your girl’s growing up, there’s a different style that you can use for teenage girl bedroom. You need these brilliant top secrets to get the perfect room makeover for your girl’s bedroom. Check out also: Modern Boys Room Ideas.
Girls Room Wall Decor
Decorate the wall using bookshelves, the colors and sizes of the books will help you get a distinctive wall design.
Do not stick to one color for all shelves. Consider using pastel colors, it suits every girl.
Use different colored photo frames, arrange them close on one wall. Choose some beautiful memories and put the photos inside. It’ll give a beautiful appearance and let the happy memories flow in your head whenever you look at the wall.
If your daughter is interested in painting, you can always use some of her paintings to decorate the walls. It would be nice if you frame them as well…
Always put a place in your calculations to a magnetic board, it will be used in many things like playing, notes and to write down future plans.
Use the mailbox to decorate the wall, consider using it to give her a daily encouragement and love letters.
The presence of mirrors on the wall in a girl’s rooms is essential. Pick up mirrors with distinctive frames, put them on a shelf on the wall for her daily use.
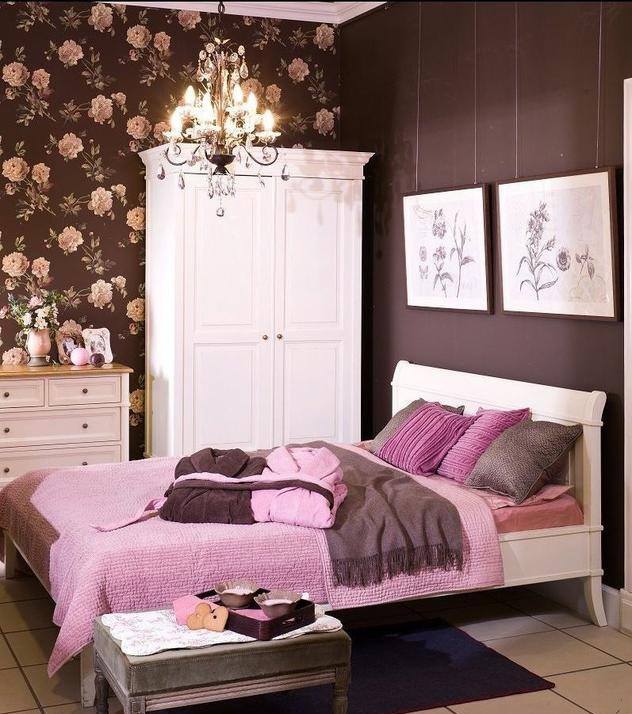
The vintage look is what every girl would love these days, it has become the certain everyday trend. Rather than using pink and green or yellow for a girls room painting, consider using brown, and then mix it with any other color, perhaps white or purple as shown in the picture. One of the walls is decorated with vintage flowers all over, this is just so beautiful!
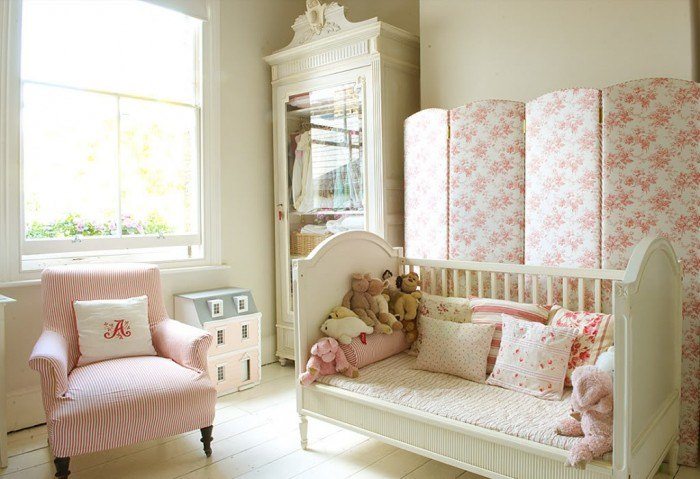
Toddler girls room decor
Follow these inspiration toddler girls room decor ideas.
Use clear and bright colors to paint the walls.
Use curtains that do not reach the ground.
Place a large poster on one wall.
Hang some shelves to put books, toys, and dolls above it.
Place a large toy box in the corner.
Small table with chairs is required if you have an empty space in the room.
If you could place a girly tent in the room, it will be like a dream come true to every daughter.
When it comes to learning how to paint a room, quality is pretty hard to achieve, yet it’s the most enjoyable process and the best comes once you’ve finished!
Painting a room has become an easy process nowadays since you can learn anything at a glance on the internet. Speaking of internet learning, get ready to paint your room all by yourself. Follow these efficient instructions carefully so you can get the most expected results.
For more of our decoration painting instructions Browse Best Painting Ideas.
Paint your room
So now you’ve decided to tackle the painting project yourself, there will be several things you need to be aware of. You’ll definitely need to count the cost needed for painting a room before you head. Read along and I’ll tell you how much does it cost to paint a room.
Not only that but also how long does it take to paint the room and how to do it in no time. You’ll know the exact answer to these questions once you know the materials and tools required and their costs.
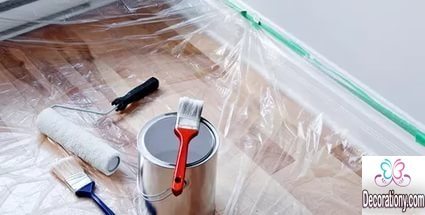
Requirements:
Materials:
fiberglass drywall tape
drywall compound
painters tape
latex paint
Tools:
putty knife
paint roller extension handle
rags
paint rollers
sandpaper
drop cloth
paint scraper
paint tray
paintbrushes
sponge
How Much it Cost to Paint a Room?
The costs for these materials varies from shop to another, but one idea is you can always borrow anything from neighbors or relatives who are willing to help. Also, I think most houses have most of these things already, the ladder, for example, is an every homeowner tool. They’re not expensive though.
Since you’ll learn how to paint a room yourself, the average cost expected is between $390-$790 without ceilings. If you’re a handy homeowner you can buy the paint and equipment required for about $200 to $300. You need to calculate the size of the area to be painted. Calculate the length of the wall and multiply it by the width of the room from the floor to ceiling (Width x length). This is called calculating the room’s square footage.
You need to calculate the size of the area to be painted. Calculate the length of the wall and multiply it by the width of the room from the floor to ceiling (Width x length). This is called calculating the room’s square footage. Calculate the square footage (The same equation) on the windows, doors, trim and baseboards, then subtract the result of the previous calculation.
Calculate the square footage (The same equation) on the windows, doors, trim and baseboards, then subtract the result of the previous calculation.
This way you know the amount of paint needed and the exact square footage you’ll need to cover not counting the unwanted areas.
It’s often advised to add back a little amount into consideration for extra paint.
How long does it take to paint a room?
Consider the time it will take you to do this yourself though. Depending on the size of your room, it could be a one day or a weekend project. It will be a good fasten of time and effort if you can get help from a partner.
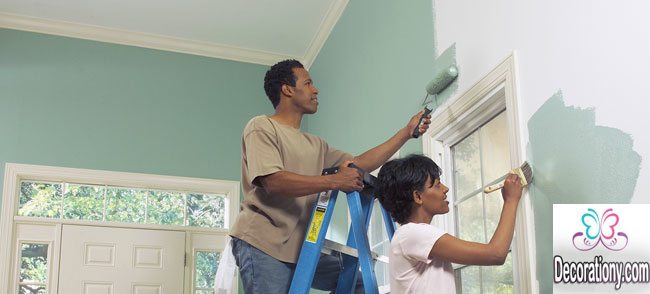
#1st step: Preparation
You need to move all furniture out of the room. You can move your large furniture to the center of the room and just cover it with drop cloths.
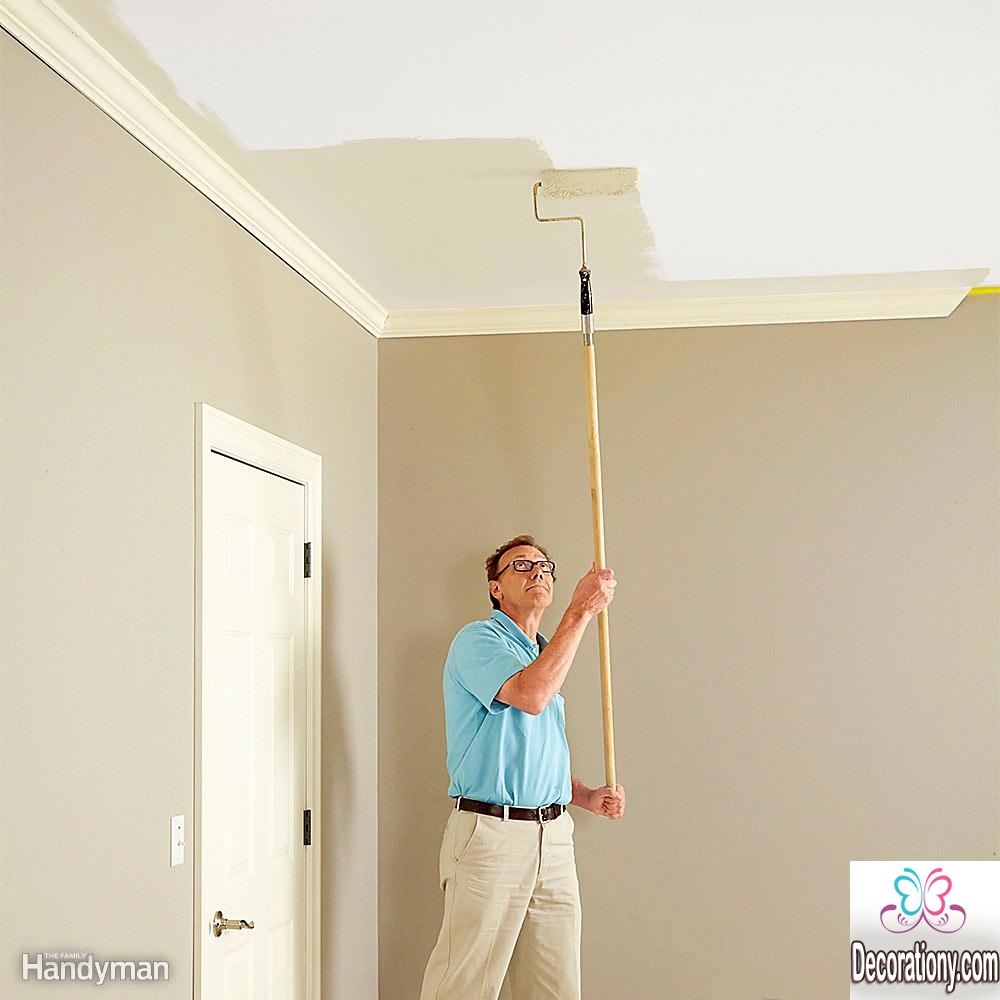
If you intend to paint the ceiling as well, don’t forget to disconnect and remove any chandeliers you have first.
Make sure you removed all the obstructions from your way. That way you’ll work faster and more efficiently.
After you’ve done, lay drop cloths to cover the floor.
Always start from the top down, the ceiling, then the walls, leave the trim for last.
#2nd step:
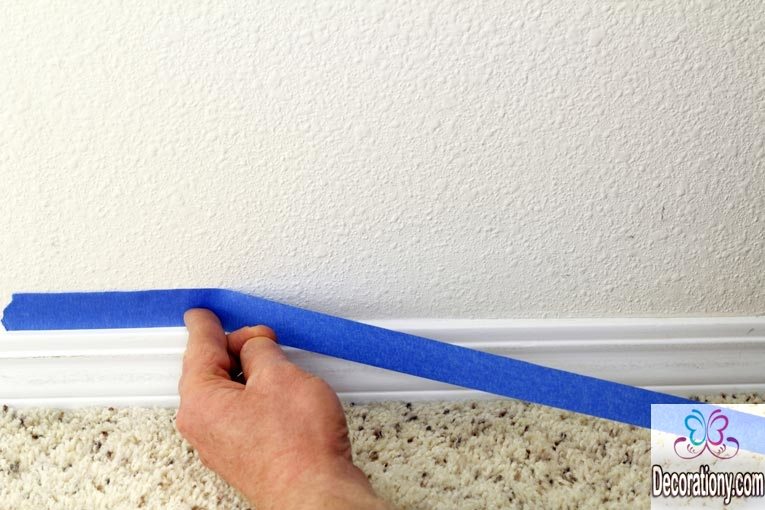
Since you won’t do the trims, windows, and door frames use painter’s blue tape to tape these areas. (Remove the tape before the wall dries)
Don’t ever believe anyone tells you that walls don’t need to be primed. Actually, you MUST prime the walls to maximize the coverage of paint and give it a professional look.
Use the roller for bigger areas and faster finish, but go for brushes when it comes to a tight place that you can’t roll. (Use a two-inch angled brush)
#3rd step:
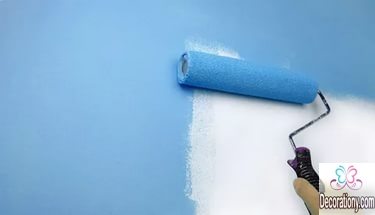
Do only 4-foot sections per time to avoid the marks appear when the walls start to dry
Your roller must be saturated but no dripping.
Paint a 2-foot wide V or W on the wall without lifting the roller, then fill in with thin strokes until you finish the wall.
Let dry overnight. Now you’ll have trim and baseboards for last, be done in no time using a 2 inched brush.
How To paint a room fast?
I hate to disappoint you, but you can’t paint a room faster than a day. The painting process takes a time to prepare and more time to paint though it’s kind of an entertainment. The walls must take its time to dry. However, the process of painting itself can take from 4 to 6 hours continuous.
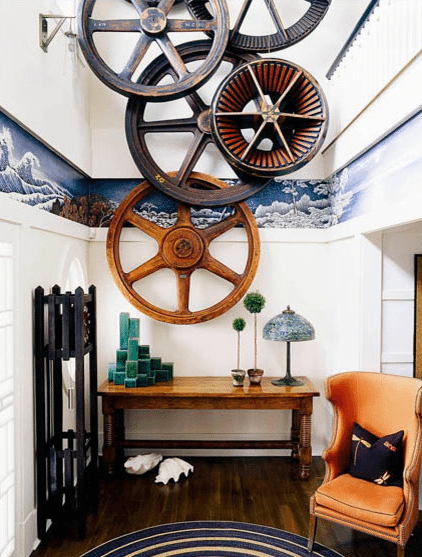
Find out what is steampunk decor? With Best steampunk home decor ideas, victorian steampunk decor for kitchen, living room, bedroom, bathroom. Unravel everything about the uncommon steampunk decor style and get inspired by these steampunk decor ideas, interior design, colors and Victorian steampunk style.
Every homeowner wants his own steampunk decor distinguished from other houses. Don’t you want brilliant expert tips from our team? Using steampunk decor to transform your place into a special vanity. We will give you the chance to easily use this elegant type of decoration efficiently.
What is steampunk decor?
It’s a special interior design style. An elegant mix of designs after the industrial revolution and the Victorian noble style. This type of decoration makes you travel through time to the Victorian era decor. Every item in the steampunk decor type is inspired by this era. Now let us start building your own time machine with the following steps.
Steampunk Decor Ideas
Use the old furniture to give your house the look of the noble’s houses in the Victorian era. Act creative, and don’t be shy.
You can definitely use this type of design to decorate all the house but, if you must choose between rooms it will perfectly fit in your living room.
Use wallpaper that fits the Victorian era decoration.
Consider brown, sepia, cream, black, dark red and dark green colors to paint the walls.
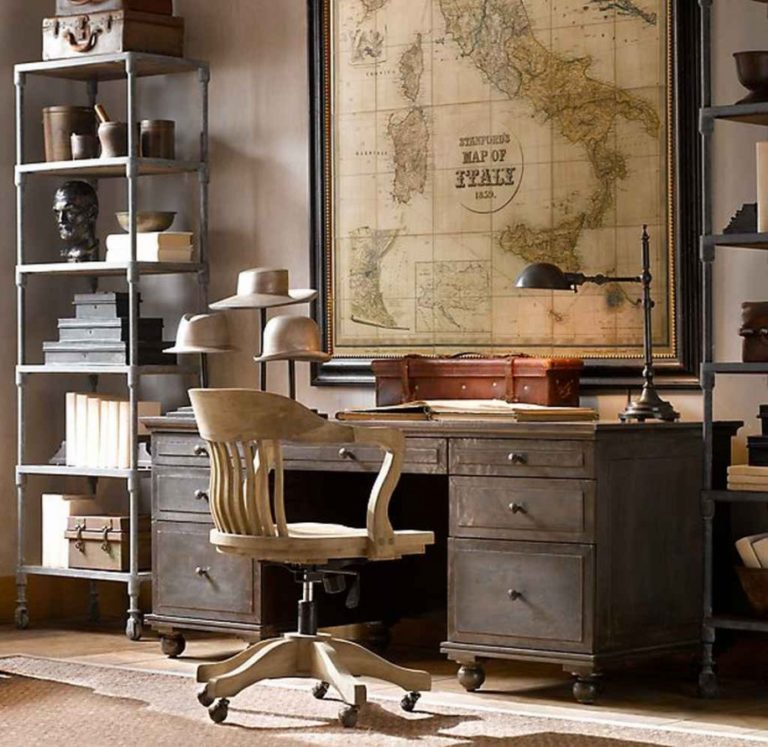
A terrestrial globe and wall maps would be perfect to complete the design.
Books covered with leather and old gears will add the Victorian spirit to the design.
Add some images with black and white effect in old frames and framed herbariums on the walls.
Leather and dark wood furniture is the most matching to steampunk interior decoration.
Use copper and bronze items to enhance your décor.
Consider some curtains with a Victorian pattern.
Antiques and classical furniture are, of course, your central pieces when talking about steampunk décor.
Steampunk home decor
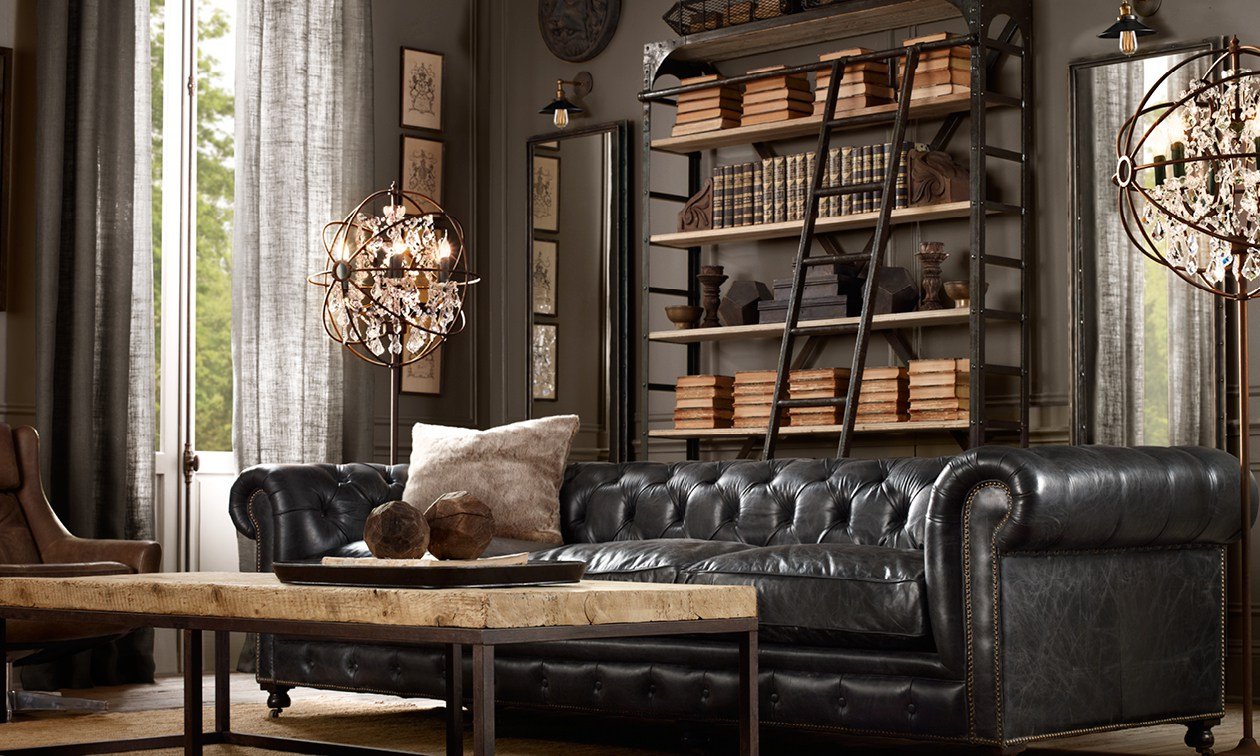
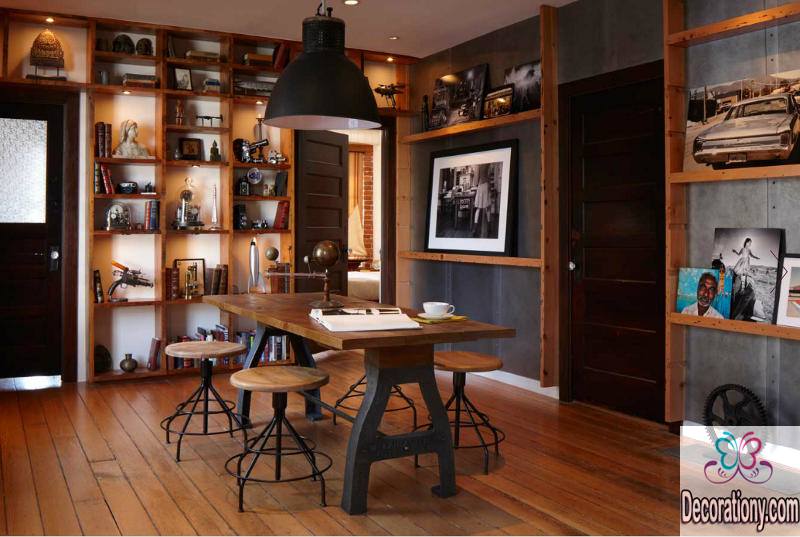
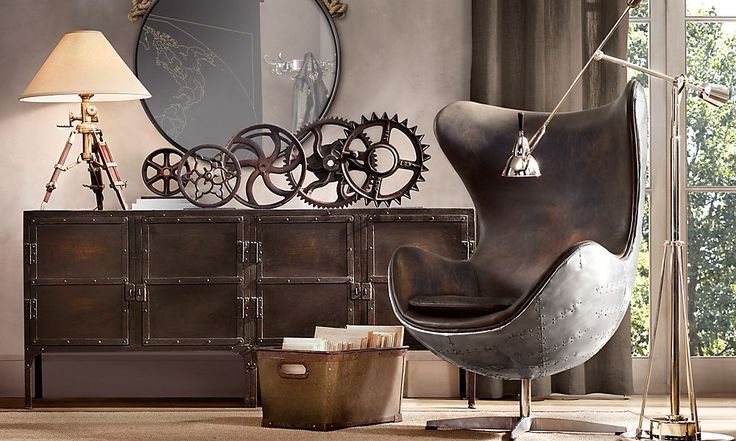
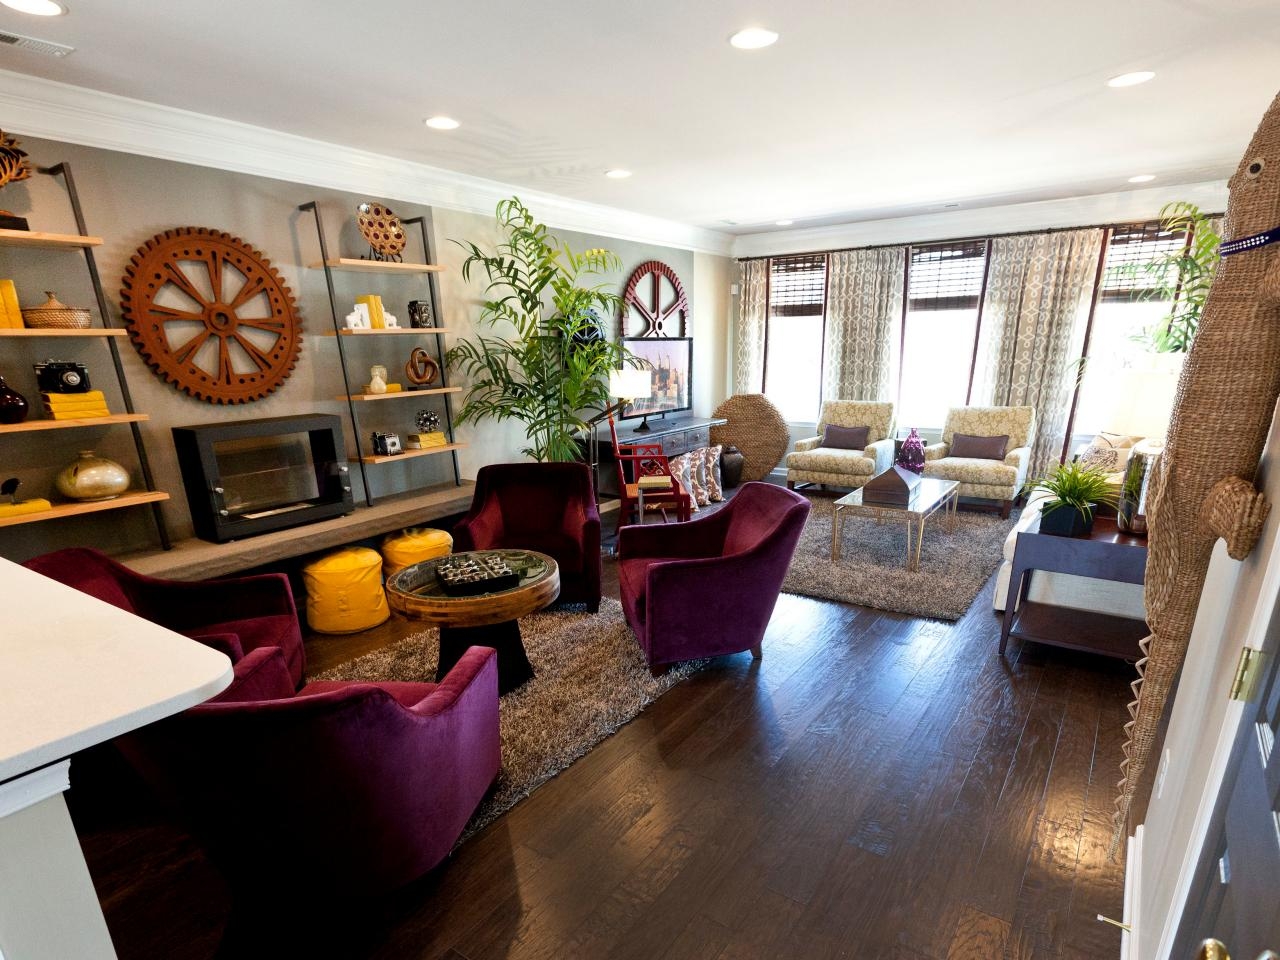
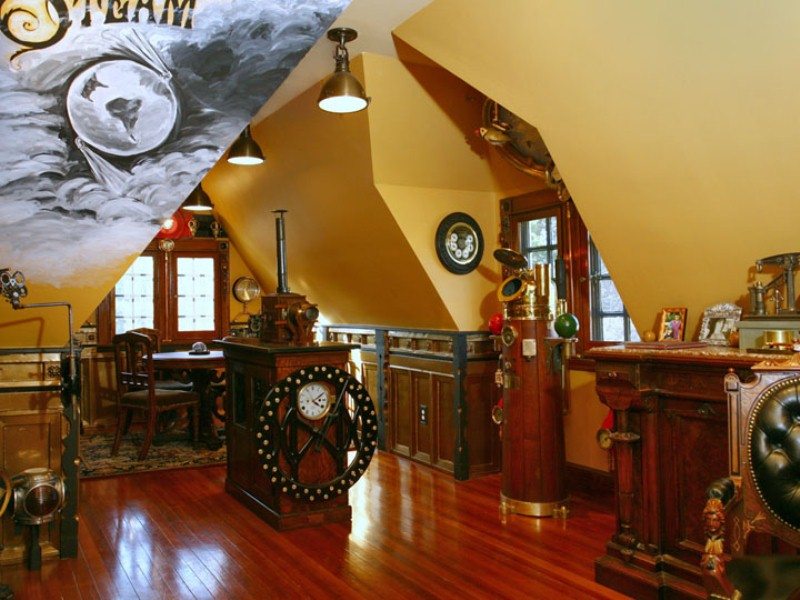
1- Steampunk living room
Steampunk Home Decorating Ideas Rhubarb Reign Steampunk 101 Grayslake Annie – Home Design Inspiration
Use the parquet floors and old carpets with some copper antiques and classical or leather furniture. Using the neutral colors like gray and beige on the walls is the best choice, and for the curtains choose dark red to add a unique appearance to your living room.
The interior corridor must also have a touch of change. You can always use a quiet lighting with some old frames and photographs on the walls.
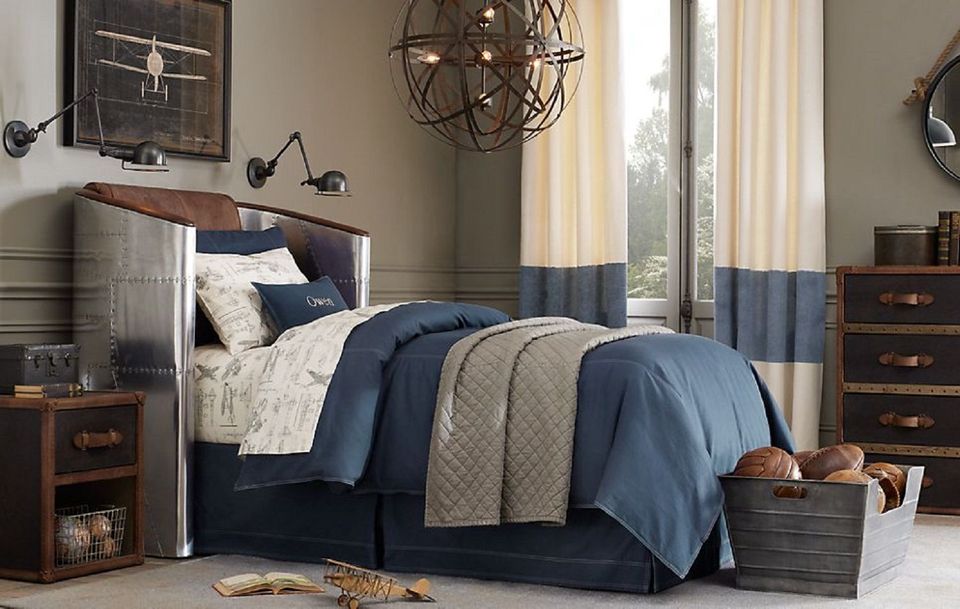
2- Steampunk bedroom
Double Bed with dark wood, bed covers with rose patterns, a chandelier of crystal with old thick curtains and candlesticks will make your room design simple and cozy. You’ll feel like you’re living in an old movie. How cool is that?
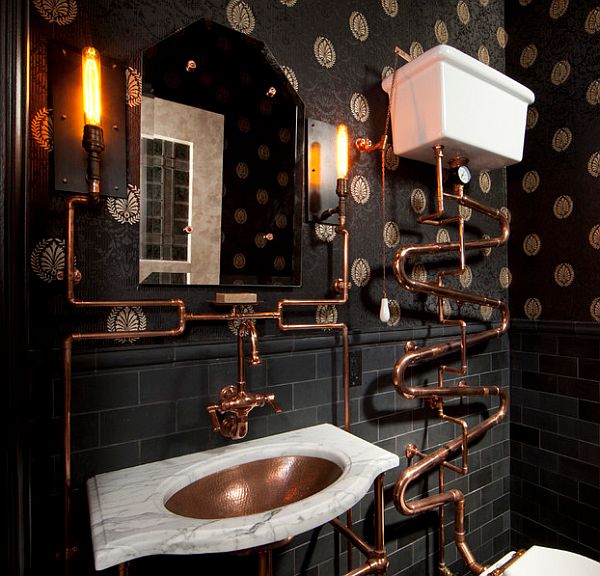
3- Steampunk bathroom
For the bathroom, white colors and some ceramic pots and curtains decorated with flowers would perfectly match with the rest of the house.
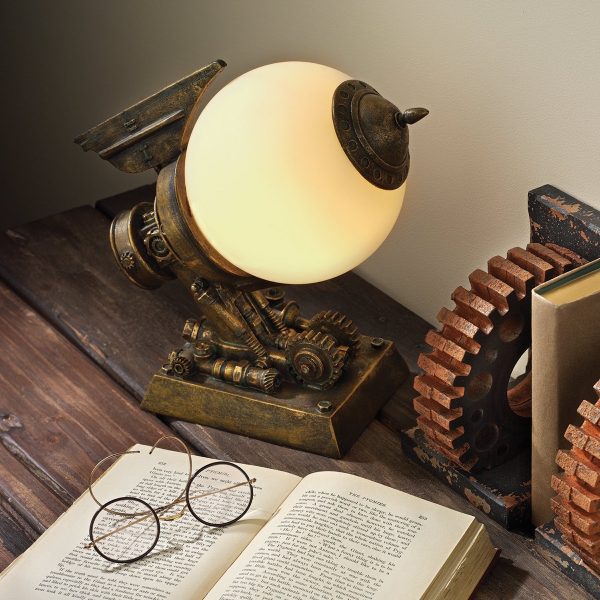
4- The children’s room
This might be the easiest room for steampunk decoration. You should add a telescope in the room, trains for playing and decoration. Also, an old toy box in the room would match the decor and make it appear like the kids’ room from old movies. Don’t forget to hang a large map on one of the walls, that’ll match it with the other rooms and yet give it a cozy feeling!
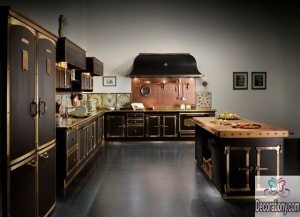
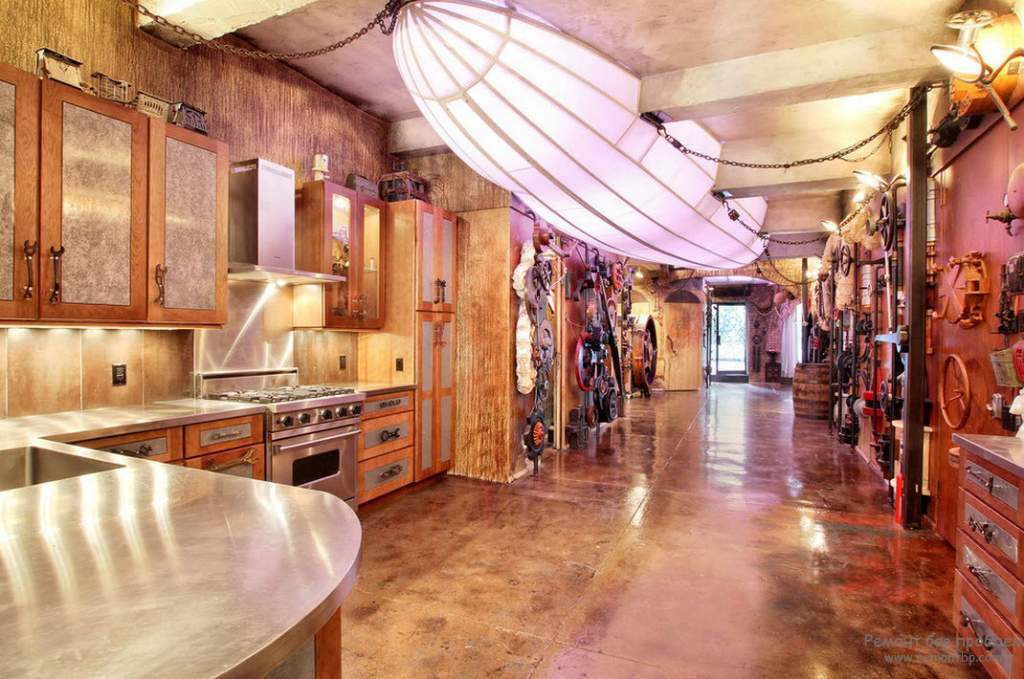
5- Steampunk kitchen
Use opened white wardrobe to store and display dishes and cooking utensils and use copper pots to reveal the old beautiful decor in your kitchen.
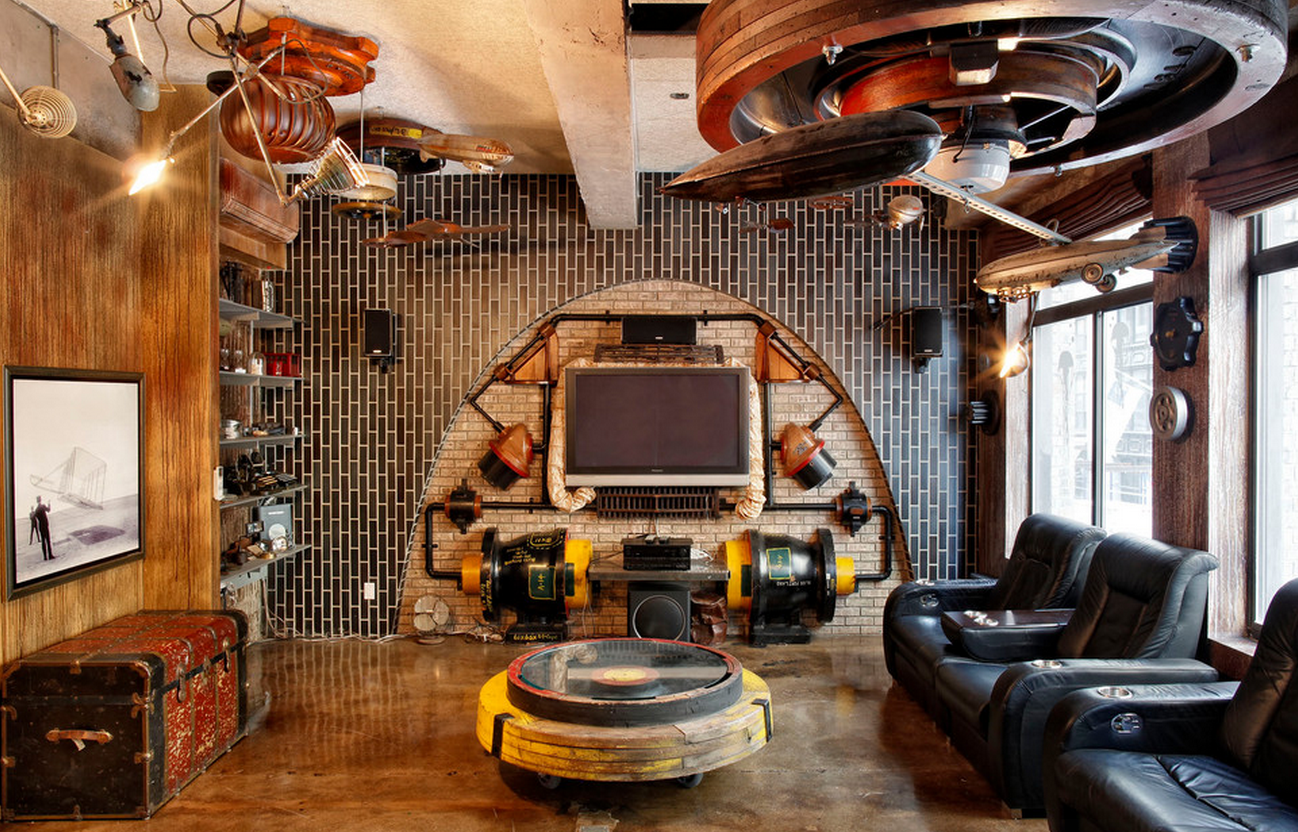
6- Steampunk Wall Decor
Watch these steampunk wall decor ideas and don’t hesitate to pick any of it!
7- Victorian Steampunk Decor
See more of our picks for interior house decoration!
Steampunk Style
People have known a lot of interior house designs and styles over the years. However, between the different styles people adapted, steampunk decor remains one of the uncommon styles despite its uniqueness. We could say that it has its special seekers or fans, which is a good thing meaning that not everyone understands or goes for that kind of splendor.
Let me introduce you to this amazing steampunk interior design. Of course, when I say the word steampunk, you recall the Victorian era of the 19th century. Well, it’s true. The Victorian period was the porn of this marvelous design. Yet Steampunk is actually a mix of two, elegance, and machinery. Until this day still, the style makes its way into the interior design industry as a sign of richness and luxuriousness.
If you’re wondering how to turn your house interior theme into a steampunk vanity, I advise you to first think of the color schemes. Thinking of this will open up a lot of doors to your sight. You’ll be able to define the furniture type your theme requires according to the colors it should match with especially if you already had them. It will shorten the way for you.
When thinking of the color schemes for this theme you should know that this scheme best goes together to create the steampunk theme that you want: Metallic tones, Copper, Bronze, Dark Wood, and Leather. Even if you didn’t know before, you must have realized the repetition of these colors on the steampunks you’ve seen so far.
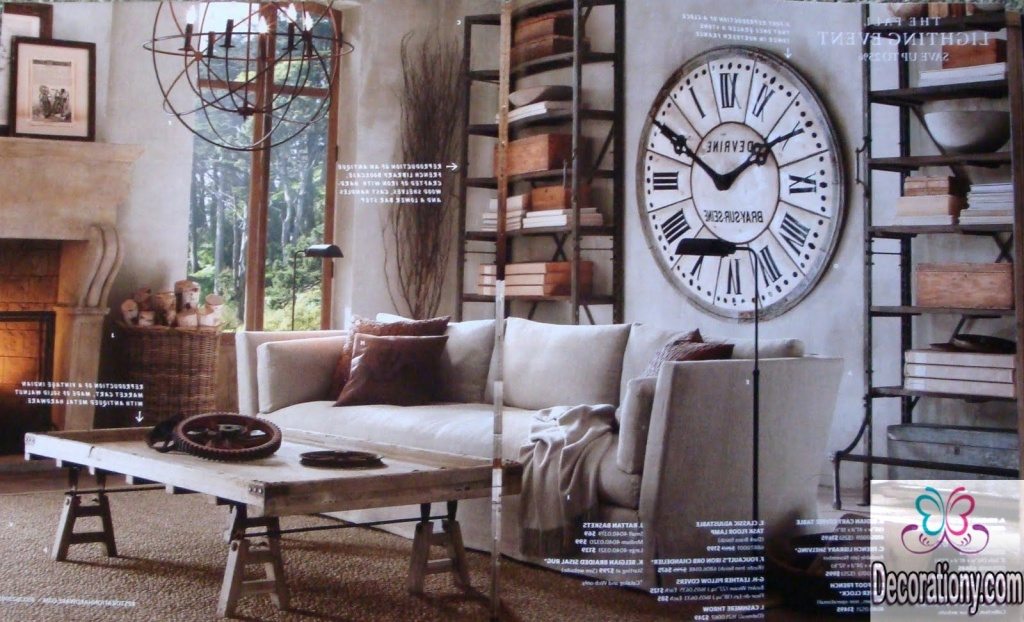
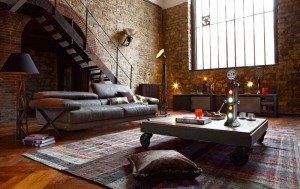
So now to make sure you get the idea of the color scheme. take a look at the furniture in the below picture.
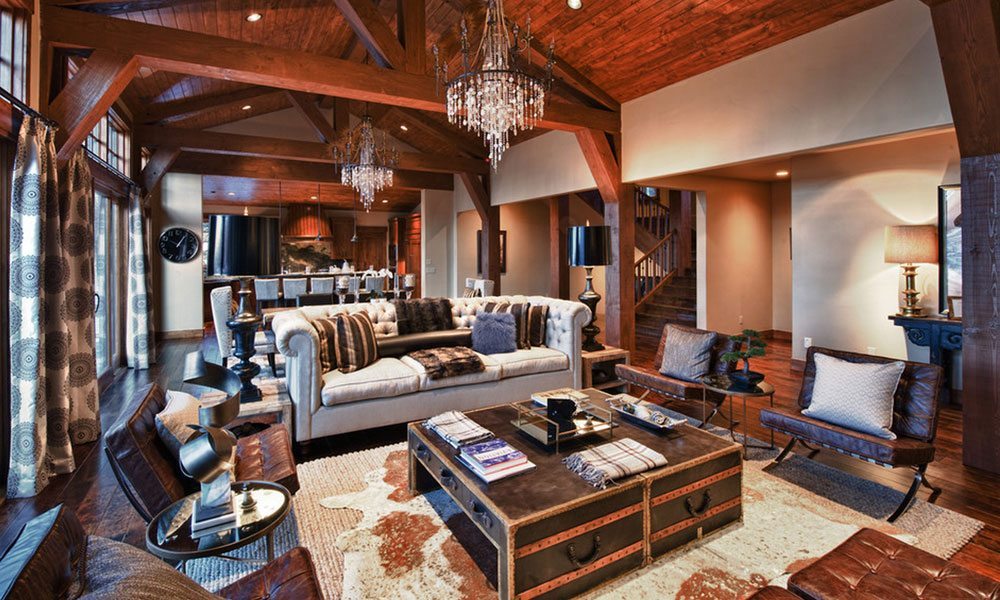
You could see the leather chairs combined with an unordinary dark wood table beside steampunk brown furniture pieces. The wooden floor and surface also give you a hint to the theme. You can also see the copper chandeliers and the country rug laying on the floor. This decor is the perfect reference for steampunk interior design in my opinion.
Consider also these colors as they surely match the color scheme you’re looking for:
Gray
Browns
Creamy
Burgundy or deep red
Deep purple
Black
Navy blue or grayish blue
Let me tell you why these colors have been used for ten years since the trend’s appeared. They perfectly make a steampunk decor richer. I’m sure you’ll find your peace matching two or three of these colors in your decor. Don’t forget to give me your feedback as always!
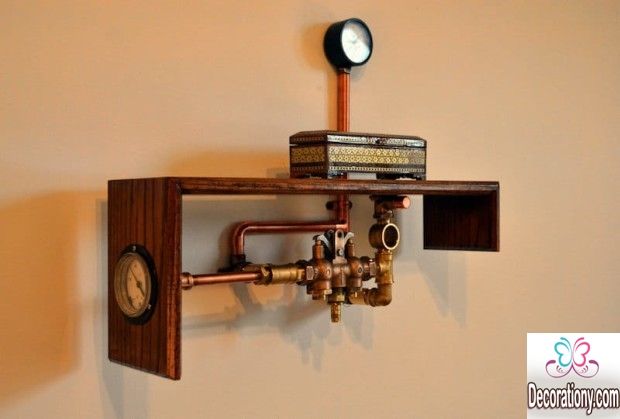
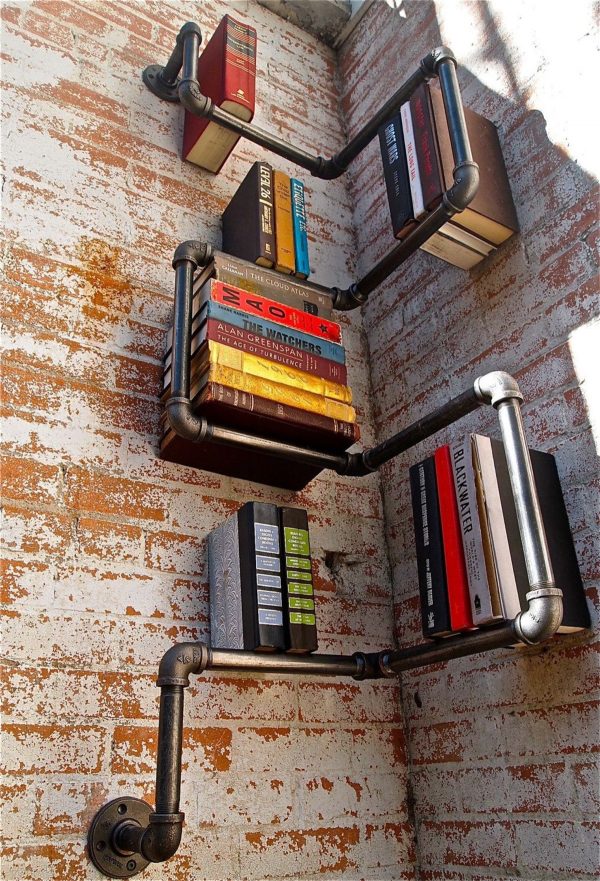
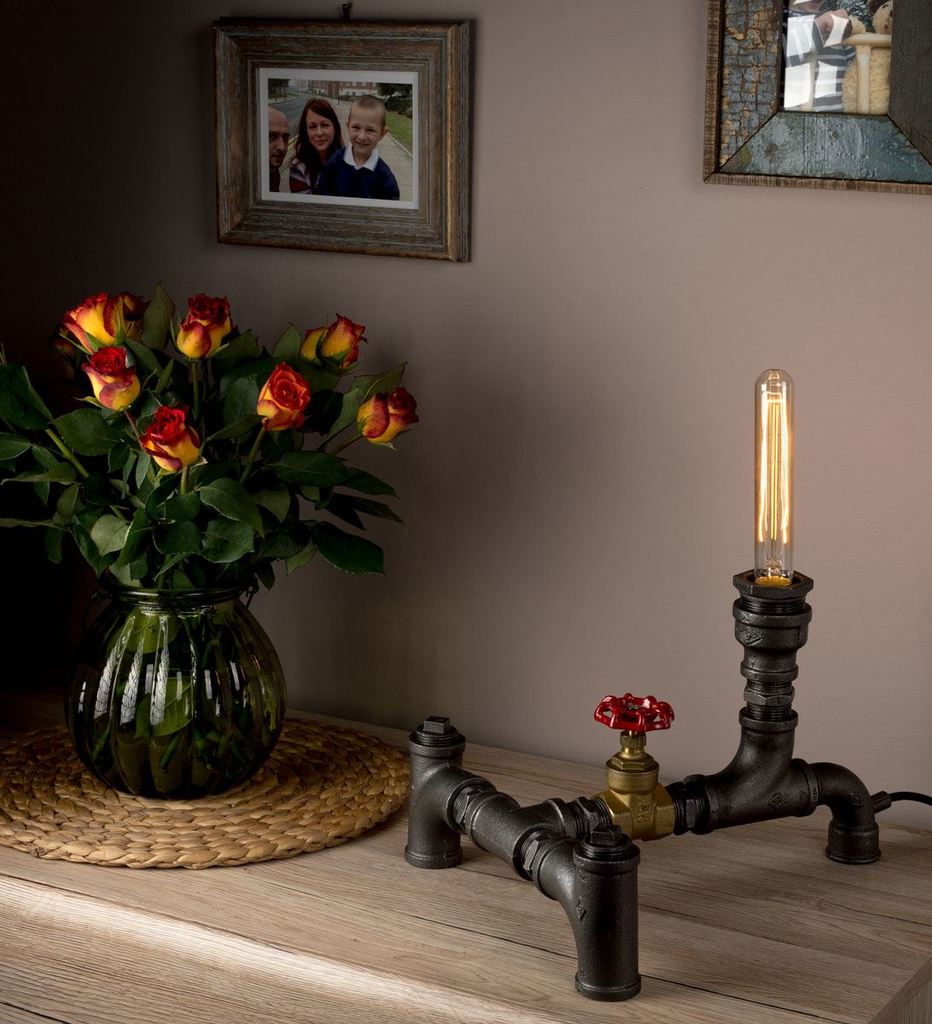
Using pipes and metallic pieces with bronze, copper or black is your perfect choice. Take a look at the above steampunk bookcase, that is no ordinary bookcase and I would definitely fall for it if I had an interior steampunk design.
Okay, you need to pay attention to the details in these pictures unless you wanna fall for steampunk furniture pieces that don’t match together!
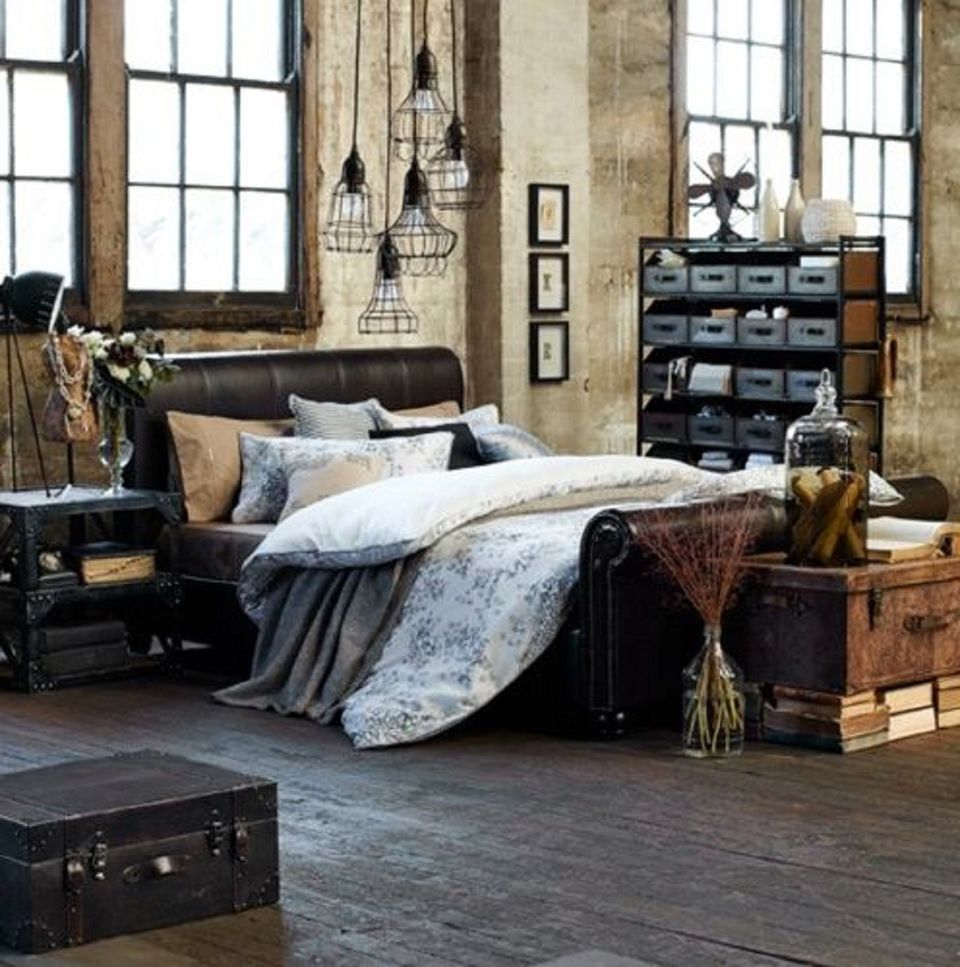
First of all, in this picture, the pieces that look old, doesn’t have to seem old fashioned! The picture you’re looking at right now is a steampunk decor ideas 2017 trend, my friend. The details we say, a dark leather bed lying under a black metal chandelier. There’s an old travel bag lying on the floor. Honestly, I don’t know what that for, but looks pretty good following the theme and lying there patiently!
The big windows and the books & that huge box above them are giving a huge hint to the steampunk we’re looking for. They also didn’t forget to add some greenery.
Take a look at the below steampunk gallery we made for you with the best steampunk decor ideas to help you in making perfect steampunk style.
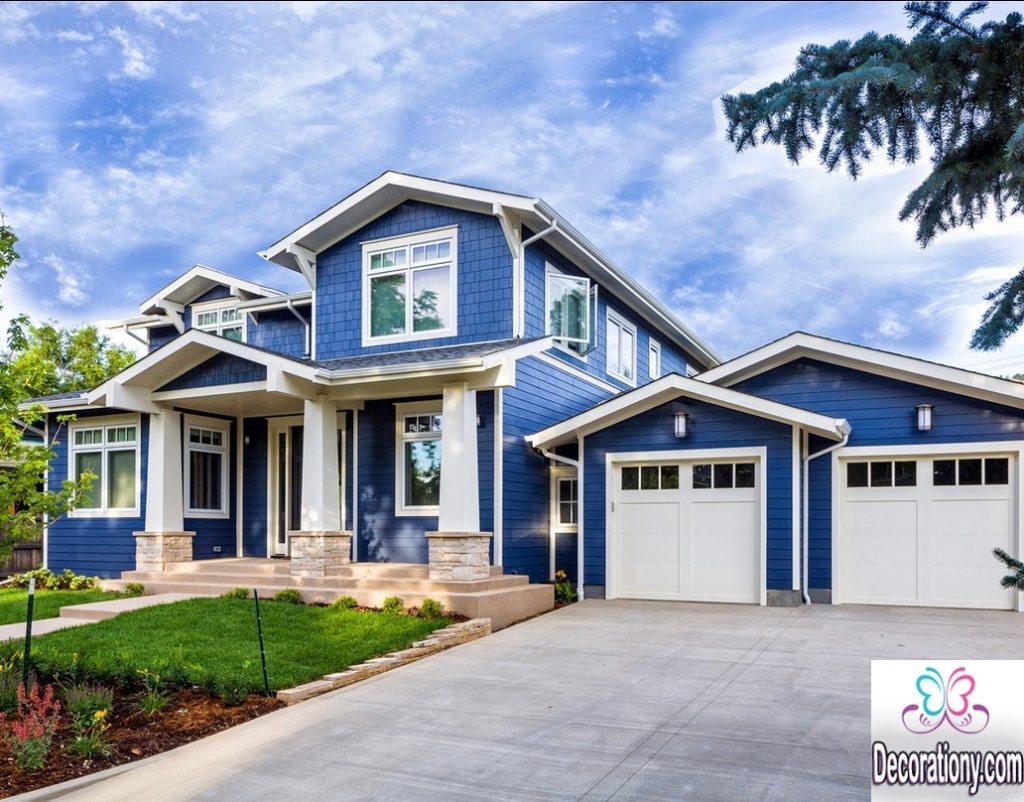
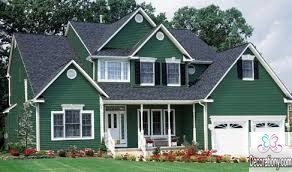
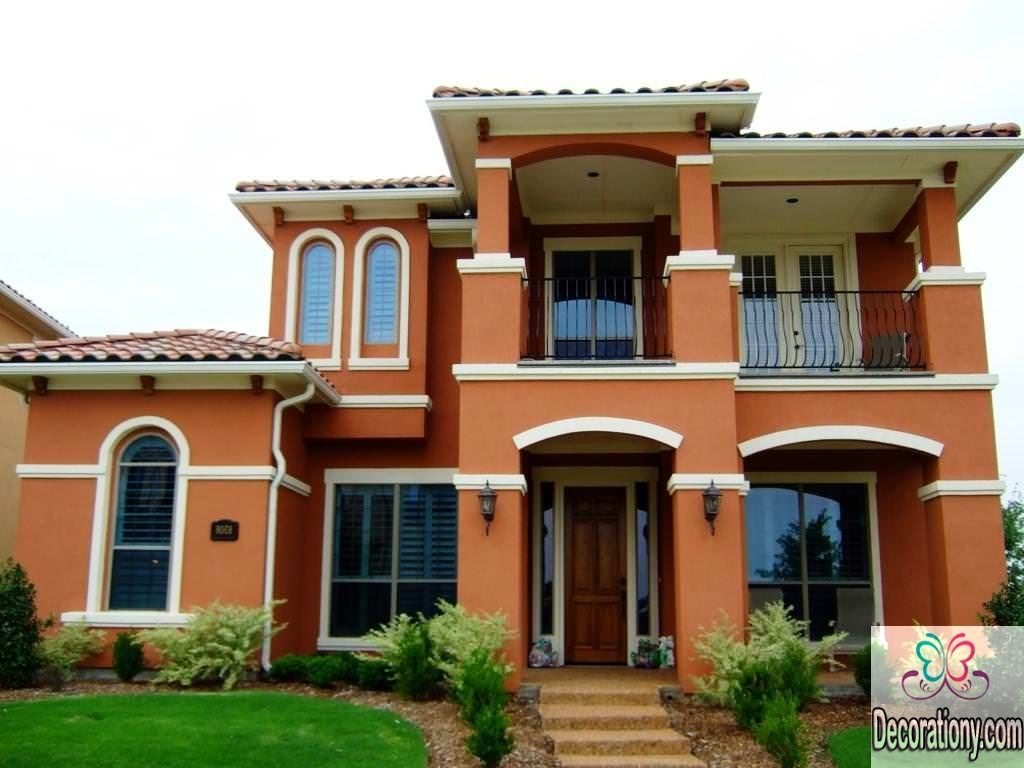
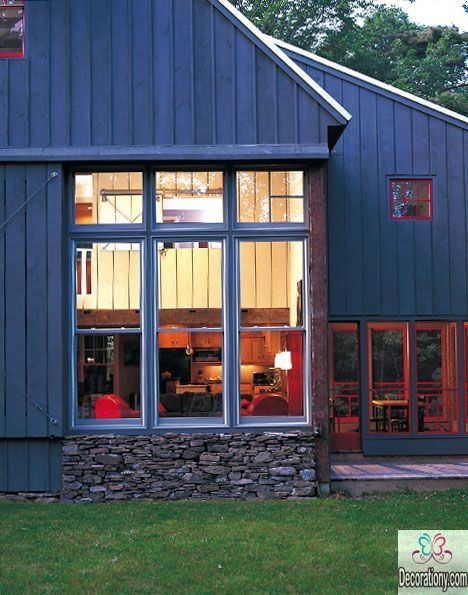
House Color Schemes are of important priority in any house interior & exterior design. Experts every year have a new color trends list collected according to consumer’s every year taste flow.
Every homeowner wants a house that talks about their taste, not all of them know that their house color schemes best shows their taste and personality. This year however you don’t want to be afraid of bold colors, read these recommendations for 2017’s new house color scheme trends and pick the closest to your heart!
House color trends 2017
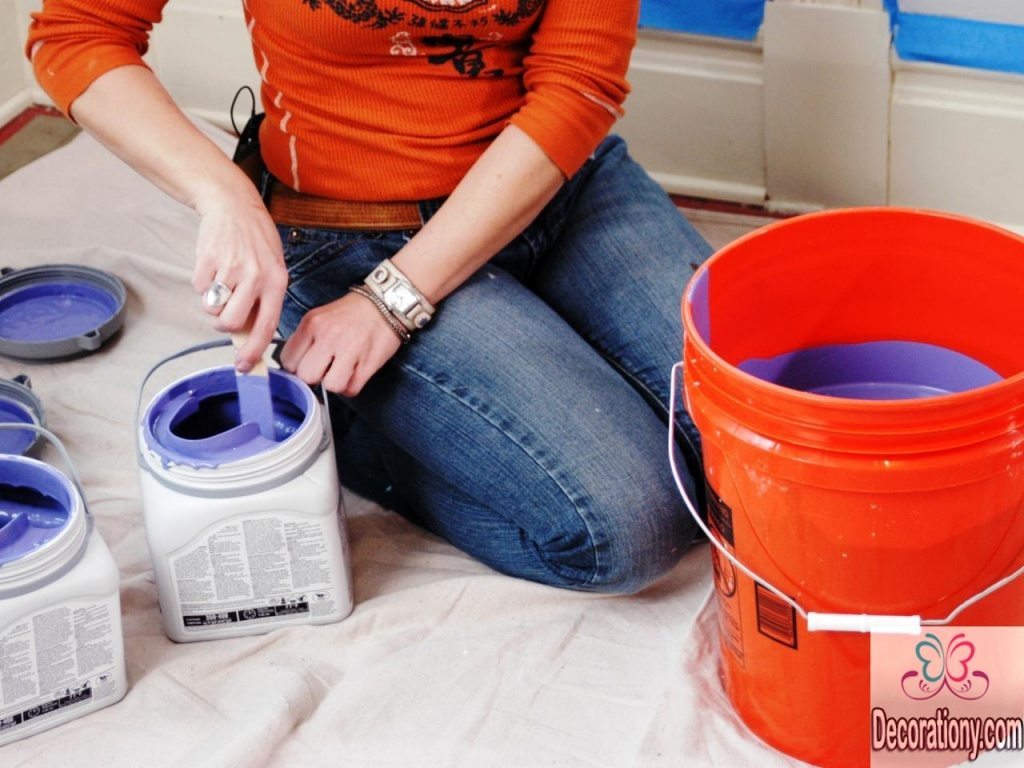
Some certain tips you want to follow after you specify the colors of your home furniture, begin to choose paint color schemes.
Don’t hesitate to combine colors together to get your own special color.
Make sure to clean the walls before you begin to paint them.
Try the color samples on the walls before you buy large quantities.
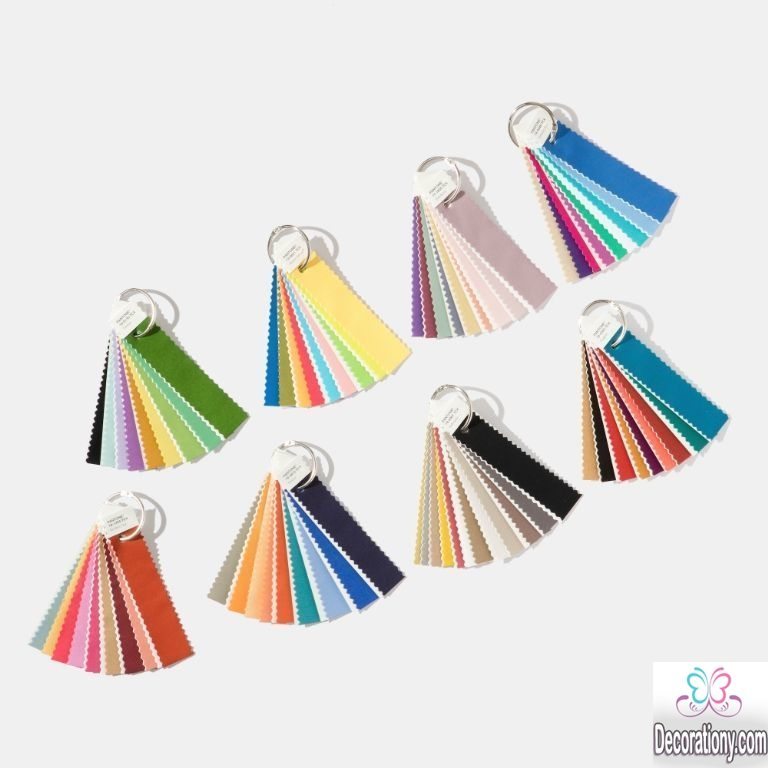
Use the color wheel to select your favorites. This is the best way to know your exact preference.
Enjoy the color selection process and don’t rush to make a decision.
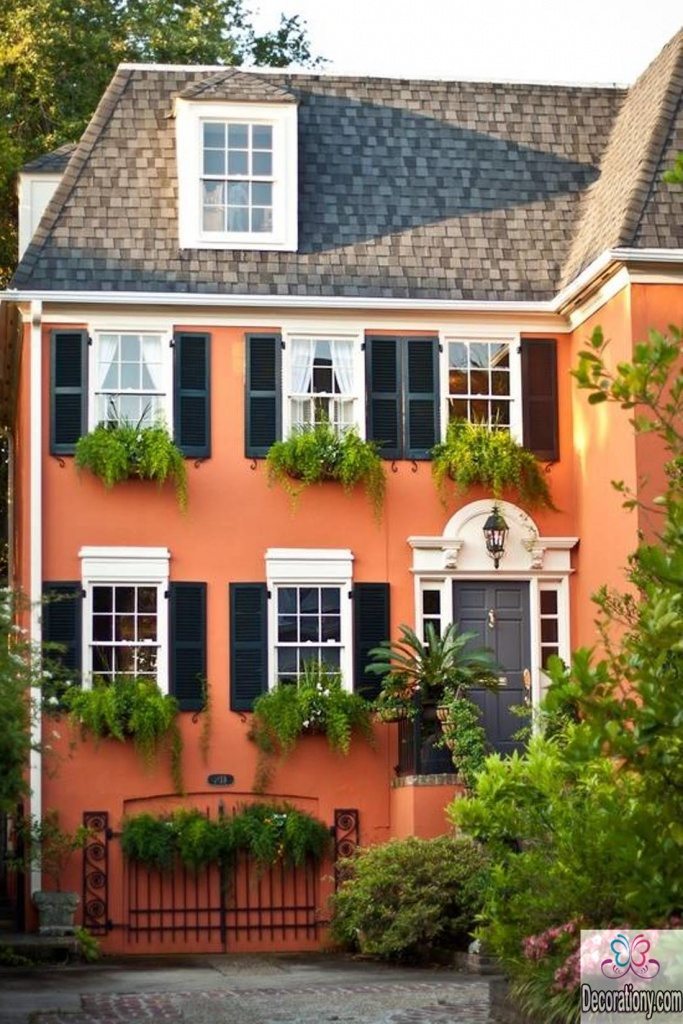
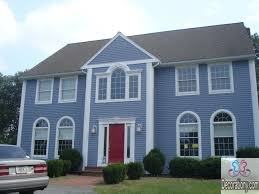
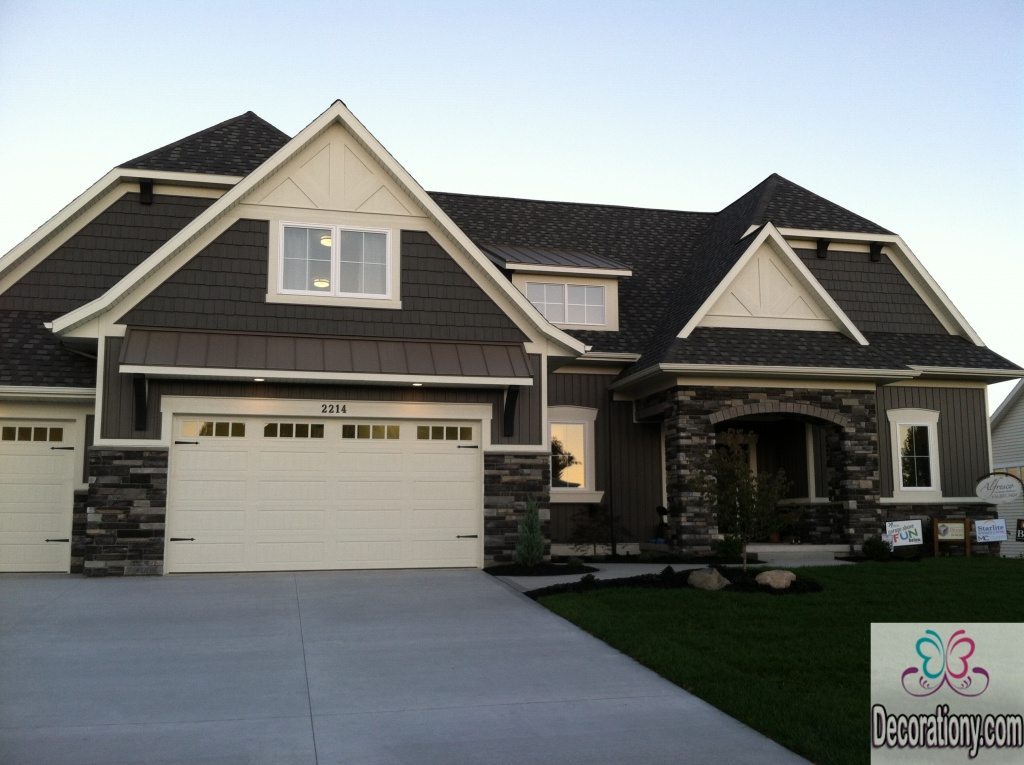
Exterior paint colors
When it comes to exterior house color schemes you need to follow the exact steps to get the process going perfectly. You don’t want to miss up your house’s exterior colors.
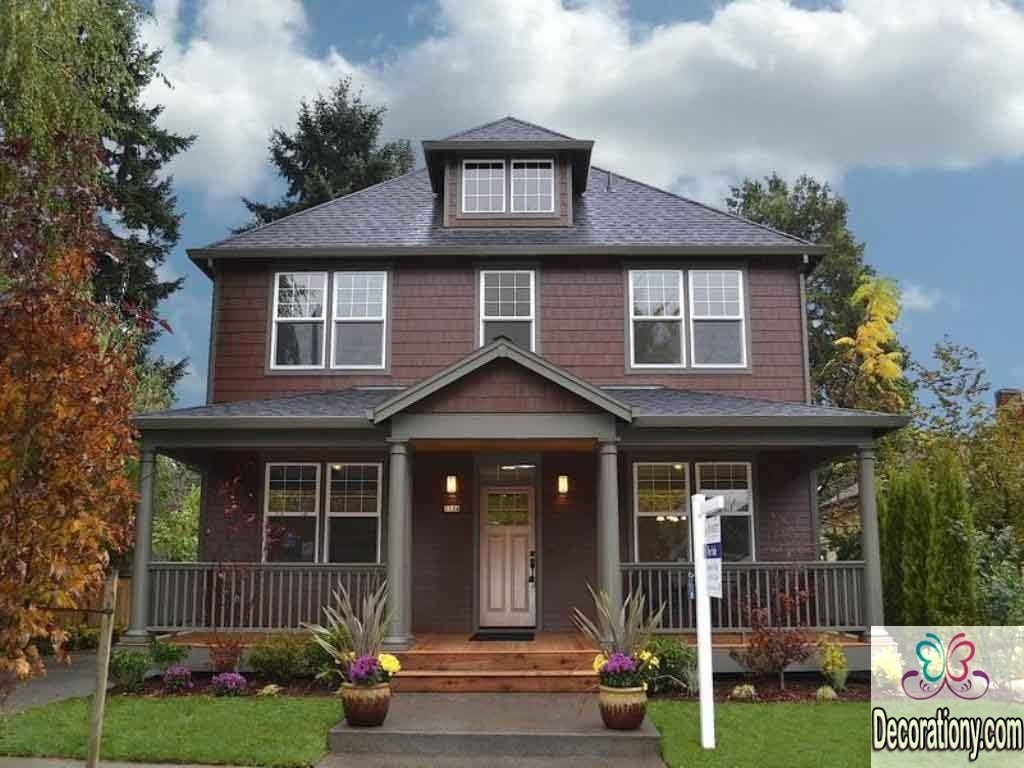
Choose the color according to the architectural style of the house.
Try to make the house color proportionate to the natural colors in the area around your house.
Try to make your home colors match the colors of the houses similar to your style, but do not forget to add your touch.
Merge two colors or use more than one degree for the same color. This works perfectly if you have difficulty to decide.
Try to make your house color schemes from inside the house and the exterior paint looks consistent with each other.
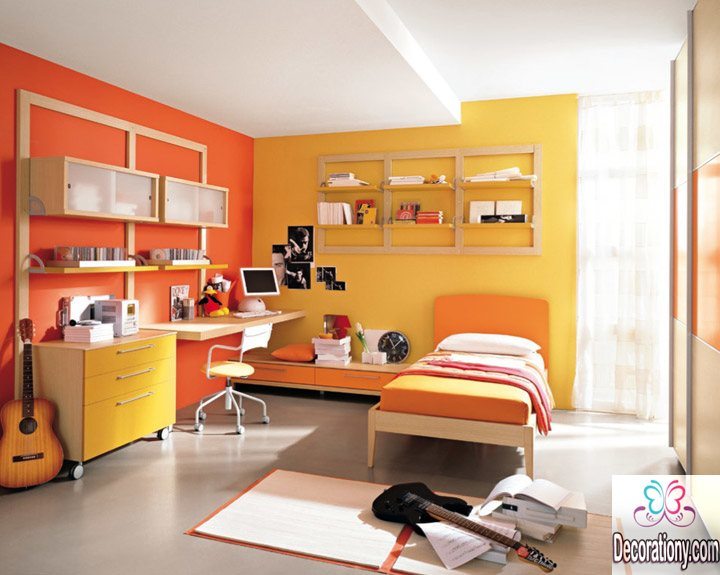
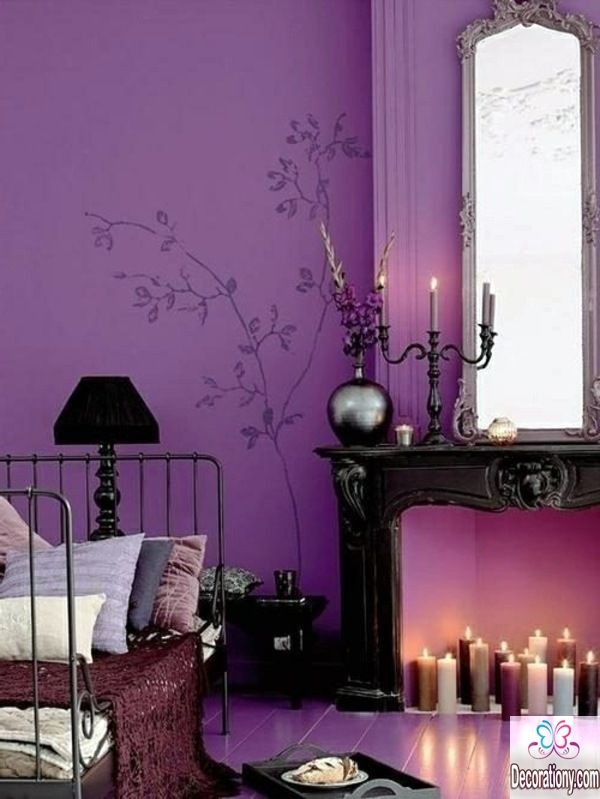
Modern color schemes
The modern colors of this year are divided into three types
The first type is clear colors that show trust like blue, green, lemon and dark red.
The second type is the classic colors that give a vague feel, like Gray, beige and dusty colors.
The last type is pastel colors that give a feeling of comfort and peace like rose and light green.
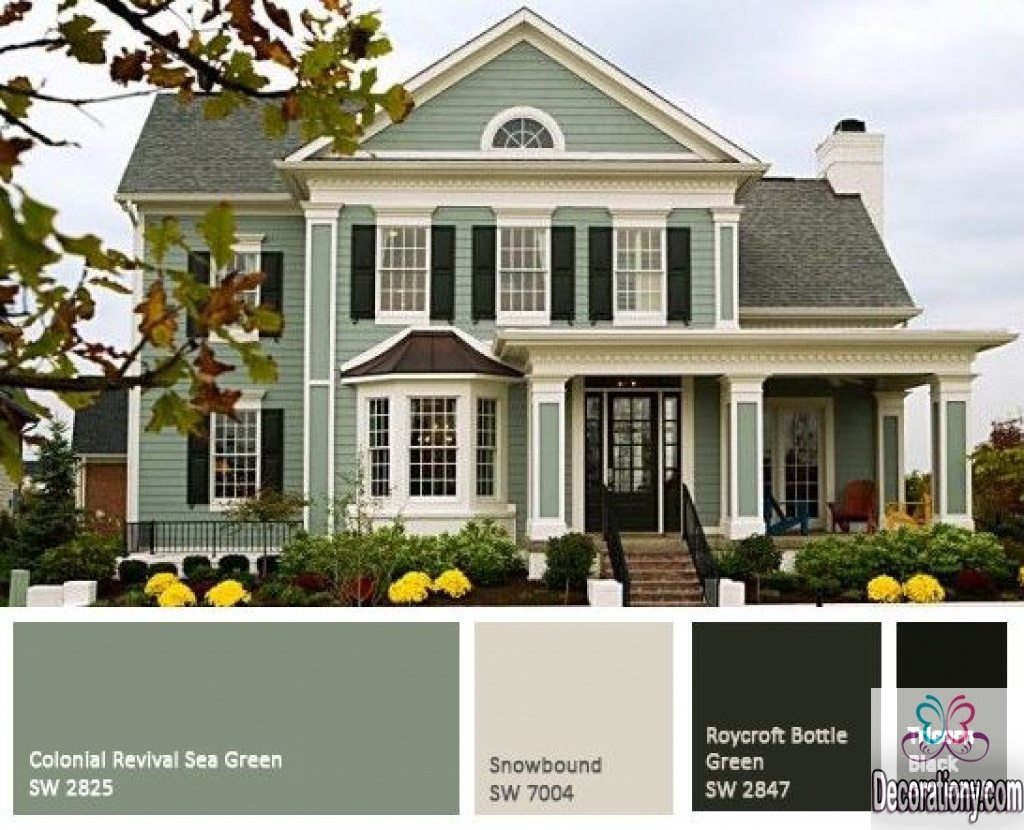
Royal peach palette
Use the royal peach palette colors to get the best harmony of Pastel colors in your house color schemes and enjoy the positive effect of peach colors on your walls.
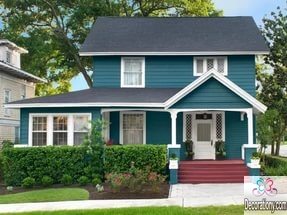
Beach color schemes
Use the monochromatic scheme of dark blue with a slight degree of blue sky and sea colors to get beach colors on your walls.
Green color schemes
You could use green color degrees in the rooms with brown colored furniture, that will give the best match between the wood color and green.
Selecting and mixing three colors such as yellowish orange with greenish blue and violet will give a pleasant contrast of colors.
It’s always possible to have your own house colors matching your personality and your lifestyle. Just make energetic colors fill your home design. And never hesitate to use dark color schemes with light colors, make sure you have a harmony of colors on your walls. The result will be impressive.
The paint process depends entirely on your taste. You have to take your time on research among all the colors to finally find your perfect color schemes.
You can always show who you really are by making your own house reflects your personality. This is easily done by using the colors that will speak about you and make your house full of life.
Short in time? You woke up thinking you might not have time to finish your Outdoor Easter Decorations before easter? Your easter decorations are not supposed to be hard and boring! You can easily DIY or BUY them. Or else, you can get a little lucky if you pass through our significant (EFFORTLESS) ideas to enlighten outside your house with these fabulous easter decorations. Become a craftsman with our daily tips and picks for your own satisfaction.
Want more of our interior Easter Decoration picks? See more on Pinterest.
Easter Door Decorations
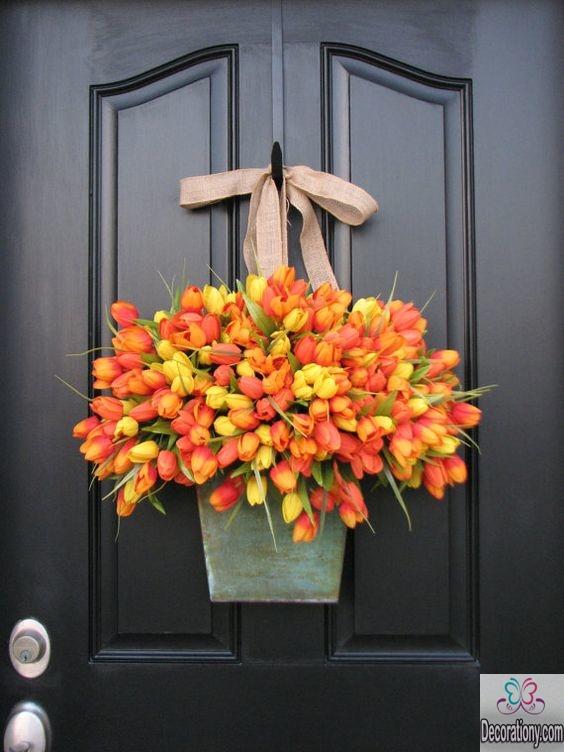
The first thing your visitors see on Easter is your door. So that’s the one thing you don’t need to omit of decorating. I say if you don’t decorate your house and you don’t have time, you should at least have a wreath on your door! You can also effortlessly DIY the door wreath decoration. If it’s not the prettier in the neighborhood, make it unique!
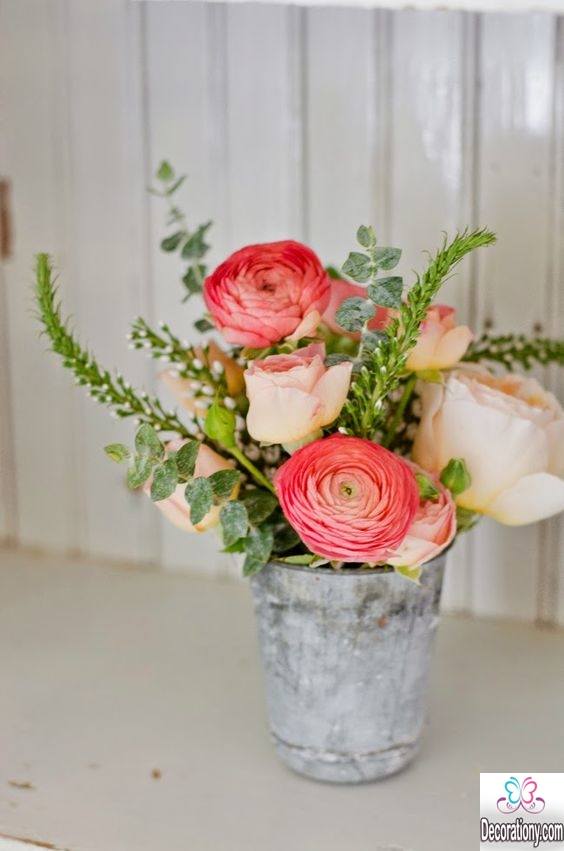
Simply buy a set of flowers of any kind you’d love, I prefer tulips. Arrange them beautifully into any vintage wooden box, a metal old bucket would give the same vintage look you want and you can find both at home. Grab a long ribbon and wrap it tight around the box and hang it on your door as shown…
This can work as a table indoor decoration or outside decoration if you simply put it in your garden.
Easter basket
Don’t be shy to use a medium sized wicker basket from the nearest local craft store. Put some faux moss, green and purple petunias. Or else you can decorate this however you prefer. Once you get this adorable basket and hang it on your door. Whether you put an eggs nest with some flowers or just eggs/flowers, it’ll be the perfect welcoming spring scene!
Easter wooden decorations have always been the prettiest!
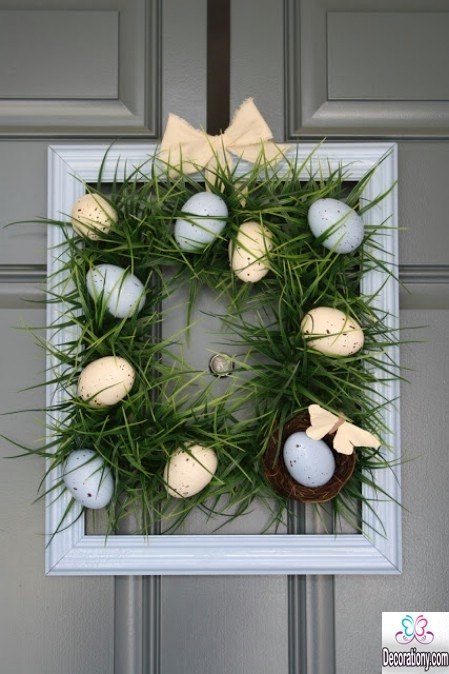
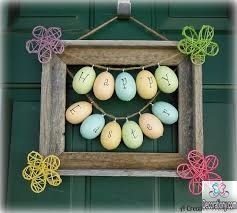
One of the easiest ways to DIY your egg wreath is to do it in a wooden frame. The wooden square style makes it easier to attach grass and eggs to it, also because it’s more available and cheap! You can find the grass (One package) & the wooden frame in the nearest store. Use plastic eggs to attach into the grass and the grass to the frame. Use a ribbon to hang the wooden frame. If you’re stuck in the colors, remember, always go for pastels!
Large Outdoor Easter Eggs
You can probably go for large outdoor easter decorations if you have a large garden. Otherwise, it would just make the place feel smaller and crowded. You can consider using large plastic eggs, arrange them beautifully in your garden and let your kids cooperate painting and coloring them in this special holiday! Egg-shaped balloons would adorably do the job as well!
Easter has always had this holiday spirit when everybody cooperates to decorate their homes and then finally gathers together to enjoy their crafts and meals in a cozy loving feeling spread. DIYing or Crafting easter decorations always and forever will be the entertainment that everybody waits for. Give us feedback on your easter crafts this year, we love to hear from you! Will you spend Easter with your family?
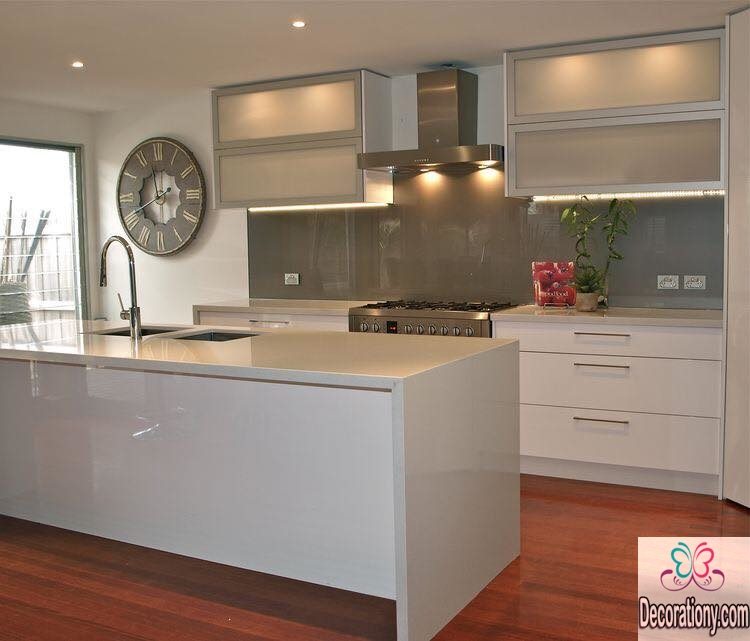
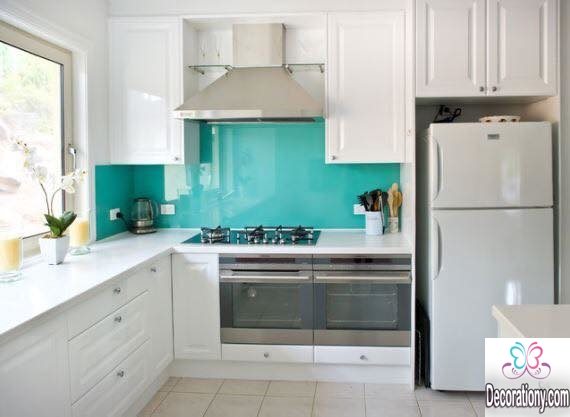
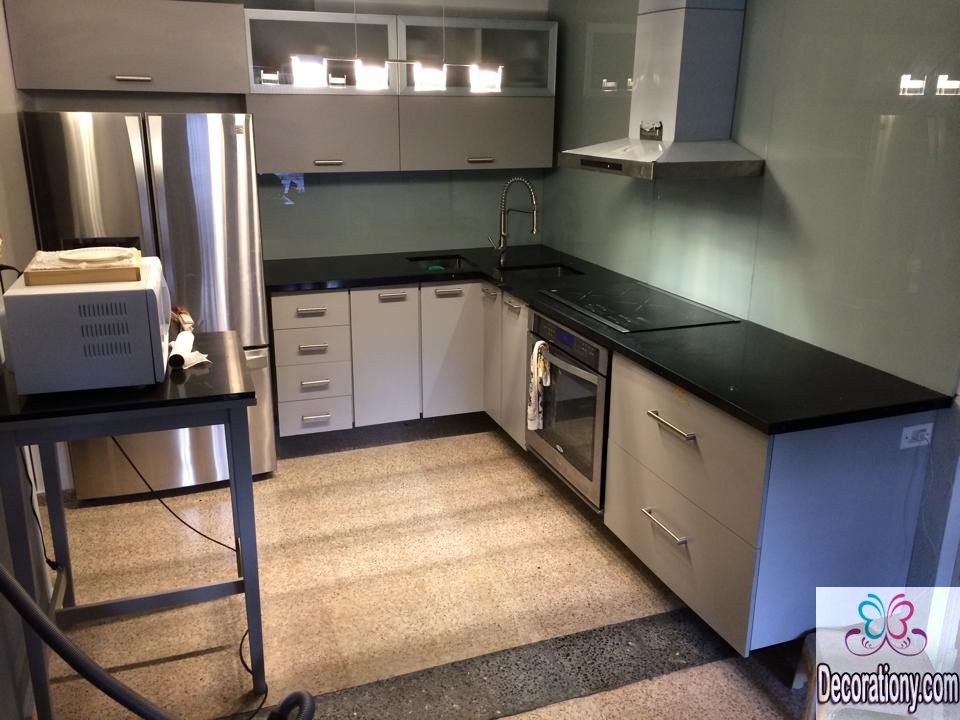
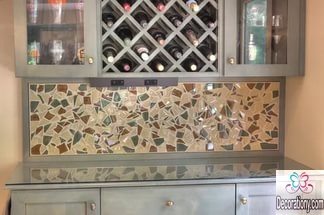
Changing your kitchen backsplash has become a remarkably easy way to transform your old kitchen into a brand modern kitchen. Read more of our interior design articles and become your own home’s expert designer!
Kitchen Backsplash ideas are the first thing you want to read along carefully when it comes to transforming your kitchen. Backsplashes are no longer a functional use only. They have become of the most important centerpieces in the modern kitchen. After reading along these 2017 modern kitchen backsplash designs. Get prepared to install stylish and efficient backsplashes in your kitchen.
Kitchen tile backsplash ideas
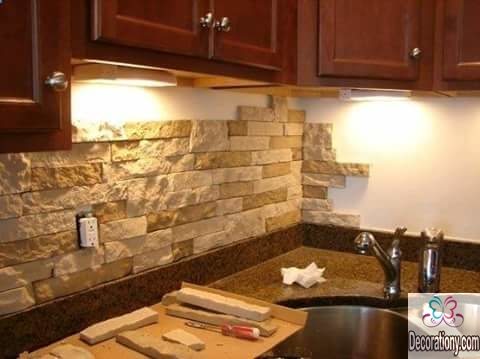
A tile backsplash is an attractive option for any homeowner, in case you didn’t notice, it’s available in a plenty of endless styles, shapes, colors or sizes.
Once you’ve applied tile backsplash style in your modern kitchen you’ll be fascinated by the smart investment you made. I already told you changing the backsplash can effortlessly transform your kitchen style. Also, tile backsplash kitchen style’s most important feature is its cleaning easiness! However, did you know it will break up the endless arrangement of cabinets?
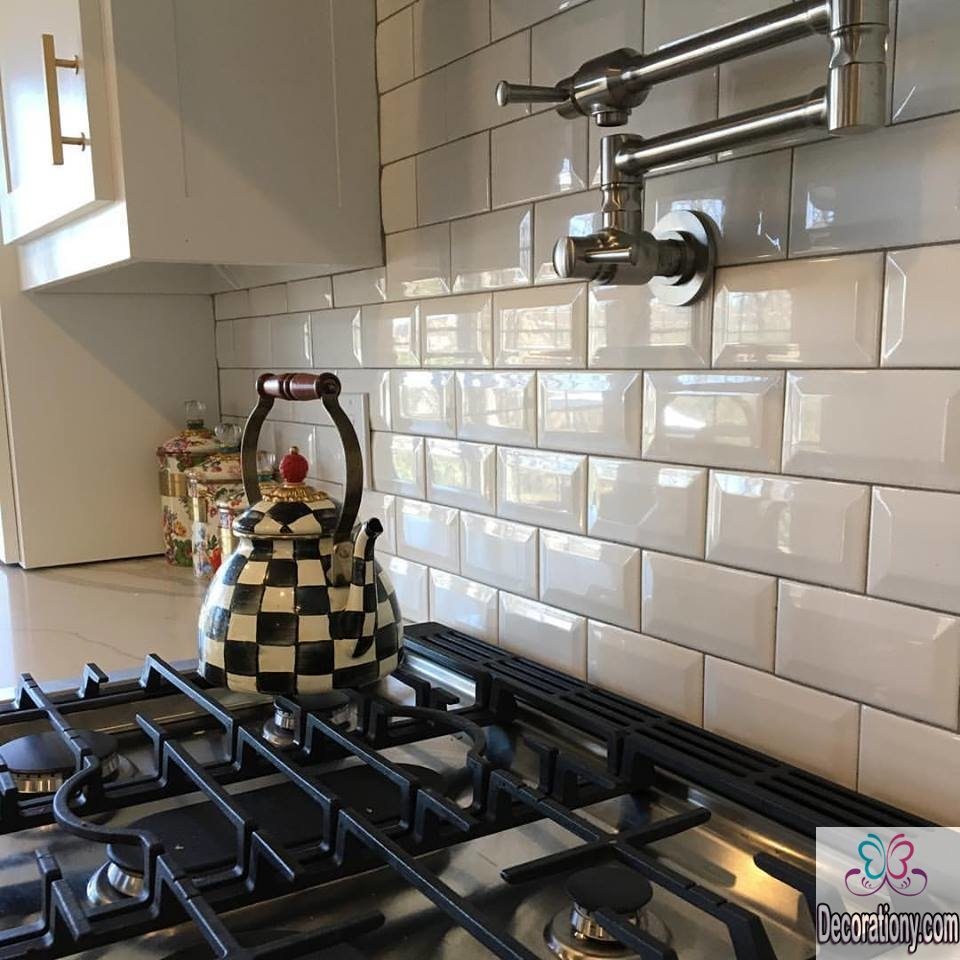
Subway tile backsplash
If you like the classic theme of the subway tile backsplash but you want to get rid of the traditional look, cheer up! Black, tan and gray are now popular alternatives for white! The patterns can also be designed in various ways to emphasize the unique nature or your style! Consider subway tile backsplash decoration and wall protection for your modern kitchen transformation. It`s one of the latest kitchen backsplash ideas for 2017.
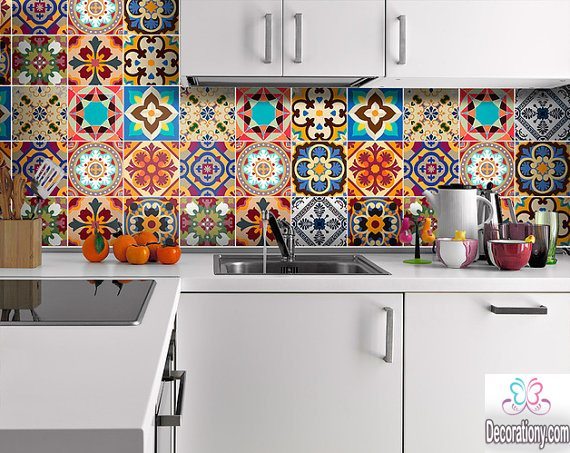
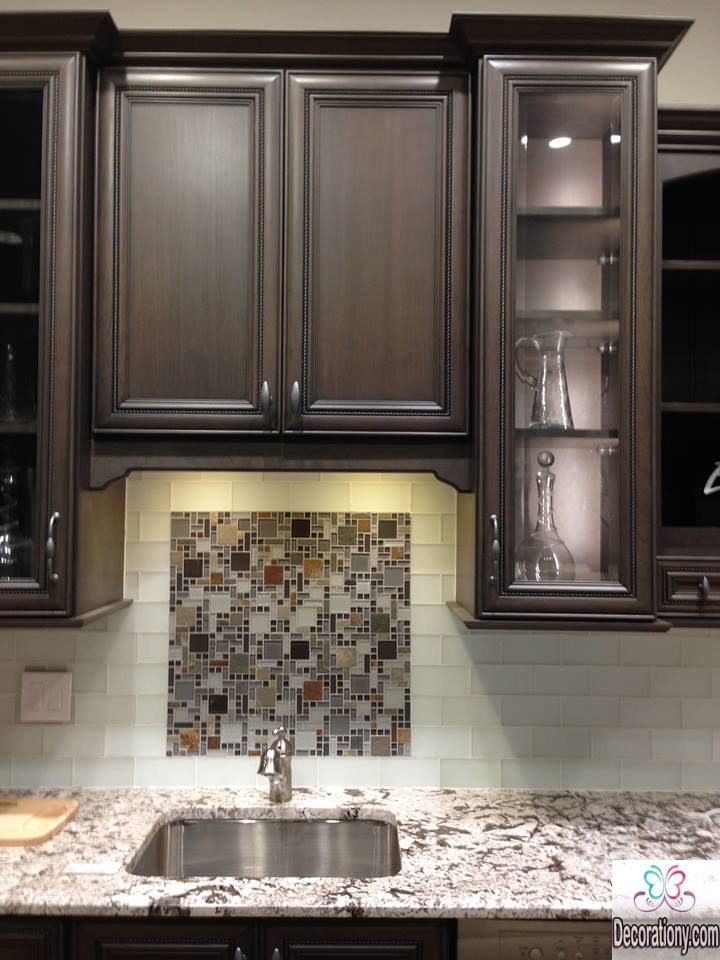
Mosaic tile (DIY-ers favorite)
Why do we call it the DIY-ers favorite? Because you get to choose between many things and you can help installing it as well. The Mosaic tile can be done with glass, ceramic, marble or metal tiles or you can mix any two of these as you wish! However, depending on the material and the area you’ll want to cover, you will then be able to determine the perfect design for chosen area. The backsplash kitchen color ideas must be chosen to match your kitchen theme. However, Beige, cream, white and all neutral tones are known to be the classics that mostly goes with any theme.
Penny tile (Vintage)
This design adds texture and vintage look into your modern kitchen. It’s kind of attractive, no matter how many designs you go through, you’ll always get back to this gorgeous penny tile look!
Don’t hesitate to install and add a little texture using this antique white grout in your kitchen! Get tips for installing a penny tile backsplash on Pinterest.
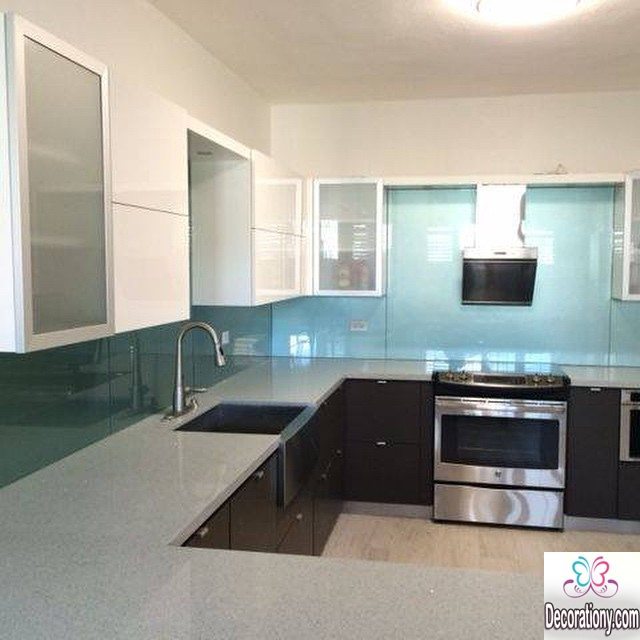
I totally LOVE this mirrored glass backsplash tiles. A small kitchen will immediately feel larger once this perfect style is applied!
kitchen backsplash ideas on a budget
Now we’ve enriched you with plenty of trendy kitchen backsplash styles, we’ve some economical tips for you. Check out these pictures for some kitchen backsplash ideas on a budget, these aren’t going to break the bank for sure!
The backsplash can cover the entire wall above your countertops or just a portion of it. Obviously the more area it covers the more expensive it will get. Therefore, talking about an inexpensive design you’ll want to consider covering only a portion above your countertops. Between 25% to 75% would be a suitable amount, considering how much cooking you do and how close the cooking area to the wall.
Put in your consideration:
How much cooking you do
How close most cooking you do to the wall
Your budget, of course, the more area you cover the more you cost. Between 25% to 75% is used among many homeowners, you might want to choose the minimal coverage.
Next to come is the style and materials.
After deciding on the materials, you’ll have two contradicting options left, whether you’ll DIY your own kitchen backsplash installation which obviously, will save you a plenty amount of money instead of hiring a contractor.
Ceramic tile is known to be the cheapest and most popular choice, and it also comes in a variety of styles.
Glass tile is also one of the options you would want to consider.
kitchen backsplash designs
Find out latest kitchen backsplash designs 2017, Explore this collection of the best backsplash design trends.
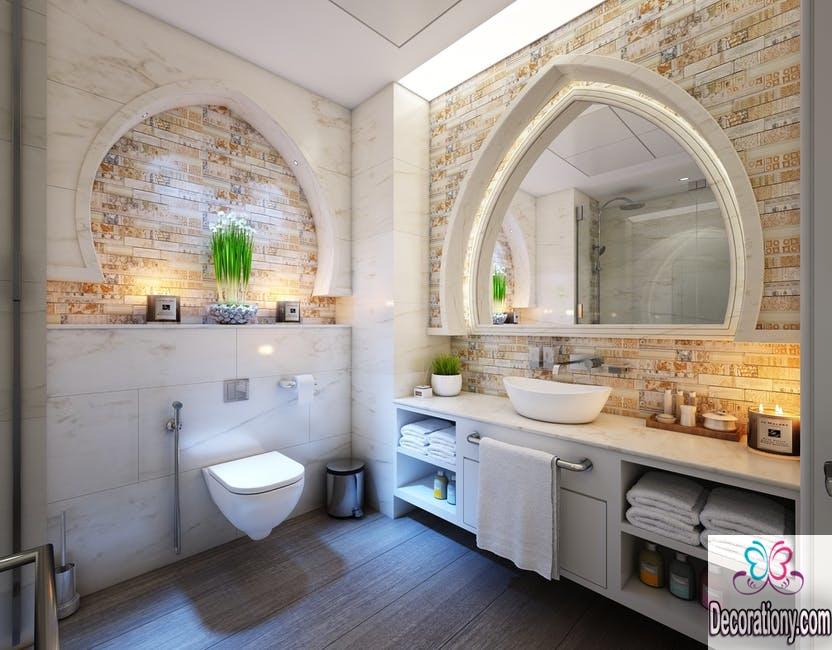
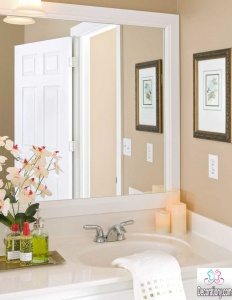
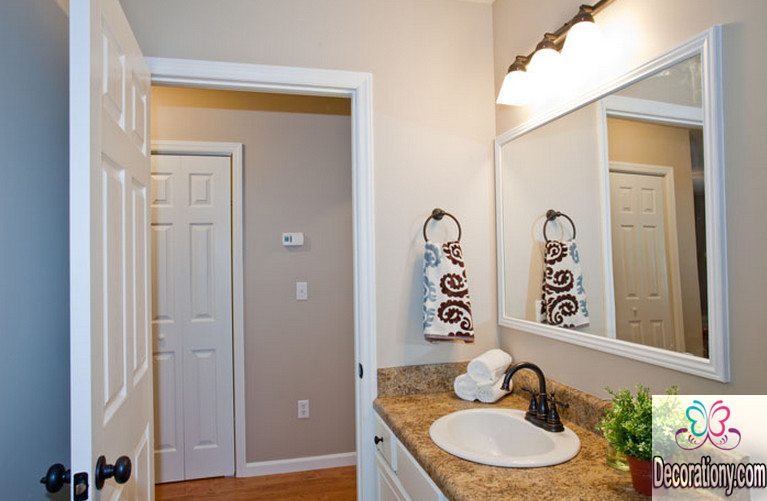
Your bathroom mirror is basically the centerpiece that definitely and directly affects your bathroom look. Whether it’s big, small, wide or tiny, there are plenty of inspirational mirror ideas and pickups that we have collected only for you.
Now you can Explore the most inspiration bathroom mirror ideas, and Find out luxury designs for bathroom mirror cabinets, mirror with lights, vanity, led, mirror frames, and frameless too. Take a look at simple ideas for how to frame mirror, and choosing the right mirror size for your bathroom.
Bathroom mirror ideas
Check out these stylish ideas to get the most out of your bathroom mirror and simply, apply your favorite!
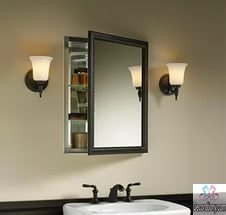
Bathroom mirror cabinets
First of all, did you know you could DIY bathroom medicine cabinets in the most easily inexpensive ways!?
Take into your consideration some of our creative ideas to get the inspiration you need for a perfect redecoration for your bathroom. If you already live in a house with a bathroom mirror cabinet, you’ll probably realize how effective this is. It saves space and keeps the bathroom looking clean of all the toothbrushes and medicine that otherwise would be thrown somewhere in a crowded drawer. Well, if you don’t, you might need to try this out. The cabinet can also be used with many other options, it doesn’t have to be behind the bathroom mirror. Just as shown here.
Here are the full steps to how to install a basic medicine cabinet.
How to frame bathroom mirror?
Not a very hard process (if you have the tools), but framing bathroom mirror might take you some time. Whether you consider framing it yourself or calling for some help. To DIY has become an everyday trend. Not only because the money it saves but for the joy and creativeness you feel creating something new or transforming old stuff into a whole new project out of little material.
Since the process contains many steps I’ve decided to explain the whole thing concluding every single detail to help you step by step. Here’s how to easily DIY mirror frame.
Bathroom mirror frames
Once you’re reading this right now it means you already realize that a frameless mirror is only for purpose but no style. Talking about frames, there are various styles of mirror frames. Each can provide a different look to your mirror that will highly affect your bathroom look.
When it comes to deciding the frame, old wood whether found in a lumber yard or found around your house would definitely provide a rustic look. Just stain it with a nice color and seal to prevent warping.
There are plenty of styles to decide on, from the handy affordable to the vanity expensive ones. You need to consider your bathroom size and design so you can accurately decide on a suitable choice.
Speaking of vanity mirror styles, here are few ideas:
Silver, Gold, Black or Brown are your winning color cards for any design.
Always consider getting close to the natural wooden color. You know fair brown once you see it, it lights up the place.
Rectangular and square mirrors are the same, both add a symmetrical balance to the place. It’s only the personal preference and bathroom style that matters.
Tastes differ, but it all gathers when it comes to the one large mirror that fills your vanity bathroom and your purpose.
It’s usually preferred to use large mirrors in small places. As they reflect the light and the space making them visually feel larger.
However, large bathroom mirrors add elegance and style to large spaces as well.
It also a clever idea to add light on top of the mirror or hang in front of it. Just like shown in the picture.
Frameless bathroom mirror
Who said frameless bathroom mirrors can’t be stylish?
Frameless bathroom mirrors aren’t actually bad as many people think. They can be a perfect match for a small bathroom.
Frameless mirrors give any homeowner the opportunity to unleash his creativity.
If you consider small frameless mirrors, you can hang them in a group, just a small area on the wall using colored cute ropes. Just like shown here
You can add a medicine cabinet behind the mirror as we said in the first paragraph, that will add style and function. (Honestly for me, using cabinets keeps the bathroom looking clean)
Also, one large frameless mirror added to a large bathroom can give the space elegance and style if you consider certain tricks, such as lighting it or adding a LED to the mirror as you would read below.
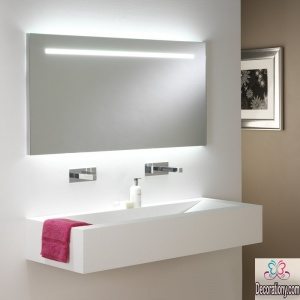
Lighted bathroom mirror
Modern lighted bathroom mirror, bathroom sink vanity units more bronze kitchen faucet –
A great way to effortlessly illuminate and add style is to use lighted bathroom mirrors.
Make it simple, don’t try to crowd your space or make extra effort adding various stuff thinking you’re styling it. It’s not about stuffing the bathroom.
A bathroom mirror with lights is simply a solution for the overthinking about how to properly light the bathroom without overdue.
It will guarantee you’ll have a perfect lighting to your face without hurting your eyes. (Make sure it has a dimmer)
Of course, don’t forget to add light fixtures elsewhere in the bathroom for other activities.
Led bathroom mirrors
Choosing Led bathroom mirror ideas is one of the best ideas that you can use for making the bathroom more stylish & brightness, you can find contemporary designs of this type that will fit any bathroom style.
Latest Designs 2017
Inspiration collection of the best bathroom mirror ideas for making a luxury bathroom design, Check these out.
Don’t replace your old bathroom mirror, turn it into a new brand vanity! DIY mirror frame and save a bundle of money. Simply update your bathroom’s whole style by adding a frame to your plain mirror.
DIYing a mirror frame isn’t such hard process as you might fear. Any woman or man can do it easily at home (and more important inexpensively) Don’t worry, it can end looking very professional if you follow the steps!
Materials needed:
Miter saw
Paint or stain
Paintbrush
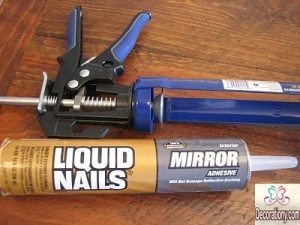
Caulk
Liquid nails
Pencil
Measuring Tape
Extra strength wood glue
Fine sanding pad
Dremel
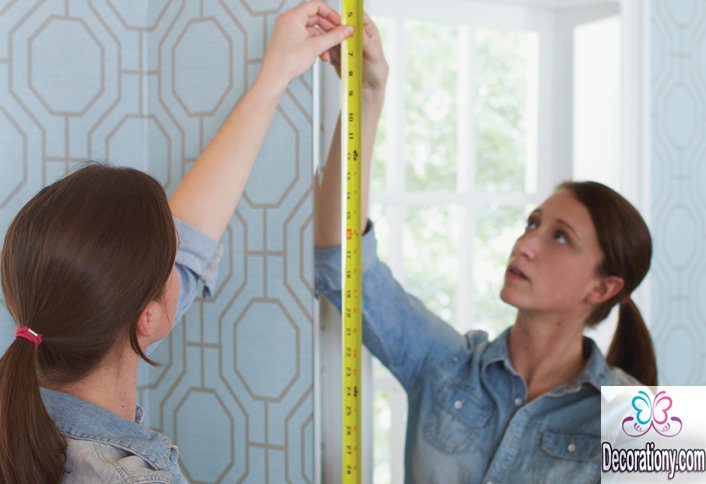
The DIY mirror frame process is expected to take approximately four hours, and under 30$ bucks for the materials. This is How to frame bathroom mirror, and it can work for any room mirror too.
Measure your mirror length and width with the measuring tape.
Use any old boards you could find for the least budget.
Or simply go to the nearest store (Lowe’s maybe) with your measurements and buy the needed materials.
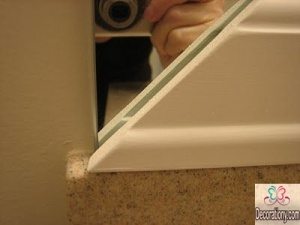
#Step 2 Miter the edges
Use a Miter Saw to cut the wood (all four sides) at a 45-degree angle to make the outside portion in full length with the mirror. Just as shown in the below picture.
Go to a home improvement store to have the materials cut properly if you made any errors that you can’t fix.
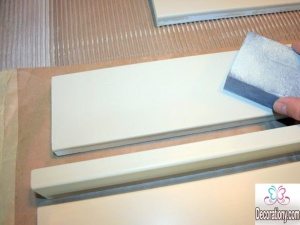
#Step 3 Sanding the frame:
Use the sanding pad to smoothen the wood, but don’t sand the angles too much so they can fit pretty much flush!
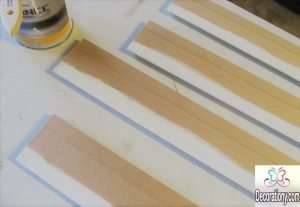
#Step 4 Painting mirror frames:
Paint the front sides, let dry for two hours.
Then paint the back sides’ trim edges and let dry for two hours. The back side trim edges will reflect in the mirror.
Paint one or two coats on each one of your pieces.
Make sure you painted the trim edges properly.
For other options, you can use spray paint the four boards. (For black or brown frames painting)
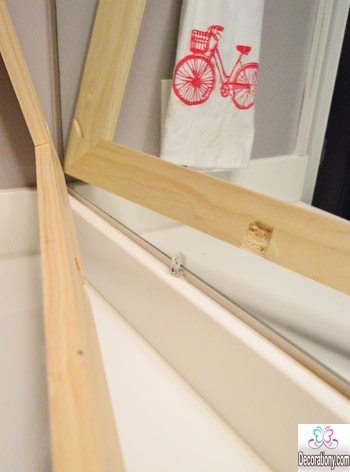
#Step 5 notch the wood
Use a Dremel to notch the wood right where the mirror clips are to make the frame flush against the mirror.
After you’ve notched the wood for the clips it should fit like a puzzle. Test that by putting the frame on the mirror, make sure everything fits perfectly.
#Step 6 Framing the mirror (Almost there!)
Use liquid nails to glue the boards to the mirror, do each side per time, start with the bottom piece.
Don’t get too close to the edges, you don’t want it to show up in the mirror.
Place the board on the mirror properly. Use a bubble level and a pencil to determine the proper placement.
Hold tight to make sure everything is okay and the frame won’t fall down. (Liquid nails dries quickly tho)
Then proceed with the following board until you’ve placed your new mirror frame all by yourself.
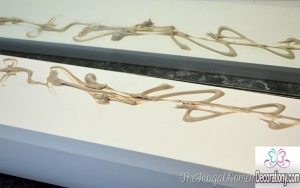
Your mitered joints might not match perfectly, that’s just fine. Use caulk to fill along the joint.
After applying the caulk, wet your finger and run it over to smooth.
After the caulk is dry if it’s too obvious you can touch the area up with paint.
Now you’re all done, this should be the final look!
Ta da!
Here you go! This is a DIYer’s favorite dream, I guess four hours didn’t mean a thing for a creative DIY-lover, Especially when you see the results!
Let us know how you DIYed your mirror frame and how the process went! We hope this was helpful. Leave your comments for any further tips or questions. We love hearing from you!
By continuing to use the site, you agree to the use of cookies. more information
The cookie settings on this website are set to "allow cookies" to give you the best browsing experience possible. If you continue to use this website without changing your cookie settings or you click "Accept" below then you are consenting to this.

")


 Via
Via 


 Via:
Via: 

 Check out more Vanity mirror styles on
  Via:
Via: 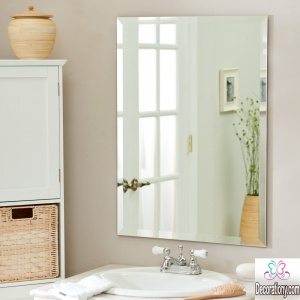


 More ideas on
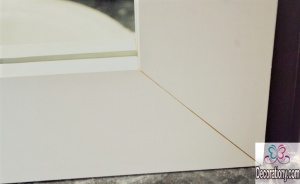
 Ta da!