Home Blog Page 16

Decorating With Florals – Where Not To Use Them

0

Decorating With Florals

Once upon a time, floral furnishings played popular roles in home décor. You may even remember seeing floral patterns on chairs and sofas in your grandparents’ home. Well, times have changed. These days, few people want to emphasize floral decorations, especially when it comes to couches and other large pieces of furniture that take up a lot of room.

Floral furnishings can still play roles in decorating, but you can make your home look more modern by avoiding floral décor in the following rooms.

Floral Furnishings Do Not Belong in the Living Room

In the 1990s, a lot of people started decorating their living rooms with floral patterns. It was a noticeable difference from the comfortable shag carpeting and overstuffed sectionals of the 1980s.

Eventually, people grew tired of having floral décor in their living rooms. The living room, after all, is one of the first rooms that guests see when they enter your home. At some point, the floral patterns that once looked so pretty in the living room turned into eyesores that made homeowners a little embarrassed.

If you still have floral furnishings in your living, consider replacing that furniture with modern designs covered in leather or microfiber cloth. You’ll rejuvenate your living room’s style and get more comfortable furniture for entertaining guests. Plus, you won’t have to worry that you’ll feel ashamed of how outdated your living room’s aesthetic is.
Don’t Put Floral Decor in the Bathroom

No matter how much floral print you add to your bathroom, you will never replace unpleasant smells with the enchanting scents of lilacs and roses.

Unless you have a very large bathroom, you probably don’t keep much furniture there. You may, however, have one or two small seats that you keep in the corner or in front of a mirror. If those seats have floral patterns on them, it’s time to find replacements that look more modern.

You’ll need to do more than replace a piece of furniture if your bathroom is covered in floral wallpaper and other types of decorations. The floral trend ended a long time ago. At some point over the next year, you should try to find time to update the room’s aesthetic. It only takes a weekend to replace the wallpaper in a bathroom.
Replace Floral Patio Furniture

Some people use floral patio furniture as if they’re added small gardens to their yards. They love weather-resistant cloth covered in flowers. It’s hard to understand why considering that this trend in outdoor furniture ended decades ago.

Today’s patio furniture emphasize bold, solid colors or striped patterns. The material used to cover cushions has also improved over the last dozen or so years. By replacing your old patio furniture, you can trade your floral patterns for cloth that dries quickly and resists mold. It will improve the appearance and health of your patio.
Keep Floral Furnishings Out of the Kitchen

Kitchen décor has come a long way over the last decade or two. At one time, people liked using fake images of flowers and vegetables in their kitchens. You could find the images sewn into seat cushions, printed on table covers, and hanging on walls.

From now on, lets keep the vegetables in the refrigerator. Modern kitchens don’t emphasize floral decorations, especially when they come on table clothes and furniture. Instead, trendsetters have decided that natural wood, stone counter tops, and easy-to-clean surfaces matter most.

If you still have some floral furnishings in your kitchen, you can find affordable replacements that will give the room a modern feel.

Floral furnishings once played an important role in home decoration, but it has gone out of style. Get affordable replacements that will keep your home looking fresh and inviting.


7 Tips to Make The Best Floor Plans

0

Best Floor Plans

One of the most important processes of building a home is designing the floor plan since it determines how well the people will live in the house. Get it wrong, and the homeowners might feel congested inside their very homes. Below we will look at seven tips that can help you design floor plans in a better way.

how to make best floor plans

Be Practical

Innovative floor plan designs may look good at first, but remember that practicality is what will make the home something worth to live in. Never go overboard with the design, trying to create a unique floor plan.  Focus on something comfortable with a touch of style. Every room of the floor plan must be placed at a location where it can perform its function the best. For example, if you are planning a guest bathroom, then consider designing one very near to the entrance. This will make it easy for the guests to go directly into the bathroom when they enter your home.

Measurements

Be very vigilant when you are measuring n existing room. Put down your measuring tape on the surface of the room and accurately check the dimensions. It is recommended that you double check the figures to make sure that the measurements are accurate. This is especially true in tight places where a difference of just a few inches can have a terrible impact.  And above all, always check whether the walls are parallel or not. If parallel, then the floor dimensions need only be taken from one spot. Otherwise, you will have to take multiple measurements to accurately layout the floor plan.

Members of Home

Always take into account the people who will be living in the home once it is completed. This will enable you to structure the floor plan more usefully. For example, suppose that you are designing a floor plan for a family consisting of a grandparent, two parents, and two kids. You might initially think of setting up a bathroom at the backend of the home. But if you do that, then the grandfather will have to walk all the way to the back. And considering their age, it might be too tough on them. So, set up a bathroom close to the living room of the grandfather.

Budget

If you are renovating your home and you are tight on budget, then focus on improving just a part of your home rather than wanting to overhaul it completely. You should also take this into consideration when designing the floor plan. So, design it in such a way that it can easily be expanded upon. Think of all the improvements you wish to make to your home, then identify those you can afford to do right now, and then create the floor plan keeping all these factors in mind. This way, you can keep your renovations within your budget and improve the home little by little.

Sunlight

Keep in mind the direction of the sunrise and sunset when designing the floor plan. This is especially important for bedrooms and living rooms. If you are the type of person who likes to have the sunrays on your face the first thing in the morning while still on bed or want to watch the sunsets in the late evenings while lazing on the bed, then tell the floor plan service to place the bedroom in the direction of sun as per your preference.

Furniture

When including furniture in the floor plan, keep in mind the position of electric switches, receptacles, and so on. The position of furniture also needs to be taken into account depending on your needs. For example, if you are placing a desk in your private study, then decide where you want to face when using the desk. Plus, also remember to consider the walkaway space between the furniture and the wall. Typically, this should be around 30 to 36 inches. It is also recommended that you avoid placing all the furniture right along the wall. Instead, split up the positions and space them out at angles to avoid a rigid atmosphere in the room.

Break the Walls

Old homes often have small rooms. And the many walls of the house can make it seem too small and restricted. So, if you are renovating the home, then make sure to look for opportunities where you can break the walls and expand the rooms. Check the floor plans and try to make the renovated spaces as functional as possible and modern in their layout. As a bonus, you will also be able to get more light into the rooms as the walls are broken.


DIY Coat Rack Ideas With Pictures

0

If you live in a small house where there is no room for a dressing room, walk-in closet or big wardrobe, then you have to think of some alternative ways of dealing with this problem. You can hang your clothes using one of the following coat rack ideas which will include some DIY coat rack ideas.

Coat rack ideas

amazing coat rack ideas
countryliving.com

The coat rack is one of the indispensable household objects, yet finding one that really satisfies us often becomes a difficult task. Yet the inspiration is born right in the walls of the house. For example, have you ever thought about recycling a drawer? You can paint it and fix it a series of supports; it will be perfect for hanging scarves and hats, avoiding the mess in the entrance of the house. So, we will try to give you some inspiration by presenting some DIY coat rack ideas that will help you with making your house tidier.

DIY coat rack ideas

DIY coat rack ideas
topdreamer.com

The idea of making a unique coat rack using creative DIY ideas that will suit your taste and your home decorations is the motive behind writing this article which we hope to be the inspiration for your new coat rack.

In traditional, the coat rack has simple designs but even such a simple design could be constantly improved, change, supplement with new functions and could be turned into an absolutely unusual design.

Tree coat rack

Tree coat rack ideas
holycool.net

A tree poster on the wall is one of the easiest, modern, and inexpensive DIY coat rack ideas you only have to buy a wall sticker (poster) or silhouettes of a tree and use it on the wall and add coat hooks at the end of the branches. This creates a beautiful effect as if the clothes hung on the branches themselves. Choose a striking color that contrasts nicely with the wall color. Or build an original DIY coat rack by using old door handles and drawer knobs instead of hooks. Find vintage door handles on flea markets and shops and design your own unique piece.

Handles DIY coat rack

Handles DIY coat rack ideas
theownerbuildernetwork.co

Collect some old handles and fix them on a wooden support, it will be a perfect coat rack for clothes, but also the right place to hang and show necklaces and jewels. Not sure where to find old handles? The flea markets are full of cheap, unique, old, and modern types of handles, which you can use to give your home a vintage touch.

Spoons and forks coat rack

Spoons and forks coat rack ideas
craftbnb.com

One of the easiest DIY coat rack ideas is to collect some old spoons and forks, and then fix them on a wooden board and use them as coat hooks. You can fold them and engrave the family names on them before fixing them to a square surface or a wooden board. You can use them as hooks for clothes or as a key ring.

best coat rack ideas
greatcafes.blogspot.com.eg

Coat rack ideas for children’s room

best coat rack ideas
hometohomediy.com

Even for the children’s room we could use plastic toys and stuffed toys for a comfortable coat rack or draw cute little animals on a wooden board to which we will attach a hook in place of the tail! It will be cute, funny, and sure will suit the children’s room decoration.

Steampunk coat rack ideas

Steampunk coat rack ideas
captivatist.com

For example, if you want to create a Steampunk flair using coat rack ideas, you are welcome to use more stable materials such as pipes and design a creative coat rack. Just like the furniture in the industrial style, the coat rack will certainly be the hit, which will attract enthusiastic views.

Steampunk coat rack ideas
hometalk.com

From a single pipe and two pipe connectors, which you attach to the wall, you can create a piece of art in no time. You just have to decide between using hanger or hook to hang up your jackets and coats. Also, spanners will perfectly fit the coat racks that made from water pipes or hooks from faucet handles.

Pallets coat rack

Pallets coat rack ideas
palletwoodprojects.com

You can use the much-loved pallets or even the recycled boards to create a beautiful coat rack on the wall that in addition to being decorated with your favorite handles, hooks, and toys. You can use it to furnish the corridor, the children’s room or any environment in which you want to place it. for more smart uses of pallets, you can read our article about how to make a pallet bed.

Final words

DIY coat rack ideas
cdn.trendir.com

So the creative and unconventional ways to make a comfortable or unique coat rack are really endless just free your imagination and start looking around to see if you can find something that can suit your home decoration. You can choose from simple hooks to the most imaginative objects to use in your coat rack project. And you can always use a wooden board to be the base which you can fix anything on it.


How to make best coffee without coffeemaker?

0

Making the best coffee need some beginner skills but by using the right way you will make coffee like a chief just follow the techniques that we will give you here and you have the best cup of coffee.

Sometimes you need to read a book or have a relaxing time and if you a coffee lover I know this would be the right time to make a cup of coffee, so I will try to help you to do that easily and like an expert so you can have a good time to make it and enjoy it the most.

make best coffee without coffeemaker

We will start right now to show you the tips that will learn you how to make coffee without coffee maker like a pro.

1- Use a pan alittle bit small ( Small pans will help that you have a good taste without losing any part of it). Fill it with a cup of  water and use low heat.

2- Wait 8 – 12 Minutes then after water boils you can use 2 spoons of coffee per 6 water ounces.

3- Don’t pour coffee immediatly just wait from 1 to 3 mintues and make sure you cover the pan while waiting.

4- The right way to pour the coffee to the cup while moving it slowly in a circle.

5- Enjoy the best cup of coffee.

This is not that hard but sometimes you will need to have a quick cup of coffee so this way won’t be helpful.

Using coffee maker will require it will give you a lot of things together to allow you to have the best experience, that would be easy if you start reading a lot of reviews about the best coffee maker machines with mention the good and bad parts fair and hones.

That’s why I would suggest you to take a look at Friedcoffee.com you could change your mind and you can find out the best selection of Espresso Machines for home that gives you delicious taste and healthy cup of coffee.

Bedroom Color Schemes and Trends 2018

0

Your bedroom is your personal shelter so if you want to change the colors according to the latest bedroom color schemes we will try to make it easy for you by explaining the best bedroom colors, bedroom color ideas, and the most important thing is 2018 bedroom color trends.

Bedroom color schemes

new bedroom color schemes
barnabaslane.com

Even the bigger problems look a little smaller when you see your bed. Have you ever wondered about, what are the ideal bedroom color schemes that can enhance the feeling of relaxation that you feel when you enter your room? The psychology of colors is not just a theory but a whole industry that is constantly being studied. You will surely have heard or read that some bedroom color schemes can have a positive effect while others have a negative effect. We’ve discovered the best bedroom color schemes to get one more excuse when you do not want to get out of bed!

Best bedroom colors

bedroom color schemes blue
khabars.net

Here are different perfect bedroom color schemes that meet the requirements and lay the foundation for a relaxing and amazing interior.

Soft red with neutral shades

nice bedroom color schemes
hgtv.com

Red tones are easy to integrate into the bedroom color scheme, but can also be used in a monochromatic way. Red as the dominant color in the decoration provides energy to any space. it catches attention and imparts passion and emotion, but if used too much on the bedroom walls, the senses can be over-stimulated. Smoother red or pink shades, which have a splash of earthy brown or wearing tones, are much more comfortable to watch and often look more sophisticated. Regardless of what shade you choose, only a few will be red, so use it as accent paint with cream or white to neutralize the intensity.

Metallic bedroom color schemes

Metallic bedroom color schemes
pinterest.com

If you want a romantic bedroom with a modern feel you can consider painting the walls in deep cupcakes or a hazy golden tint. Copper shades containing happy orange tones or earthy tones are a great way to add warmth to dark spaces, while shimmering gold can be a lightweight shade that’s easy to combine with other colors.

Gray and yellow bedroom color schemes
bhg.com

Create a sophisticated touch in the color scheme by selecting low watt lights for a smooth and comfortable shine.

Gray and yellow

new bedroom color schemes
dcicost.com

This color scheme is modern and very balanced. The gray is very easy for the eyes, while the yellow serves to draw attention to the most important points of space in a joyful way.

Coral and blue

blue bedroom color schemes
cpiat.com

Blue is a much-appreciated color it can be embedded in virtually any style and mood and its countless soft shades – has been described as the “color of sleep”. It is also very easy to find a good complementary color to it, as the coral, and other soft colors. With shades of blue, and coral you can get a nice relaxing underwater feel from this combination.

Pink and copper

pink bedroom color schemes
dailydreamdecor.com

This is a combination that is very fashionable. Copper color and objects bring to any environment an appearance of luxury and sophistication. While the pink is chic and feminine, it has a tone of light. All this combined with white, makes this combination an incredible option. By the way, copper also creates a good contrast with lighter colors.

Green and brown

green bedroom color schemes
7desainminimalis.com

For those who are thinking of a more naturalistic composition, betting on the use of shades of green and brown is a perfect choice. Hardwood floors or furniture are also a great way to make the style even more convincing. Natural textures or patterns are things that can not miss in this decorative style.

Pastel

nice bedroom color schemes
lonny.com

Muted shades of favorite colors are the best option for those who do not like experiments and do not believe in bright bedrooms. These colors should be combined with some type of texture or pattern to provide a bit of life to the bedroom.

Bedroom color ideas

best bedroom color schemes
itcertstore.com

Finding bedroom color ideas that suit your bedroom is no longer difficult. if you take the risk, you will receive a unique interior that will bring you a sense of pride and satisfaction. Start by choosing the basic colors and gradually move on, delving into every detail. There are computer programs that allow you to create design projects. You can view on the screen a lot of different options for bedroom color schemes and then make a decision.

2018 bedroom color trends

red bedroom color schemes
cynthiavardhan.com

2018 bedroom color trends are going to combine Heart Wood with earthy tones to create a warm and relaxing color combination. Heart Wood is a gray-brown color with a faint pink tone that creates a welcoming and warm feeling in the room. The small difference of versatility means that you can use it in a variety of color combinations, ranging from really green to cool blue shades to create a sense of comfort that feels right for you. Break off the warm, harmonious shades with an accent of ink-blue and add elegance to the cozy feel, or combine it with lighter colors for an airy yet inviting atmosphere. for more inspiration, you can read the past article about best home decor ideas for bedrooms 2018.


Bedrooms – Things to Keep in Mind While Setting It Up

0

Your own personal space, a bedroom is where you spend at least a third of your lives. It’s a space which gives you comfort, where you relax, think, read and sleep.  There is nothing like a peaceful and comfortable sleep at the end of a hectic day. So when you are setting up a new home or renovating your current home it’s no surprise that bedrooms occupy the top position on most peoples list.

Setting Up Bedrooms

You could opt for a design and style that reflect who you are and a look that you absolutely love. While trying to create a bedroom that’s stylish or ultra-modern, make sure that you don’t end up creating a showpiece without a soul. The interior of a bedroom does have an impact on getting a proper sleep, so creating a space that’s cozy and pleasant according to your taste would be a great idea.

best interior design ideas for bedrooms

The trends in setting up a modern bedroom are changing by the day but no matter what the trend it’s your private space to unwind and relax so create something that you’ll love. By changing colors, making changes to the lighting and adding new pieces of furniture you can give a new look to your bedroom even on a low budget. Keep these things in mind while creating your dream bedroom.

Budget and a theme

You should always have a budget in mind and plan and work accordingly. Deciding a theme for your room would help you attain a bedroom that looks and feels exactly the way you want it to be. Depending on your personal taste you could choose a theme that gives a traditional look, one with a country vibe, or a modern look.

Colour choice

Doesn’t matter if you like cool or warm colors, it’s always best to choose colors that give you a feeling of calm and peace. If you’d like your walls to be bright and sunny a pale yellow shade would be the best. Likewise, you can choose a shade based on how you would love your bedroom to be.

Lighting

The right choice of lighting could give a totally different feel and look to your bedroom. You can include ambient, accent and mood lighting in your bedroom by choosing the right combination of lights. A wide range of lights that gives traditional, contemporary and modern look are available in the market.  Bedside lamps, overhead lights, ceiling fixtures, chandeliers, decorative lights and pendant lights can be used according to your personal taste.

Furniture

Depending on the style and design of your bedroom you can choose between contemporary, modern, and traditional furniture.   You also need to consider the size of your room before deciding on the what to buy.

Bed Frames and mattresses

You can choose between a king size bed, queen size bed, single bed, or bunk beds, depending on the size and decor of your room. Wooden, metallic, and upholstered beds are available in the market; choose one that matches the theme of your room. Opting for a bed with built-in storage could help you save space in the room. A wide range of mattresses like foam and latex mattresses, spring mattresses, cotton mattresses and feather mattresses are available in the market. Opt for the most comfortable one. When you choose bed frames, keep in mind the décor too.

Closets, cabinets, and cupboards

Depending on the size of your room or the space available you can choose between a built-in closet, wardrobes, cupboards or cabinets.  Adding a nightstand or a bedside table would also be a wise idea to keep a table lamp, alarm clock, books or a bottle of water which might come in handy at night.

Decorative ideas

You could add more colors to your room by including vases and flowers, works of art, rugs, and showpieces.

Bedroom designs

Country style

If you are looking to create a bedroom that has a country style walls painted in neutral shades would work well. Wallpapers in floral print, all white or wooden furniture suits best for this style.

Industrial and Rustic style

People who love the traditional designs for a bedroom usually prefer the industrial or rustic style.

Modern bedrooms

When it comes to modern bedroom designs the shades usually preferred is white, black and grey. Geometric or abstract patterns are usually included on the walls. A feature wall with splashes of colors is also quite popular with this design. A modern design gives importance to storage but has minimal accessories. Click on https://www.moderndigsfurniture.com/modern-bedroom-furniture.html to get more information on modern bedrooms.

How To Make A Blanket for This Winter Easily

0

How To Make A Blanket

Everyone has their preferred blanket for snuggling up in the lounge on a cold day, but few make their customized blankets. Sew or knit your personalized blanket or make keepsake blankets to give as gifts to friends and family that they’ll cherish forever. Choose a style and think How To Make A Blanket and start crafting your way to a cozy creation, DIY blanket easy.

Baby, it’s cold outside. One thing I prefer to do on a cold winter day is grasping up under an afghan with a cup of tea. Even if it’s sunnier where you are, a pretty crocheted afghan adds powerful character to any place. In that tutorial, as part of the Crochet Basics range, you’ll discover how to make a traditional granny square. I’ll also show you whereby you can join your granny squares to create a comfortable afghan of your own!

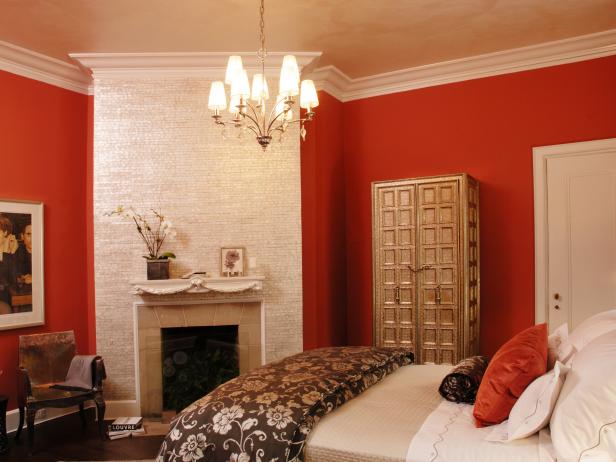
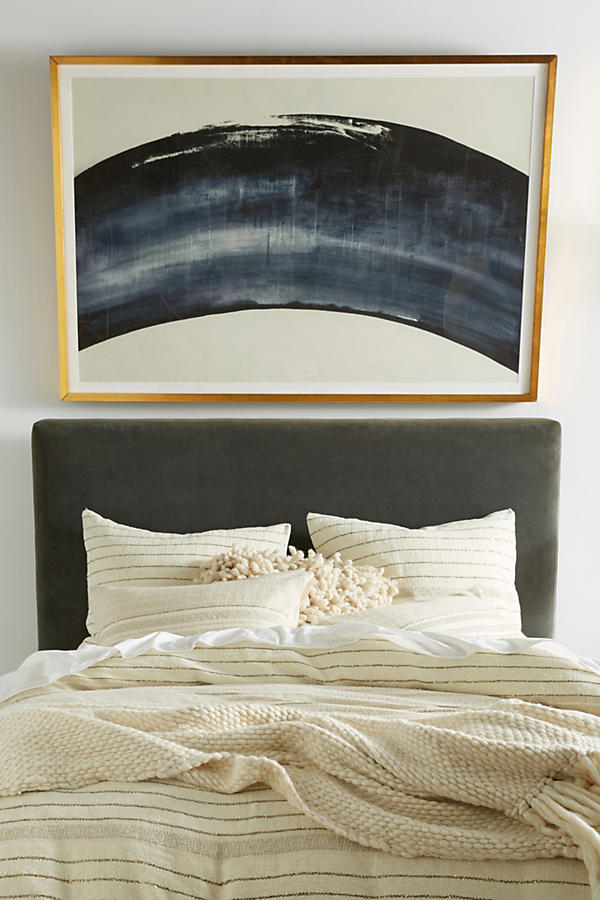
Winter Must-Have The Coziest Blanket Ever

Do you see yourself swinging up from the frigid winter morning each day? Grandma has set to illustrate the pioneer of the comfortable blankets the society has ever seen. With these soft blankets, you will never be cold again.

Started sewing these thickset wool blankets with her firearms. Her arm-knitting method and final product matched such a hit that she determined to turn it into a business. These cloud-like blankets are manufactured out of 100% Merino wool, which is exceptionally soft and unimaginably light. The blankets will not only keep you astonishingly warm but will also turn your house into a P interest lovers dream; with its chic and minimalist look, this piece is an interior must-have!

Once her blankets became a hit, she ventured into creating jumpers and scarves that will keep you warm and bright through the dark, frosty day at work.  For DIY enthusiasts who want to knit their blankets, scarves, or sweaters, she also provides state-of-the-art needles and imperial balls of Merino wool yarn along with a few useful tips. Sounds like a fantastic Christmas gift for your loved ones!

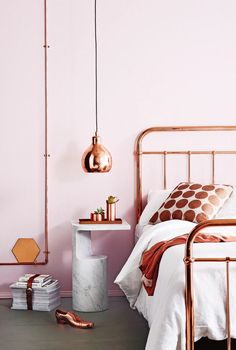
Her chunky blankets come in a variety of different shades including yellow, pink, blue, gray, white, and green. The blankets come in four different sizes: small, medium, large, and extra large. Considering the quality of the blankets, my grandma has priced her products reasonably.

DIY Blankets

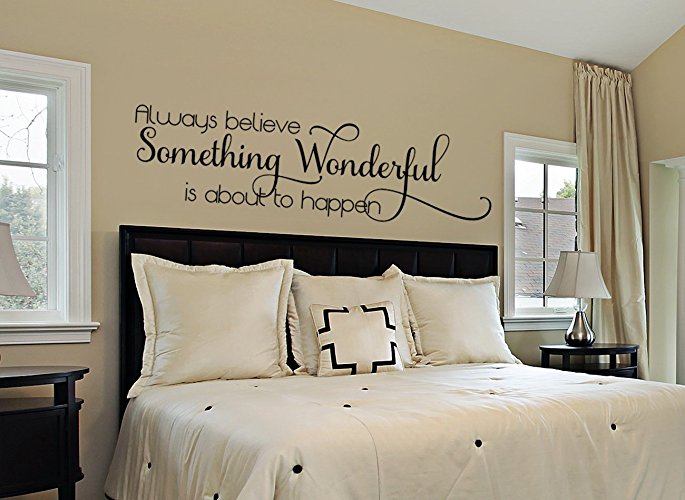
A beautiful, warm, knitted blanket pairs perfectly with a good book on a cold night…
How To Make A Blanket is a long-term project, but you can knit some as and when you have the time and inclination. Plus, when it’s finished, the sense of achievement will make it all worthwhile!
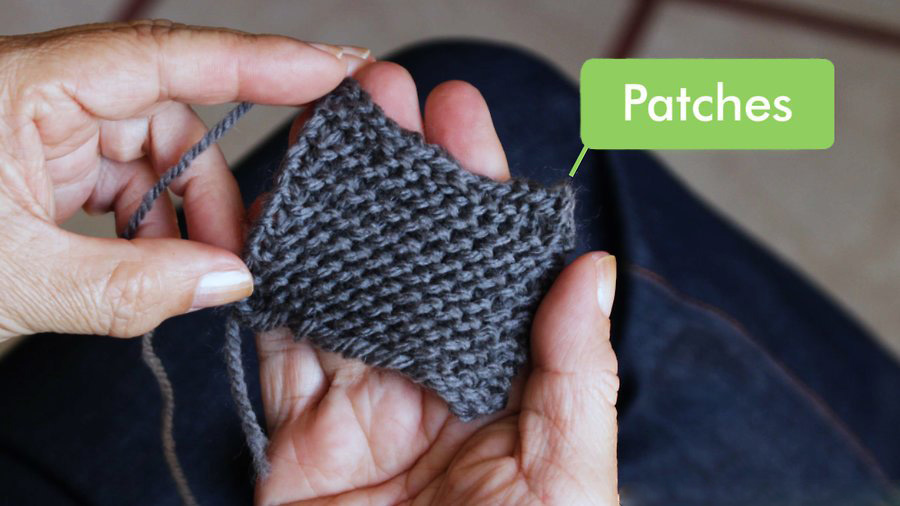
Method 1Patch Blanket

  1. Learn How To Make A Blanket, to knit, cast on and cast off if you do not know how. You might also find it helpful to learn to purl.How To Make A Blanket - Knit Blankets Step 1
  2. Choose the size of the patches. About 5 or 6 inches (12.7 or 15.2 cm) is a pretty good size – big enough to get stuck into the knitting, and quick enough that your blanket will start to look interesting quickly!How To Make A Blanket - Knit Blankets Step 2
  3. Choose the size of the blanket, and work out how many squares full it will be.How To Make A Blanket - Knit Blankets Step 3
  4. Start knitting your squares. Try to unite them as close to your chosen size as possible to make assembly easier. Use any wool/yarn that you like the look of – you can use leftover thread, you can experiment with stripes or different kinds of stitches. Bear in mind that your blanket will look best if there’s no reverse side – be thoughtful about using purl stitch.How To Make A Blanket - Knit Blankets Step 4
  5. When you have enough squares, sew them together side by side to make one row. When you reach this stage, you will see how important it is to get the size of the squares as accurate as possible – mismatched sizes can result in odd bunching textures.How To Make A Blanket - Knit Blankets Step 5
  6. Knit and assemble another row, and sew the two longer sides together.How To Make A Blanket - Knit Blankets Step 6
  7. Keep going! Each time you finish a row, attach it to the previous row. Eventually, you can stop when your blanket is as long as you’d like it to be.How To Make A Blanket - Knit Blankets Step 7

Method 2Plain blanket

  1.  Cast on 150 stitches.How To Make A Blanket - Plain Blankets Step 1
  2. Work the garter stitch for about 2″.How To Make A Blanket - Plain Blankets Step 2
  3.  Knit 20, purl 110, knit 20.How To Make A Blanket - Plain Blankets Step 3
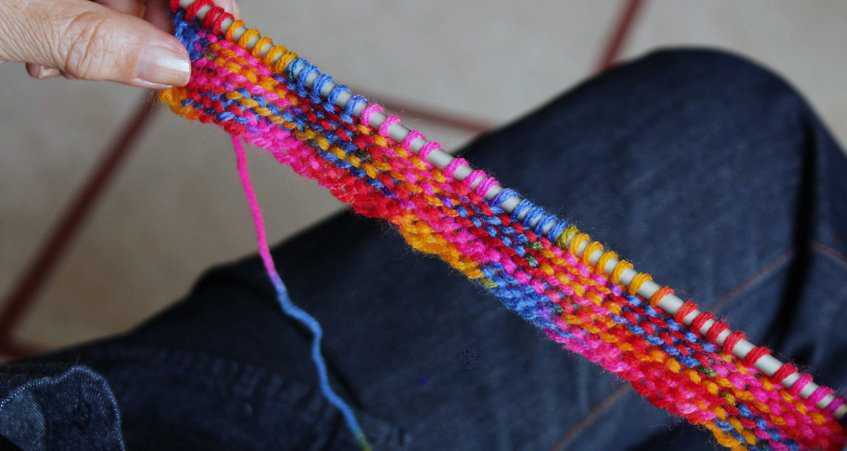
  4.  Knit 20, knit 110, knit 20.How To Make A Blanket - Plain Blankets Step 4
  5. Repeat steps 3-4 until piece measures just under the length desired.How To Make A Blanket - Plain Blankets Step 5
  6. Knit for about 2″ more.How To Make A Blanket - Plain Blankets Step 6
  7. Cast off.How To Make A Blanket - Plain Blankets Step 7

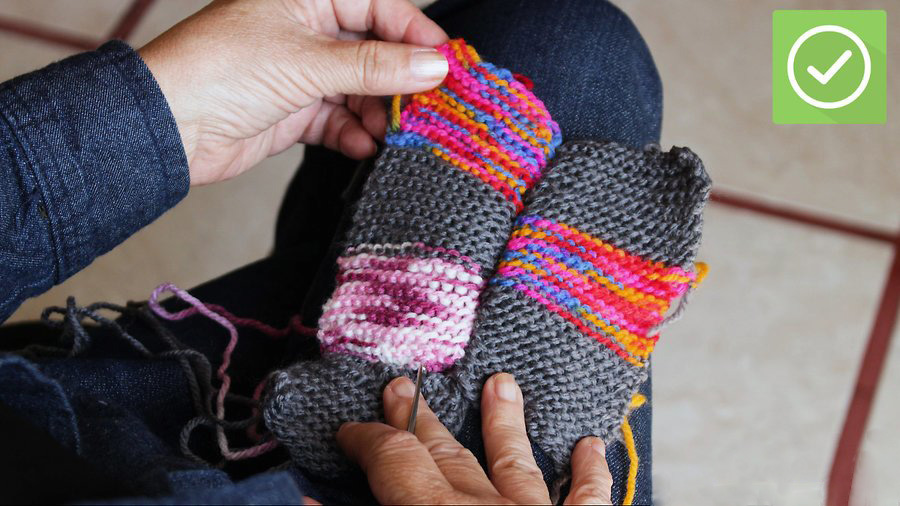
Method 3: Striped Blanket

  1.  Cast on 20 stitches, more for a faster afghan, less for a harder.How To Make A Blanket - Striped Blanket - Step 1
  2.  Knit desired width of the blanket, cast off.How To Make A Blanket - Striped Blanket - Step 2
  3. Repeat steps 1-2, alternating between colors until you have enough for the whole blanket, about ten stripes (more or less depending if you change the needles and stripes’ width).How To Make A Blanket - Striped Blanket - Step 3
  4. Sew stripes together (make sure that when you sew them together that they are straight, else your blanket will be crooked).How To Make A Blanket - Striped Blanket - Step 4
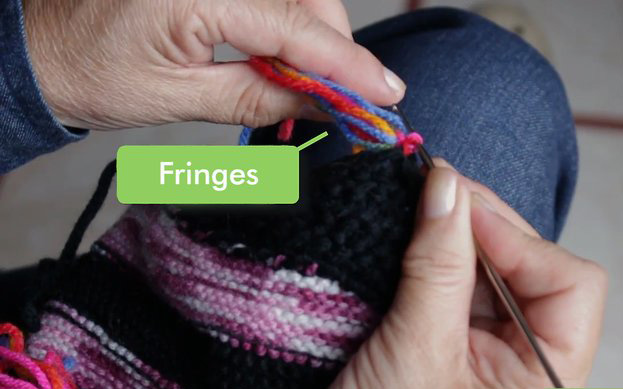
  5. Add fringes (optional).How To Make A Blanket - Striped Blanket - Step 5

Advice Tip on How To Make A Blanket: For making a large blanket, use circular needles. It’s the only way to make sure you don’t lose stitches when making something with a lot of them. You can use a 36″ to 40″ circular needle for making shawls or large blankets. They can have more than 500 stitches on them before you’re finished. Use a 60″ for making circular shawls, round tablecloths, and large blankets. 

DIY Throw Blanket

Even with the warm fall we’ve been enjoying, that seasonal chill is in the air– the grab the blankets and a coffee and cuddle in front of the fireplace kind of chill. I’m always cold, even in summer, so our house is strewn with throw blankets.

I add a few each year, and it never seems to be enough! Each family member has their favorite; I decided to grab a few yards and see what I could do.

After some measuring, cutting, and quick sewing we had our very own DIY throw blanket to fight over.How To Make A Blanket - DIY Throw Blanket

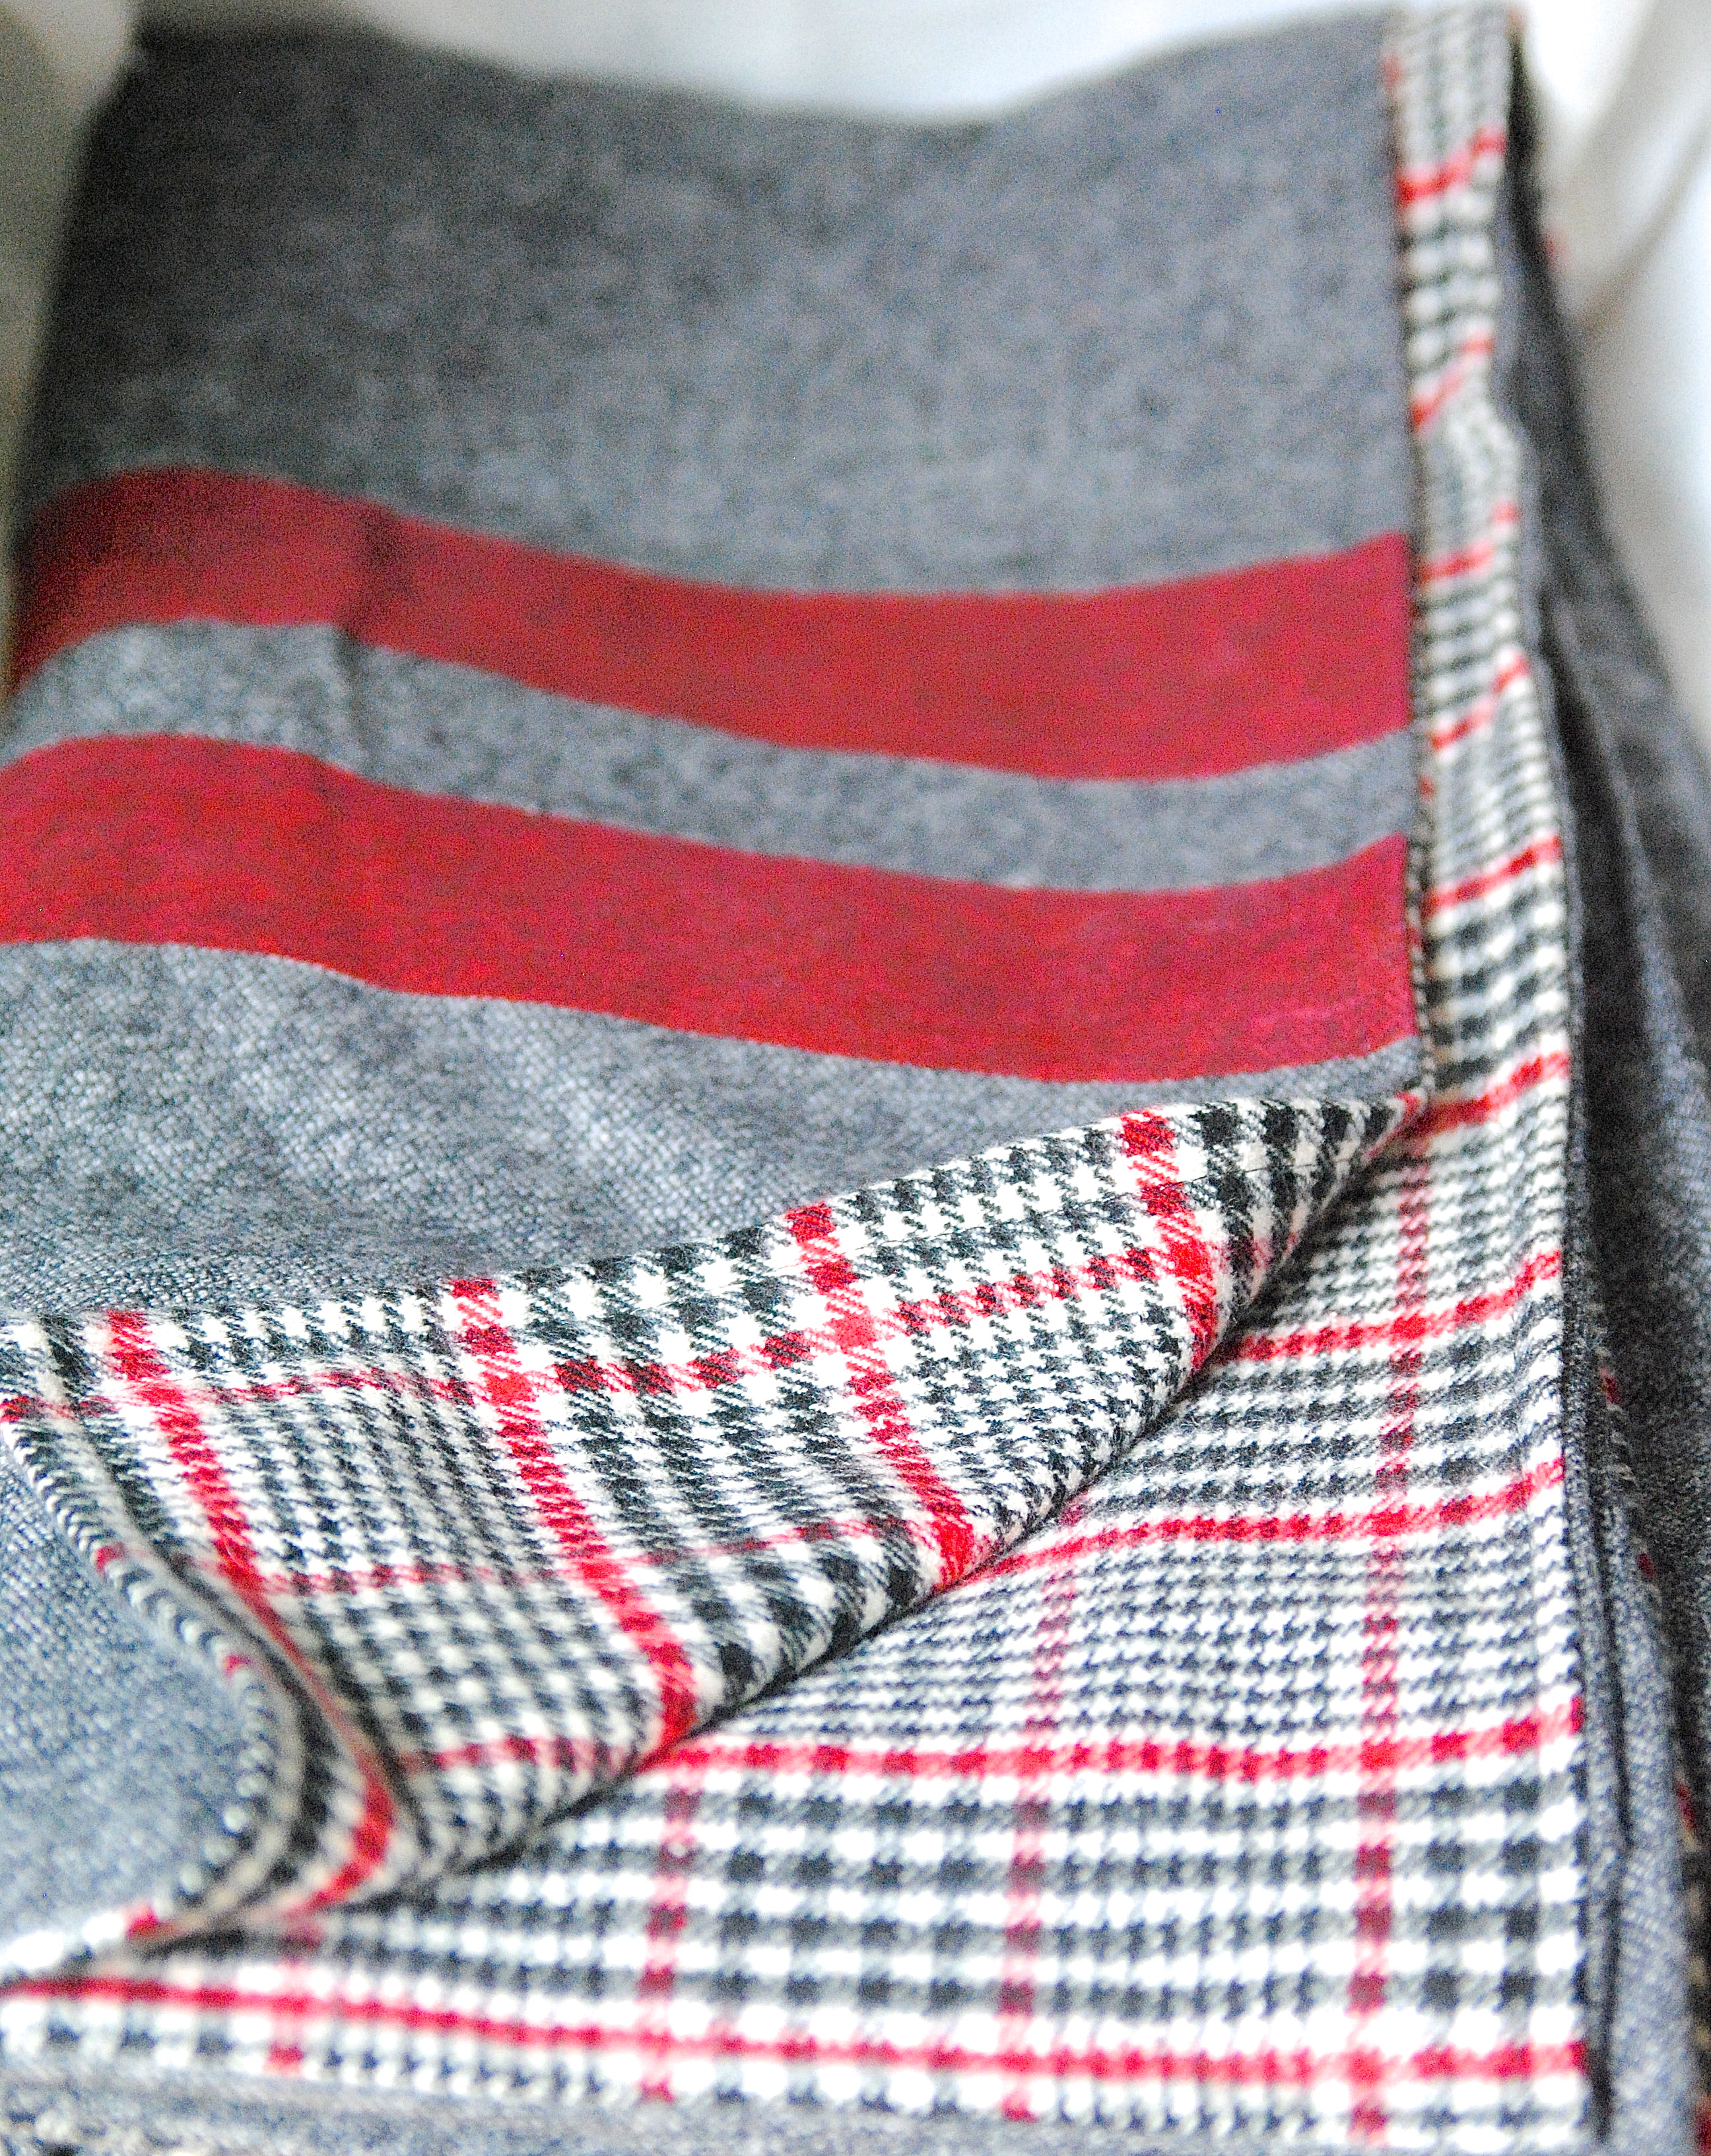
Seriously, feast your eyes on these goodies, though I bet they carry them at most fabric stores. So many great patterns to choose from, I couldn’t decide which ones to get. Which means I got all the patterns.How To Make A Blanket - Decide which Blanket to get

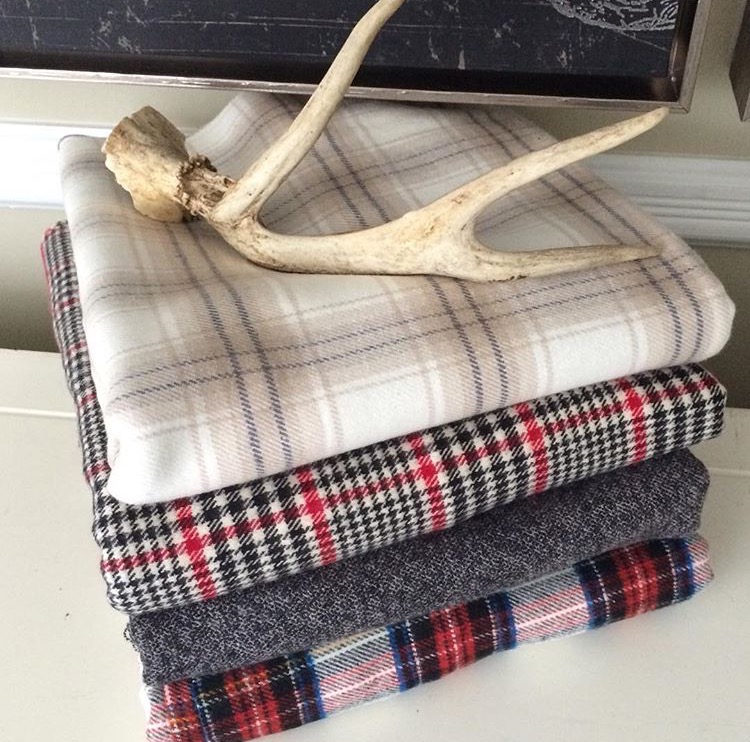
There are two ways to How To Make A Blanket jazz up this simple blanket, and I included them both here. Skipping those steps makes this even more comfortable and quicker, perfect for homemade gifting or building a stack for your entire family. Without the painted stripes, this throw blanket would take under an hour to go.How To Make A Blanket - Simple Blanket

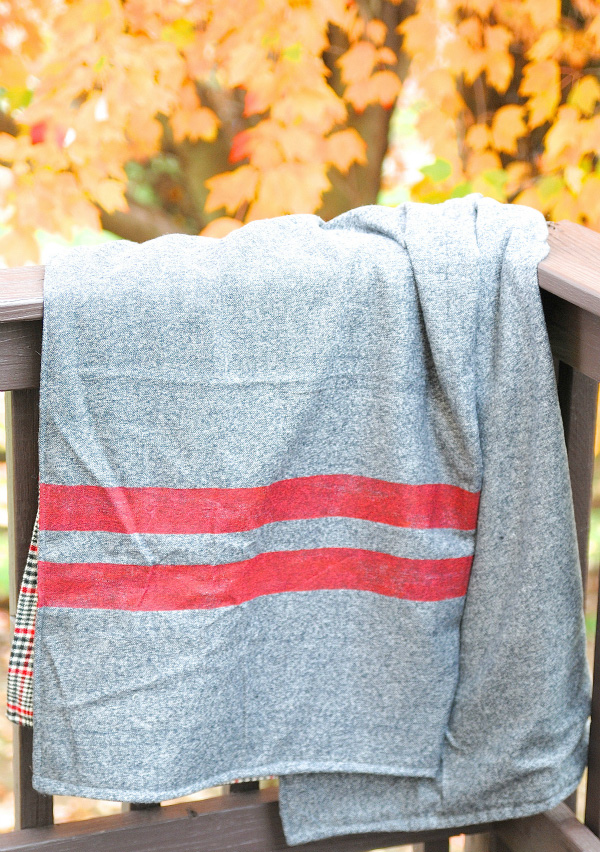
One way I made this extra blanket fancy was making it double sided since I couldn’t possibly choose just one fabric to use. If you want a thinner version to skip that step and just hem the edges to give it a finished look.How To Make A Blanket - DIY Reversible Throw Blanket

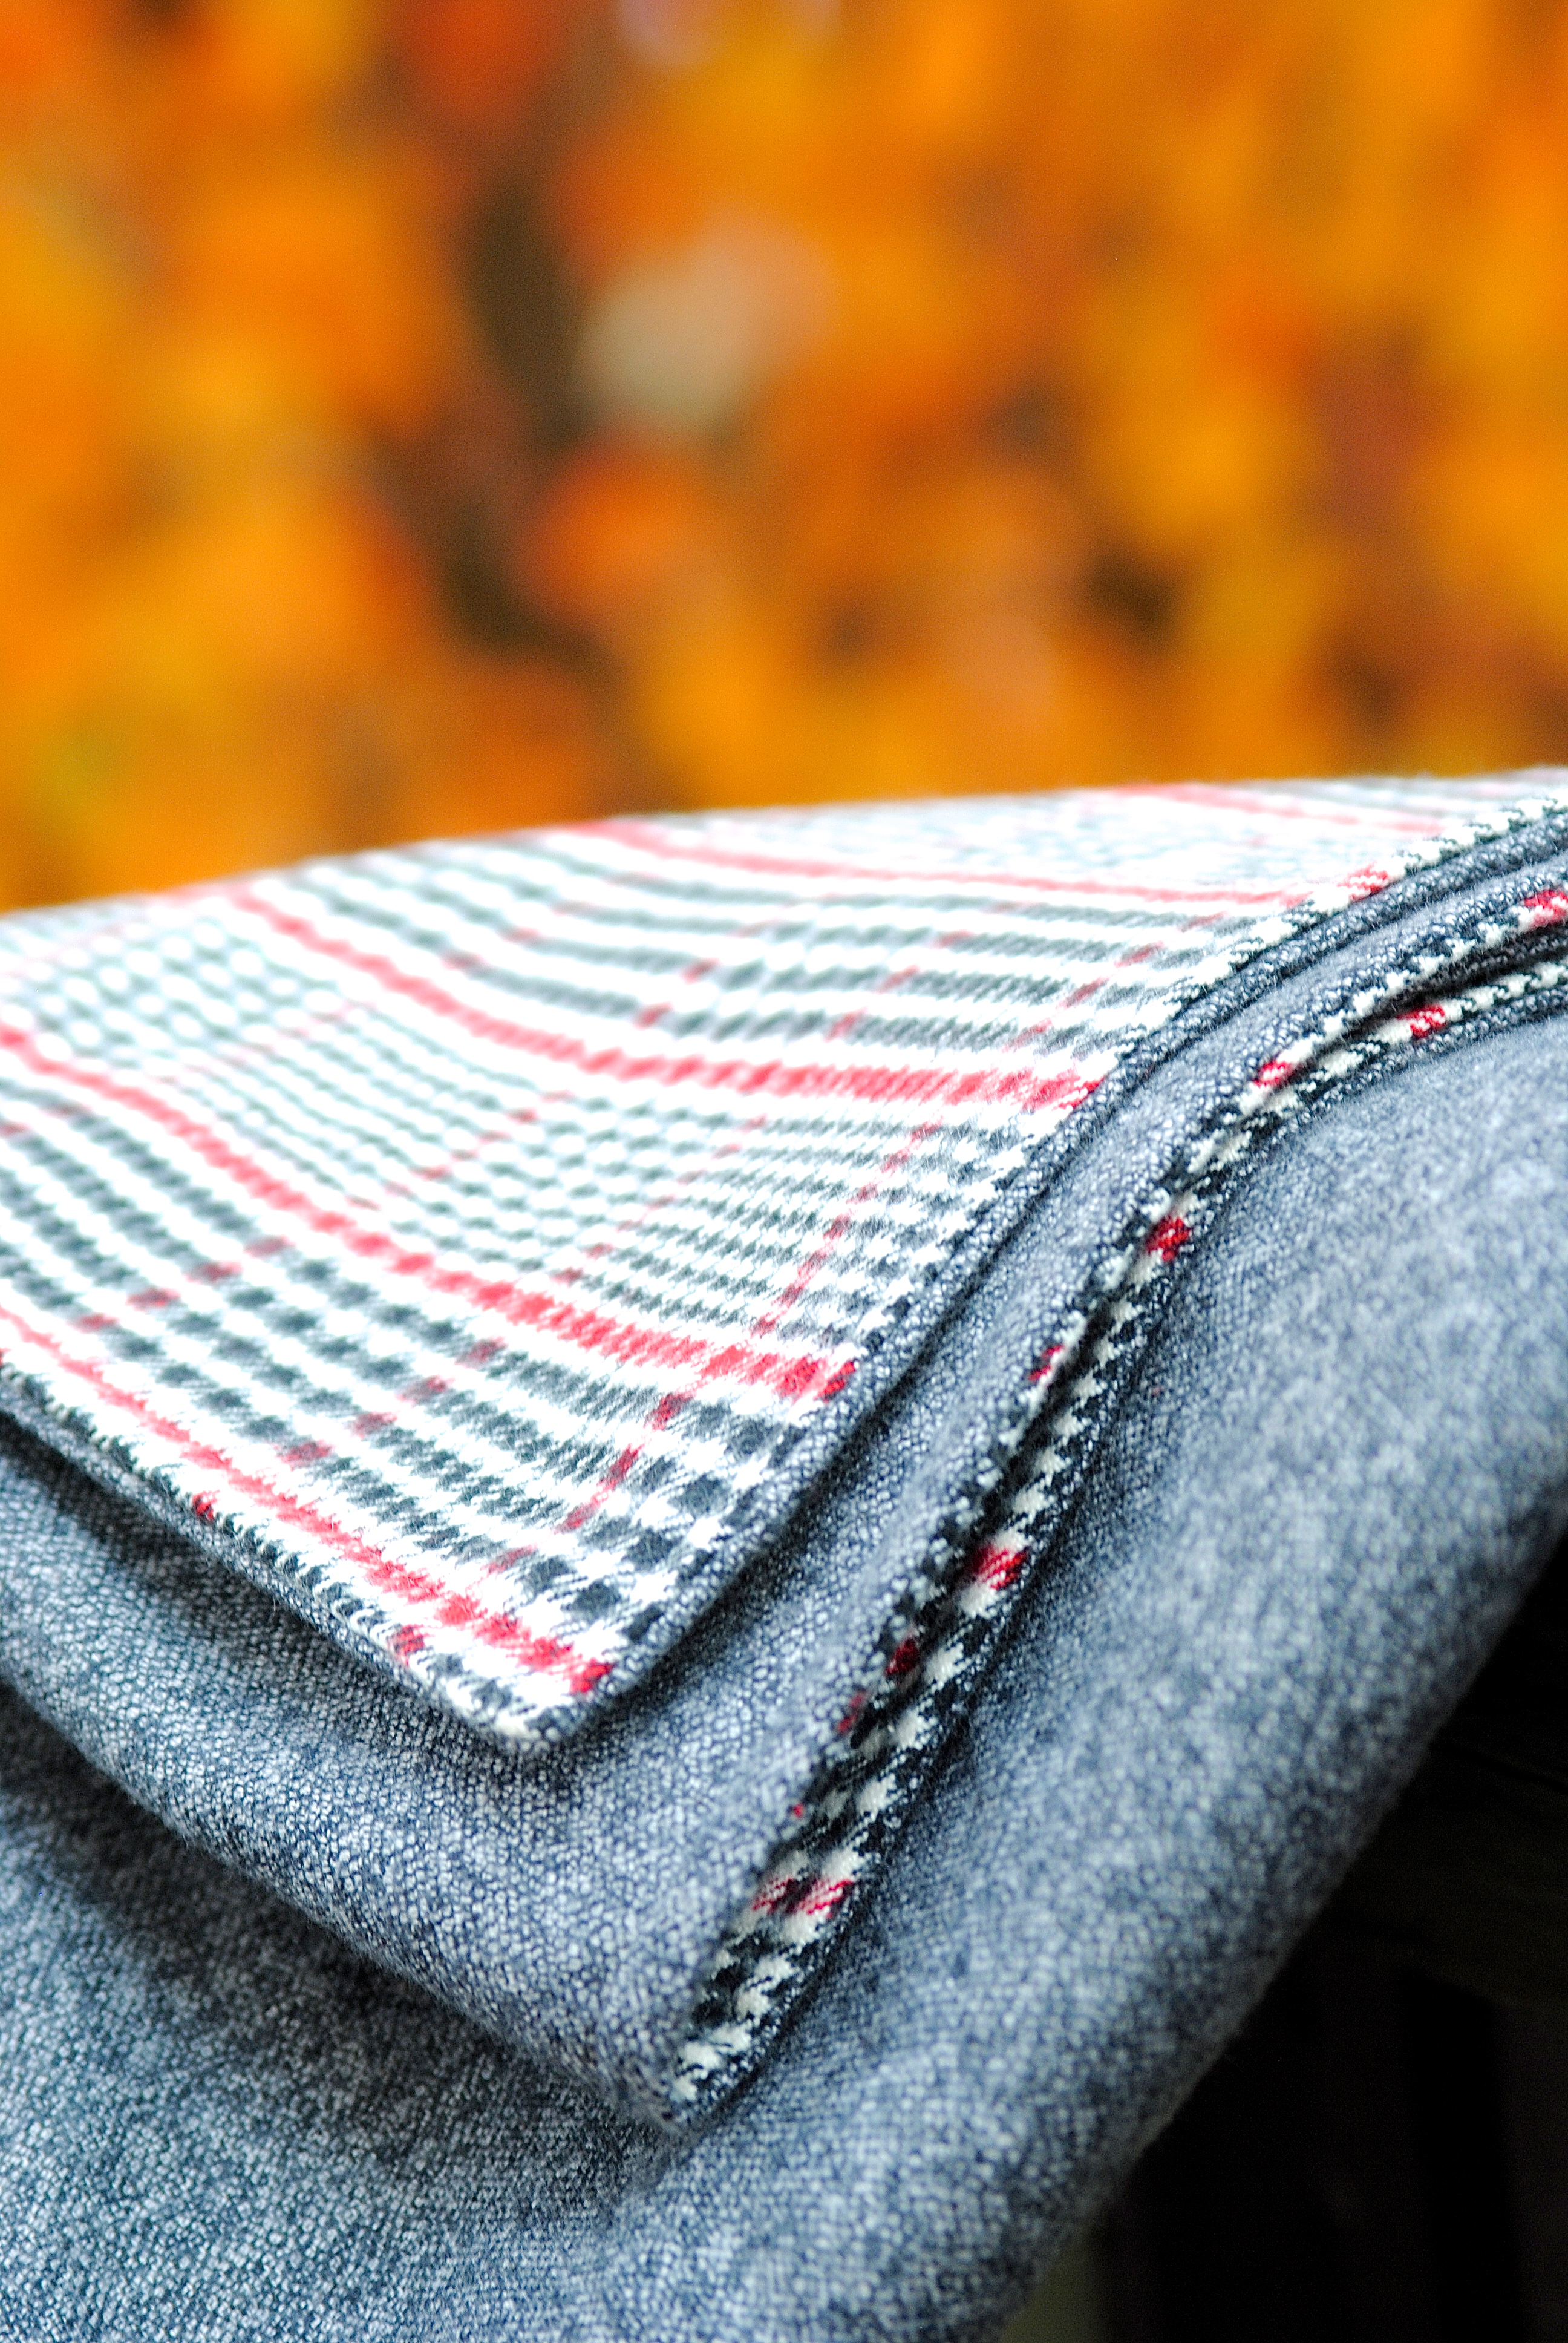
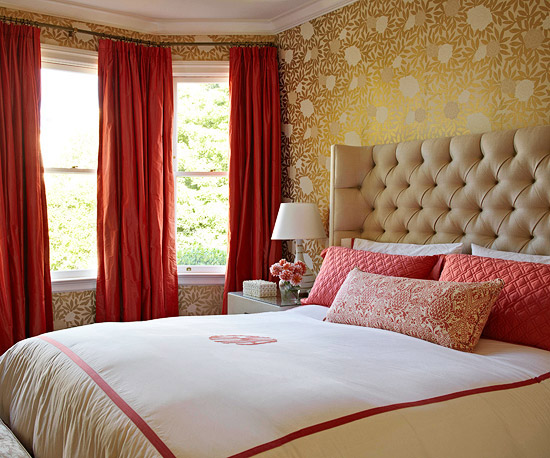
The other way I added to it was by using fabric paint to add in stripes. This was my way of making a DIY throw blanket. You could also add a red cross to make a vintage-looking army blanket. So many ways to pimp your blanket.

Full disclosure, I am not a seamstress. My skill level is at about the fifth-grade level. In other words, if I can do this ANYONE (even your 5th grader) can too. And they will probably do it better.

Materials:

2.25 yards of flannel fabric for EACH SIDE (I used 2.25 yards of each pattern, so 4.5 yards of fabric total)

Thread

Sewing machine

Fabric scissors

Pins

Fabric paint medium (optional)

Craft paint (optional)

Painter’s tape (optional)

Measuring tape (optional)

Directions:

For How To Make A Blanket Painted Stripes: Follow the instructions to mix the fabric paint medium with the craft paint (usually it’s two parts paint to 1 part medium). Place three pieces of painter’s tape the desired distance apart, making sure to keep them level. Paint in between the tape to create two stripes– use a ‘dry brush’ method and dabbing motion, so it doesn’t leak under the tape. Let dry. For darker lines apply two coats of paint, I liked the distressed, vintage look of just one layer. Once baked remove tape.How To Make A Blanket - How to paint on fabric

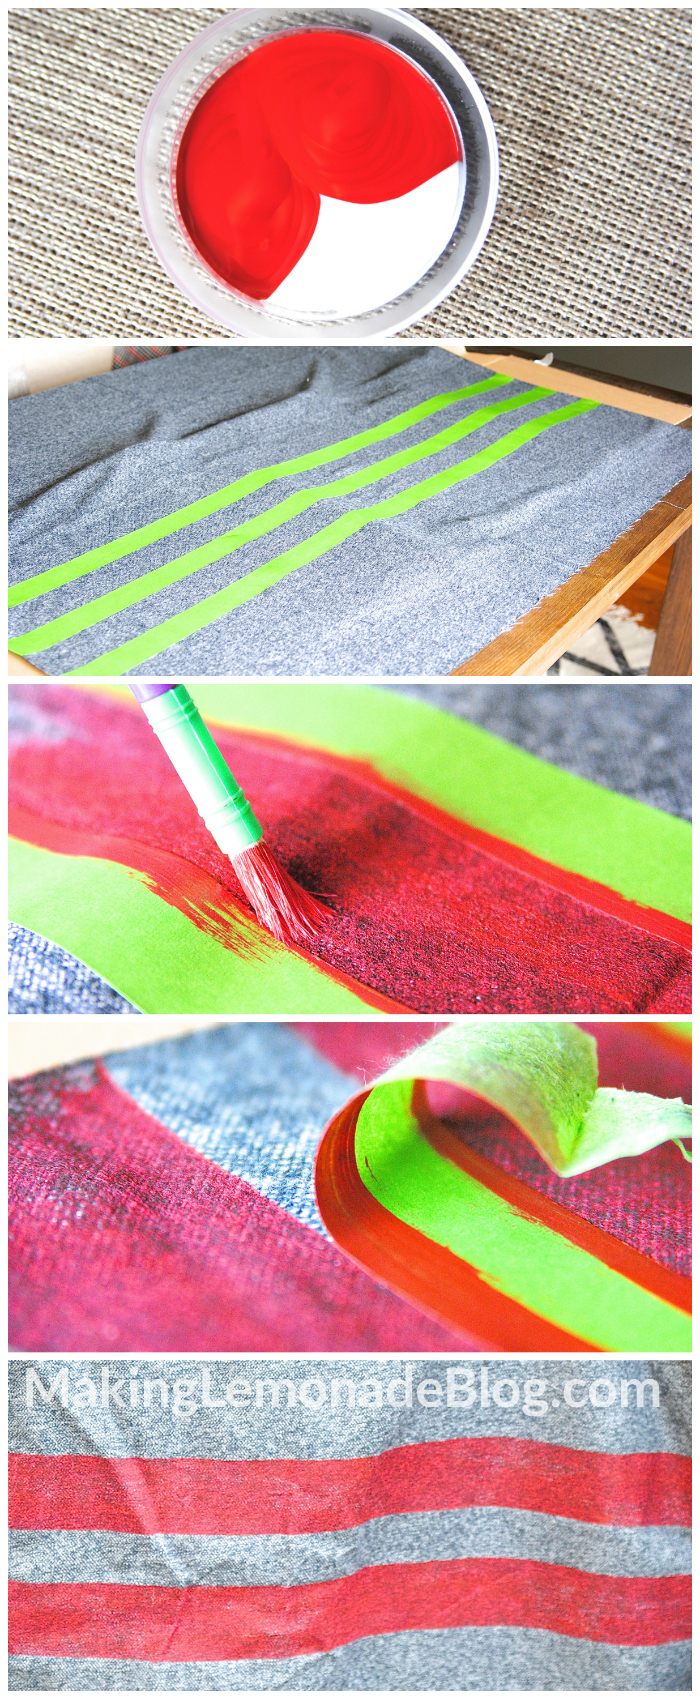
Step 1. Set the two pieces of material mutually, Reverse Tops Standing Down. Clasp the ends together, sitting room to stitch your union.

Step 2. Stitch a closure nearly all the way nearby, giving about half a side free to provide some room when you turn it clean side out. Before you turn it right side out, cut extra material around the edges; I left about 1/4 of an iota excess fabric and clipped off the rest. Turn right side out, taking responsibility to perform surely your corners are pushed all the way out and look excellent.

Step 3. Now you’re going to add a topstitch around the edge of the blanket. This will give it a finished look as well as secure that .5 of a side that still needs to be hemmed. First, you’ll want to invert the seam that needs to be hemmed and pin it. It should now look like the rest of the edges but without stitches.How To Make A Blanket - Sew DIY Throw Blanket

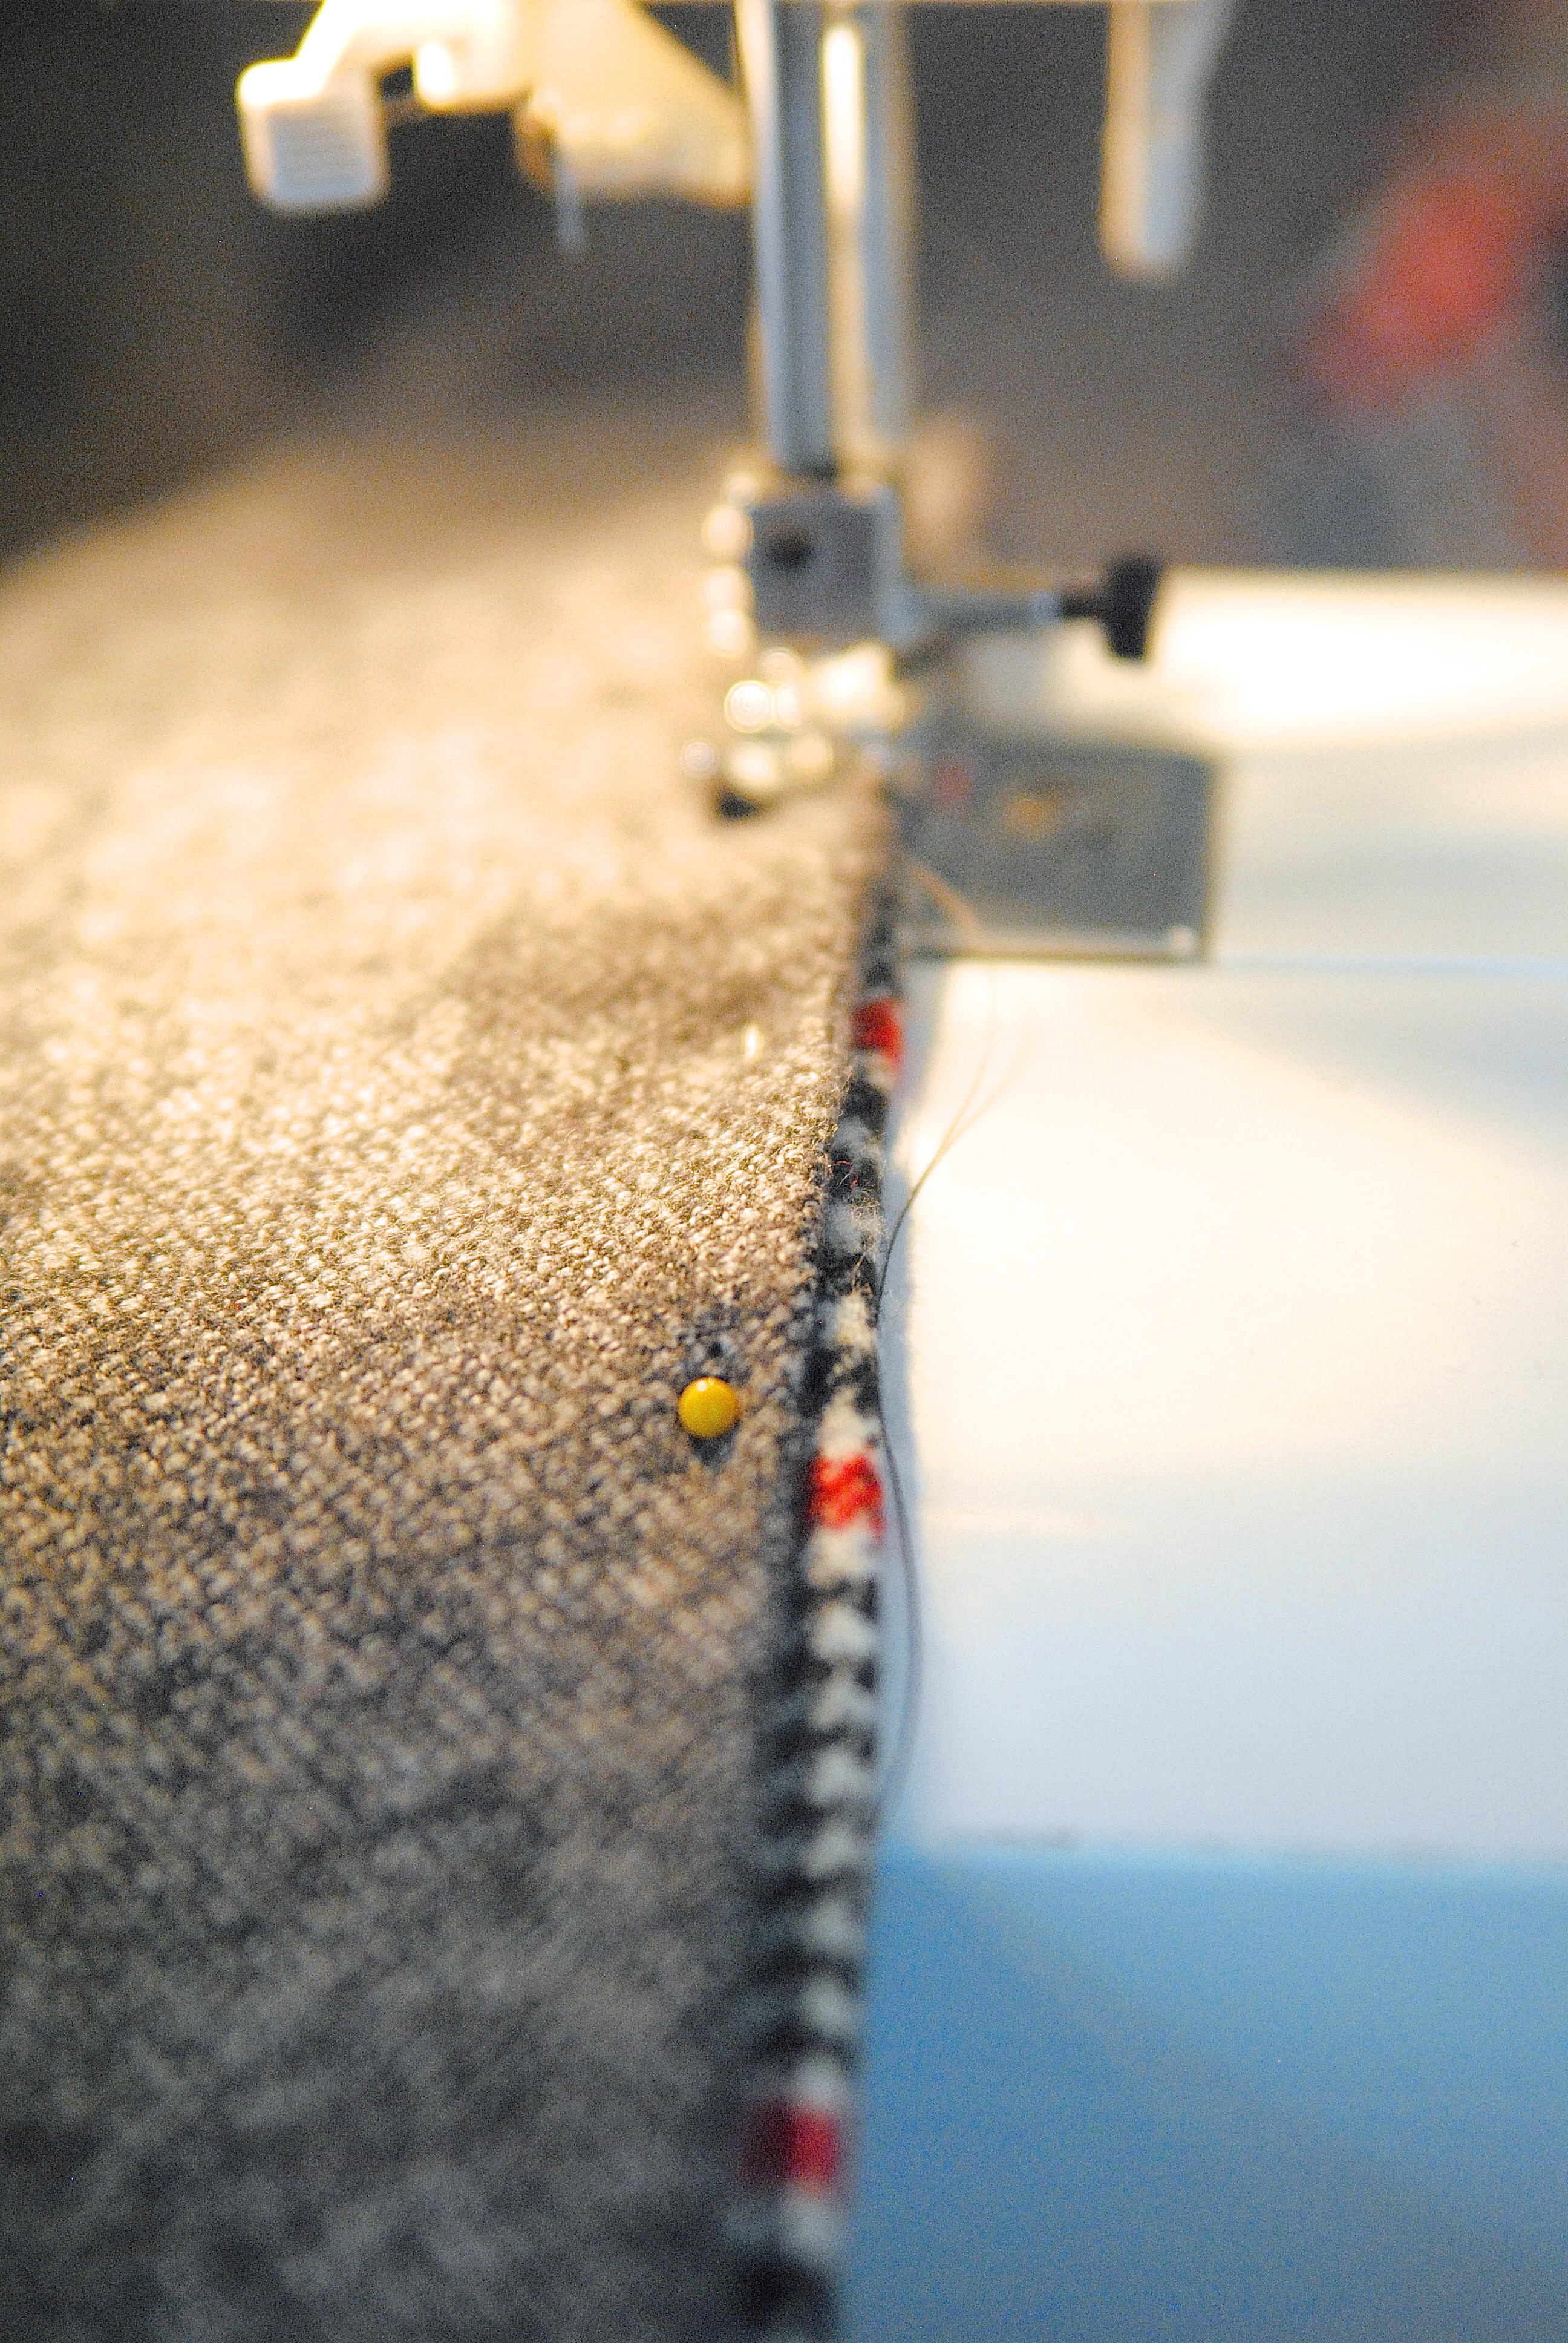
NOW, you have learned How To Make A Blanket. Go ahead and sew a topstitch around the edges, when you come to the unfinished section it will naturally blend into the rest once it’s topstitched. Doesn’t that edge look amazing?

Step 4. That’s it; you’re done! Now go snuggle!How To Make A Blanket - Seams Reversible DIY Throw Blanket

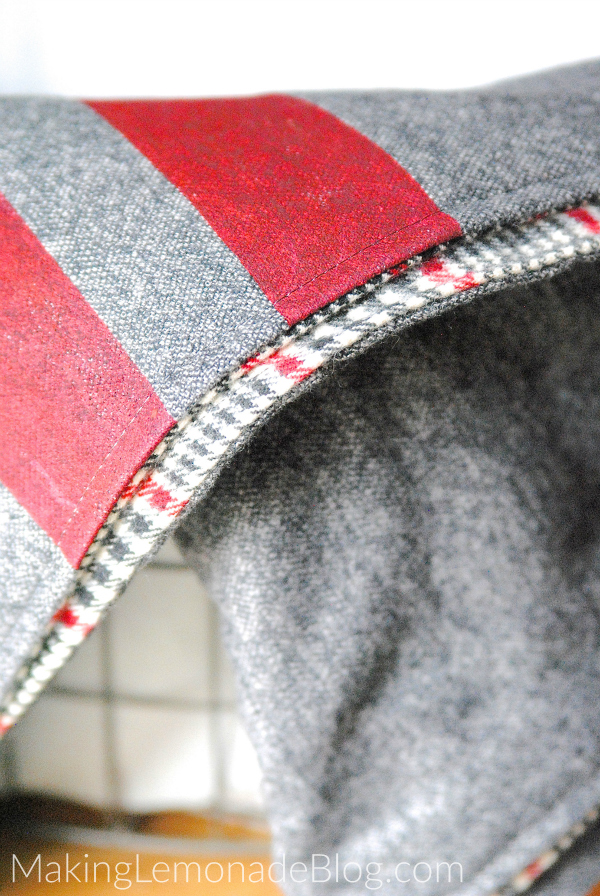
Oh boy. I’m going to want some extra blankets.

Suggest your guidance if you’re a throw blanket parents too. If not, it’s never more too late to bounce on the blanket train. Now get stitching!

Best Home Decor Ideas for Bedrooms 2018

0

Decorating a bedroom to make it cozy should not be that difficult. A little lovely home decor ideas for bedrooms, a nice bedroom lamp and maybe a couple of lovely curtains will make a great change. Are you still do not get it? Look through these little tips, and you’ll see that your bedroom will be the coziest room in your entire home!

Home Decor Ideas for Bedrooms

cool Home decor ideas for bedrooms
hgtv.com

How lovely is your bedroom really? Unfortunately, the bedroom usually comes in the shade of the living room and the kitchen. We spend all our time and effort in making our apartment a dream home. Each room receives carefully selected furniture and you take great care to make your interior decor look perfect. Then you come to the bedroom and get tired. You think it doesn’t matter how it looks, however, the door is always closed and no guests usually enter.

Simple home decor ideas for bedrooms

cute http://www.hgtv.com/remodel/interior-remodel/teenage-bedroom-color-schemes
theinspiredroom.net

It’s time to give your bedroom some extra love. There are especially some home decor ideas for bedrooms that each bedroom needs and which is a must for creating a harmonious sleeping environment. So, it is the time to throw out the “dressing chair” and fill the room with lovely energy.

Bet in light colors

simple http://theinspiredroom.net/room-tours/reading-room-decorating/
housebeautiful.com


Light colors enhance the feeling of space, while darker tones tend to close the room. Attending to the correct lighting of the room is also critical. In small rooms, white is the easiest and obvious color to apply in this situation, but you can also opt for a neutral color palette on the walls and in the bedding.

Have shelves

nice Home decor ideas for bedrooms
lookyna.com

The walls are the perfect allies for those who can’t count on much space. Enjoy the free areas to create niches and shelves. They make the environment more organized, practical and functional, even in smaller rooms.

best home decor ideas for bedrooms
homegirllondon.com

A shelf above the bed is the most practical and economical solution not only to find the place for our most expensive objects but also to create a very personal decoration in the bedroom furniture.

Bookcase

amazing home decor ideas for bedrooms
theinspiredroom.net

They are perfect for organizing any kind of a mess inside the room. Instead of putting a shoe rack, for example, try using a bookcase or cube bookshelf. it is higher and roomier, they allow you to store other things that will surely mess the room.

Give the built-in drawer a chance

amazing home decor ideas for bedrooms
rotmans.com

There are many ways to store shoes, clothes and everything you need in the room. One is the built-in drawer. You can install it as a compact and practical alternative to the wardrobe.

Extra piece

amazing home decor ideas for bedrooms
keltainentalorannalla.blogspot.com.eg

Bedroom bench, a wooden table, a daybed or a pouf at the end of the bed will give it extra length and space to rest your clothes and things. To increase the storage space of your bedroom, you only have to put a nice trunk where your bed ends. All the past are practical and nice home decor ideas for bedrooms

Mirrors

new home decor ideas for bedrooms
trendir.com

Mirrors are one of the most efficient ways to visually expand an area. They reflect the space and leave a greater sense of amplitude.

Lighting

cool home decor ideas for bedrooms
voinevier.com

Instead of the nightstand and the table lamp, a floor lamp and a low table become a solution for the bedroom. In addition to being a trendy solution, the idea of using suspension lamps next to the bed saves space compared to a classic table light and offers more diffused lighting.

The wall behind the bed

cool home decor ideas for bedrooms
amazon.com

Cartons pictures, paintings, and posters!! fill the central wall of your bedroom with pictures, paintings or posters that make you smile. This decorative intervention is ideal if the central wall behind your bed is large enough. In this case, do not hesitate to cover at least 2/3 of its surface with one of those home decor ideas for bedrooms, the result will be super impressive.

amazing home decor ideas for bedrooms
livingjuice.me

Still, you can use bright drawings on the walls throughout the room. With matching colors in the rest of the decor, the room will get perfect style.

The bed

cool home decor ideas for bedrooms
anthropologie.com

There are too many plans for beds. Do not discount your taste, choose whatever you like but make sure it is in the right dimensions. With cautious choices, you will have as much space as you need for storage space.

cool home decor ideas for bedrooms
waynehomedecor.com

Your bed is undoubtedly the most dominant piece of furniture in the bedroom. It is best to choose a more subtle model. The simplest variant is box beds without legs. Beds with legs, even if they are short, are lighter and therefore better suited for small spaces. In addition, try to use color and material to form a visual unit of your bed and space, so it blends harmoniously.


6 Fall tips for a great lawn in the spring

0

The fall season is here and winter will soon arrive, one of the last things you are thinking about is lawn care. Fall’s cooler temperatures and occasional rainfall, is the best time to prepare your lawn for next spring.

Lawn Tips for Spring

During this time of year, grass is absorbing energy, moisture, and nutrients preparing for a long, dormant winter. Take the time and address the slower growth, and you’ll be rewarded in the spring.

Continue To Mow Your Lawn

Water and mow your lawn, as needed, throughout the fall season. When the Fall season draws to a close, drop the mower’s blade to its lowest setting for the last two cuttings of the year. This will allow more sunlight to reach the crown of the grass.


Soil Aeration

Fall is also an ideal time to aerate your lawn so that oxygen, water, and fertilizer can easily reach the grass’s roots. The self-propelled machine will quickly punch holes into the soil and extract plugs of dirt. If you’ve got a very large yard—say, more than 3 or 4 acres—and don’t feel like aerating it yourself, hire a landscaping contractor.


Remove Fallen Leaves

Rake the fallen leaves from your lawn as soon as possible. Waiting until all the leaves have fallen from the trees to start raking will become wet from rain and morning dew, stick together, and form an impenetrable mat that will suffocate the grass and breed fungal diseases. Regardless of whether you use a rake or a lawnmower, just be sure to remove the leaves before they turn into a soggy, suffocating mess.


Fertilize for Future Growth

A fall application of fertilizer delivers essential nutrients for the grass to grow deep roots now and to keep nutrients on reserve for a healthy start next spring. Wait until mid-to-late fall, then apply a dry lawn fertilizer to all grassy areas. You could use a crank-style spreader, but for best coverage, consider using a walk-behind drop spreader. It takes a little longer,  but a drop spreader provides the best way to apply an even, consistent layer of fertilizer.


Fill in Bald Spots

Autumn is also a great time of year to fix any bare, bald spots in your lawn. Lawn repair mixtures are the quickest, and easiest way to do this. Sold at most garden shops and home centers, this ready-to-use mixture contains grass seed, a special quick-starter lawn fertilizer, and organic mulch.

Rake the loose the soil at the bald spot in your lawn, next spread a thick layer of the lawn repair mixture over the area. Lightly compact the mixture, then water thoroughly, and continue to water every other day for two weeks.


Weed Control

Weeds, like most plants, are in the energy-absorbing mode during the fall. They are absorbing nutrients and water faster than normal grass would. Using weed killers and apply an herbicide now and the weeds won’t return in the spring.

Please read the package label before use. Herbicide manufacturers usually recommend applying the weed killer during early-to-mid fall, when daytime temperatures are consistently above 60 degrees Fahrenheit

How To Make A Small Outdoor Fish Pond

0

Make A Small Outdoor Fish Pond

Hello, you are welcome to this fishing world! Have you ever pictured a graceful and beautiful creature slowly swimming in the clear water?

Well, it is amazing to see the different types of fish are swimming in the water in the midmorning sun. Yes, I am here to talk about the small outdoor pond for fishing and how to make it successfully.

This article gives significant information about how to make a small outdoor fish pond. Due to the current shortage of land and the effects of pollution, the natural environment of pond life for fishing is diminishing.

To help nature many people build a small outdoor fish pond. This guide will help you with the planning stage to make it successfully. So let’s see overall discussing the small outdoor fishing pond.

How to build a small outdoor fish pond?

For the people who always make a dream of having something fun and enjoy in their garden, making a small outdoor fish pond is the right way to go. It seems to be a charming addition to an attractively kept garden or outdoor. Build a fish pond will make the outdoor one of the most-liked areas in the house. It is not only fun for children but also a great place to entertain with friends and family.

But before making a fish pond, first of all, you should design your plan. Just digging a big hole in the outdoor area is not a fish pond. It needs to take plenty of time, effort, and planning. So let’s take a look at the current tips that will help you to build a small outdoor fish pond.

Here are a few important tips on how to build a small outdoor fish pond:

  1. Location:

The most important consideration you need to fix is the location. First of all, people must decide where they want to dig the hole in their overall outdoor space. Selecting the random place in the outdoor area is not a good way to go to the fishing pond. Keep in mind that it is a part of the permanent landscape in the outdoor area. So take your decision wisely when it comes to choosing the location.

It might not the best idea to build your pond under a tree as it sheds their leaves. You should do hard work for keeping your fish pond clean and unpolluted. Also, some people choose an elevated fish pond that goes above the above ground level.  This is the one that tends to be more expensive to build.

  1. Design of your outdoor fish pond:

When you select the small outdoor location for your fish pond then you should go for the design. So you need to select the size of your pond that you want to build for fishing. Basically, the size of the pond is proportionate to the size of the area of outdoor location that you fixed for fishing. It can be square, rectangular or any other shapes you like best. It important to make sure that it is even out or symmetrical.

  1. Plants of the fish pond:

Those who like to have plants for their fish pond should remember that they need to place their fish pond in a place where it can be exposed to enough sunlight.

  1. Digging the hole:

When making a pond for fishing, it is important to ensure that you dig deep enough. If you dig enough it does not freeze during winter. Moreover, think about the types of aquatic life you decide to include in your pond before digging. Depending on the plants and fish that will live in the fish pond, you should decide the depth of the pond.

  1. Don’t make your fish pond too small:

You should ensure that your fish pond is not too small. It seems like a mistake that a lot of beginners make. It is due to the layout as start out with always nearly end up smaller than what you had in mind earlier the fish pond has truly been realized.

Final verdict:

It is not an easy task for all to make a small outdoor fish pond. It needs lots of effort and hard work. You should ask your friends who have experienced with fishing pond and get the suggestion for your project. It is always welcome to make some research before making this small outdoor fish pond.

You need to finish your fishing pond construction about a week. Thanks for reading this article. If you have any question please leave a comment below.

By continuing to use the site, you agree to the use of cookies. more information

The cookie settings on this website are set to "allow cookies" to give you the best browsing experience possible. If you continue to use this website without changing your cookie settings or you click "Accept" below then you are consenting to this.

Close